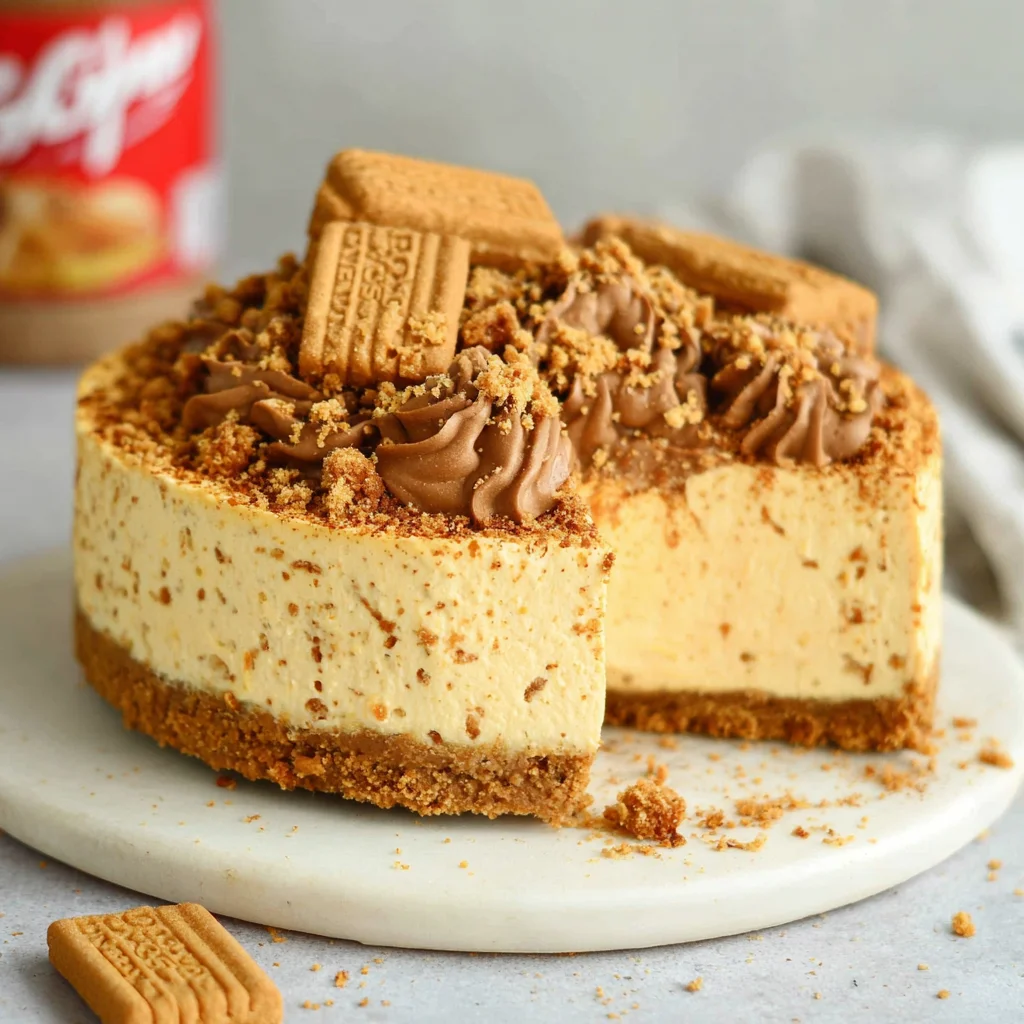
Indulge in the irresistible allure of a Biscoff Cheesecake, a decadent dessert that marries the crunchy, caramelly goodness of Lotus Biscoff biscuits with the creamy richness of a classic New York-style cheesecake. This recipe isn’t just about following instructions; it’s about crafting a culinary experience that tantalizes your taste buds and leaves you craving more. Imagine the delightful contrast of the buttery, digestive biscuit base yielding to the smooth, velvety cheesecake filling, all topped with a generous sprinkle of crushed Biscoff biscuits for an extra layer of textural and flavor magic. This Biscoff Cheesecake is more than just a dessert; it’s an unforgettable culinary journey.
This recipe is perfect for any occasion, from a casual weeknight treat to a sophisticated dinner party dessert. Its elegant presentation and unforgettable flavor profile make it a showstopper that will impress your guests. Whether you’re a seasoned baker or a kitchen novice, this step-by-step guide will empower you to create a Biscoff Cheesecake that’s both beautiful and delicious. Get ready to embark on this delightful baking adventure, and prepare to be amazed by the results!
Why You’ll Love This Biscoff Cheesecake Recipe
There are countless reasons why this Biscoff Cheesecake recipe will quickly become a favorite in your dessert repertoire. First and foremost, the flavor combination is simply divine. The unique caramelized biscuit flavor of the Lotus Biscoff biscuits perfectly complements the creamy, tangy cream cheese filling. This isn’t your average cheesecake; it’s a sophisticated dessert with a depth of flavor that will leave you wanting more. The crunchy biscuit crust provides a delightful textural contrast to the smooth, creamy filling, offering a truly satisfying eating experience.
Beyond the incredible taste, this recipe is remarkably easy to follow. Even beginner bakers can achieve professional-looking results with clear, step-by-step instructions and helpful tips. The recipe is also incredibly versatile. You can easily adapt it to your preferences, adding different toppings or variations to create your own unique twist on this classic dessert. Imagine adding a swirl of Biscoff caramel sauce for extra indulgence, or perhaps a dusting of cocoa powder for a richer, chocolatey note. The possibilities are endless!
Furthermore, the beauty of this Biscoff Cheesecake lies in its simplicity. With minimal ingredients and straightforward preparation, you can create a stunning dessert without spending hours in the kitchen. The elegant presentation makes it perfect for any occasion, whether it’s a casual gathering or a special celebration. This recipe is guaranteed to impress your friends and family, making you the star baker of any event. Finally, and perhaps most importantly, the sheer satisfaction of creating such a delicious and visually appealing dessert from scratch is unparalleled. The pride you’ll feel when you present this Biscoff Cheesecake is well worth the effort.
Why You Should Try This Biscoff Cheesecake Recipe
Are you searching for a show-stopping dessert that’s both easy to make and incredibly delicious? Then look no further than this Biscoff Cheesecake recipe. It’s the perfect blend of simplicity and sophistication, making it ideal for bakers of all skill levels. The recipe’s versatility allows you to personalize it to your taste, adding your favorite toppings or creating variations to suit different dietary requirements.
This Biscoff Cheesecake offers a unique flavor profile that’s both comforting and exciting. The familiar taste of Lotus Biscoff biscuits gets elevated to a whole new level when combined with the creamy tang of cream cheese. It’s a dessert that satisfies both sweet and savory cravings. Moreover, this recipe is a fantastic way to impress your guests. Its beautiful presentation and incredible taste will leave a lasting impression on everyone who tries it. It’s the perfect dessert for celebrations, potlucks, or simply a special treat for yourself.
Beyond the deliciousness and ease of preparation, this Biscoff Cheesecake recipe represents a rewarding baking experience. The process of creating something so beautiful and tasty from scratch is incredibly satisfying. It’s a chance to unleash your creativity and produce a dessert that’s both delicious and visually stunning. If you’re looking for a recipe that combines ease, impressive results, and undeniable deliciousness, then this Biscoff Cheesecake is a must-try. It’s a guaranteed crowd-pleaser, and a recipe you’ll want to return to time and time again. This recipe is perfect for those who want to impress without spending hours in the kitchen. Try it and experience the magic!
Ingredients and Necessary Utensils for your Biscoff Cheesecake
This Biscoff Cheesecake recipe uses readily available ingredients, ensuring a straightforward baking experience. However, having the right tools will significantly enhance your baking process, helping you achieve the perfect texture and consistency. Let’s delve into the precise quantities of each ingredient and the recommended utensils for optimal results.
Ingredients:
- For the Crust:
- 200g Lotus Biscoff biscuits, finely crushed – Choose high-quality biscuits for the best flavor.
- 85g unsalted butter, melted – Use unsalted butter to control the saltiness of the crust.
- For the Cheesecake Filling:
- 1kg full-fat cream cheese, softened – Full-fat cream cheese creates a richer, creamier filling.
- 200g caster sugar – Caster sugar dissolves easily, ensuring a smooth filling.
- 2 tsp vanilla extract – High-quality vanilla extract enhances the overall flavor.
- 2 large eggs – Use large eggs for optimal volume and texture.
- 150ml double cream – Double cream adds richness and creaminess to the filling.
- 100g Lotus Biscoff biscuits, roughly crushed (for topping) – For added texture and flavor on top.
Recommended Utensils:
- 23cm springform tin – Essential for creating a neat, removable cheesecake.
- Food processor or zip-top bag – For efficiently crushing the Biscoff biscuits.
- Mixing bowls (large and medium) – For preparing the crust and filling separately.
- Electric mixer (handheld or stand mixer) – For achieving a smooth and creamy cheesecake filling.
- Rubber spatula or wooden spoon – For gently folding in the ingredients.
- Measuring cups and spoons – For precise ingredient measurements.
- Large roasting tin – To create a water bath for even baking.
- Wire rack – For cooling the cheesecake evenly.
- Baking parchment – Optional, but helps prevent sticking.
Detailed Recipe Steps for your Biscoff Cheesecake
Follow these detailed steps for a perfect Biscoff Cheesecake. Remember, attention to detail is key to achieving that creamy, dreamy texture and irresistible flavor.
- Prepare the Crust: Preheat your oven to 160°C (140°C fan/Gas Mark 3). Crush the 200g Lotus Biscoff biscuits into fine crumbs using a food processor or by placing them in a zip-top bag and crushing them with a rolling pin. In a medium bowl, combine the crushed biscuits with the 85g of melted unsalted butter. Mix thoroughly until all the crumbs are evenly moistened. Press this mixture firmly and evenly into the base of your 23cm springform tin. Tip: Use the bottom of a measuring cup or glass to ensure an even crust. Bake for 10-12 minutes, or until lightly golden. Remove from the oven and let it cool completely before proceeding.
- Make the Filling: In a large bowl, beat the softened 1kg of full-fat cream cheese and 200g of caster sugar together using an electric mixer until the mixture is completely smooth and creamy. Important: Make sure your cream cheese is softened to room temperature for optimal blending. Beat in the 2 tsp of vanilla extract.
- Add the Eggs: Add the eggs one at a time, beating well after each addition. Crucial Tip: Mix on low speed and avoid overmixing to prevent incorporating too much air into the batter, which can lead to cracks in the cheesecake.
- Incorporate the Cream: Gently fold in the 150ml of double cream using a rubber spatula or wooden spoon until just combined. Don’t overmix! You want a smooth batter, but not a lot of air.
- Assemble and Top: Pour the cheesecake filling over the cooled crust in the springform tin. Sprinkle the 100g of roughly crushed Biscoff biscuits evenly over the top.
- Bake in a Water Bath: Place the springform tin inside a larger roasting tin. Pour enough boiling water into the roasting tin to come halfway up the sides of the springform tin. This creates a water bath, ensuring even baking and preventing cracks.
- Bake to Perfection: Bake for 60-75 minutes, or until the cheesecake is just set around the edges but still slightly wobbly in the center. The center will firm up as it cools.
- Cool and Chill: Turn off the oven and leave the cheesecake inside with the oven door slightly ajar for 1 hour. This slow cooling process helps prevent cracks. Remove from the oven and let it cool completely on a wire rack. Once cool, cover and refrigerate for at least 4 hours, or preferably overnight, to allow the cheesecake to fully set.
- Serve and Enjoy: Carefully remove the cheesecake from the springform tin. Slice and serve. Enjoy your delicious homemade Biscoff Cheesecake!
Tips and Variations for your Biscoff Cheesecake
Mastering this recipe is easier than you think, but a few helpful tips and suggestions can elevate your Biscoff Cheesecake to perfection. Here are some ideas to avoid common mistakes and personalize your creation.
- Room Temperature Ingredients: Ensure your cream cheese and eggs are at room temperature before starting. This promotes smoother blending and prevents lumps in the filling.
- Don’t Overmix: Overmixing the filling incorporates too much air, leading to cracks during baking. Gently fold in the ingredients to maintain a smooth, consistent texture.
- Water Bath is Key: The water bath is essential for preventing cracks and ensuring even baking. Make sure the water level reaches halfway up the sides of the springform tin.
- Slow Cooling: Slow cooling prevents sudden temperature changes that can cause cracks. Leave the cheesecake in the oven with the door slightly ajar for at least an hour before removing it to cool completely.
- Chill Thoroughly: Refrigerate the cheesecake for at least 4 hours, preferably overnight, to allow it to fully set and achieve its creamy texture.
- Topping Variations: Experiment with different toppings! Consider a drizzle of melted Biscoff spread, fresh berries, chocolate shavings, or a dusting of powdered sugar.
- Gluten-Free Option: Use gluten-free digestive biscuits to create a gluten-free crust.
- Vegan Option: Substitute the cream cheese with a vegan cream cheese alternative and the eggs with a flax egg substitute or applesauce. You might need to adjust the baking time.
Nutritional Values and Health Benefits of Biscoff Cheesecake
While Biscoff Cheesecake is undeniably indulgent, let’s explore its nutritional profile and the potential health benefits of some of its components. Remember, this is a treat, so moderation is key.
Please note: The following nutritional information is an estimate and may vary based on the specific ingredients used. For precise values, use a nutritional calculator with your exact ingredient brands and quantities.
A typical slice of Biscoff Cheesecake will likely contain a significant amount of calories, primarily from fat and sugar. The cream cheese contributes to the fat content, while the sugar and biscuits add carbohydrates. However, cream cheese is a source of calcium and protein. Biscoff biscuits, while containing sugar, offer some fiber. The exact nutritional breakdown will depend on the specific brands and quantities used in your recipe. For a more detailed nutritional analysis, consider using an online nutritional calculator and inputting your precise ingredient measurements. You can find many free calculators available online.
It’s important to enjoy this delicious dessert in moderation as part of a balanced diet. If you’re watching your calorie intake, you might consider reducing the sugar or using a lower-fat cream cheese alternative. This would slightly alter the flavor and texture, but it could help manage the overall nutritional values.
FAQs about Biscoff Cheesecake
How long does Biscoff Cheesecake need to chill?
Can I make this Biscoff Cheesecake ahead of time?
What happens if my Biscoff Cheesecake cracks?
Is it possible to freeze Biscoff Cheesecake?
How can I prevent my Biscoff Cheesecake from being too dense?
Conclusion: Your Biscoff Cheesecake Journey
This Biscoff Cheesecake recipe is more than just a set of instructions; it’s an invitation to create a truly memorable dessert. The rich, buttery crust, the smooth, creamy filling, and the crunchy Biscoff topping combine to create a symphony of flavors and textures that will delight your senses. The detailed steps, along with tips and variations, guide you through the process, ensuring success even for beginner bakers. This recipe is perfect for impressing friends and family or simply indulging in a delicious treat.
We encourage you to try this recipe and share your baking experience with us in the comments below. Don’t hesitate to experiment with different toppings and variations to create your own unique twist on this classic dessert. Share your beautifully crafted Biscoff Cheesecakes on social media using #BiscoffCheesecake and tag us! Also, check out our other amazing dessert recipes on our blog, like our Basque Cheesecake and other delicious recipes. Happy baking!
For more baking inspiration, check out our Pinterest board! Click here to explore!
Biscoff Cheesecake
Ingredients
Equipment
Method
- Preheat oven to 160°C (140°C fan/Gas Mark 3). Crush Biscoff biscuits (for the base) finely. Combine crushed biscuits and melted butter; mix well. Press into the base of a 23cm springform tin.
- Bake for 10-12 minutes. Remove and let cool completely.
- Beat softened cream cheese and sugar until smooth. Beat in vanilla extract.
- Add eggs one at a time, mixing well after each addition. Gently fold in the double cream.
- Pour filling over the cooled crust. Sprinkle with crushed Biscoff biscuits.
- Place springform tin in a larger roasting tin. Pour boiling water halfway up the sides of the springform tin. Bake for 60-75 minutes, or until set around the edges but slightly wobbly in the center.
- Turn off the oven; leave cheesecake in the oven with the door ajar for 1 hour. Cool completely, then refrigerate for at least 4 hours, or preferably overnight.
- Remove from tin, slice, and serve.


