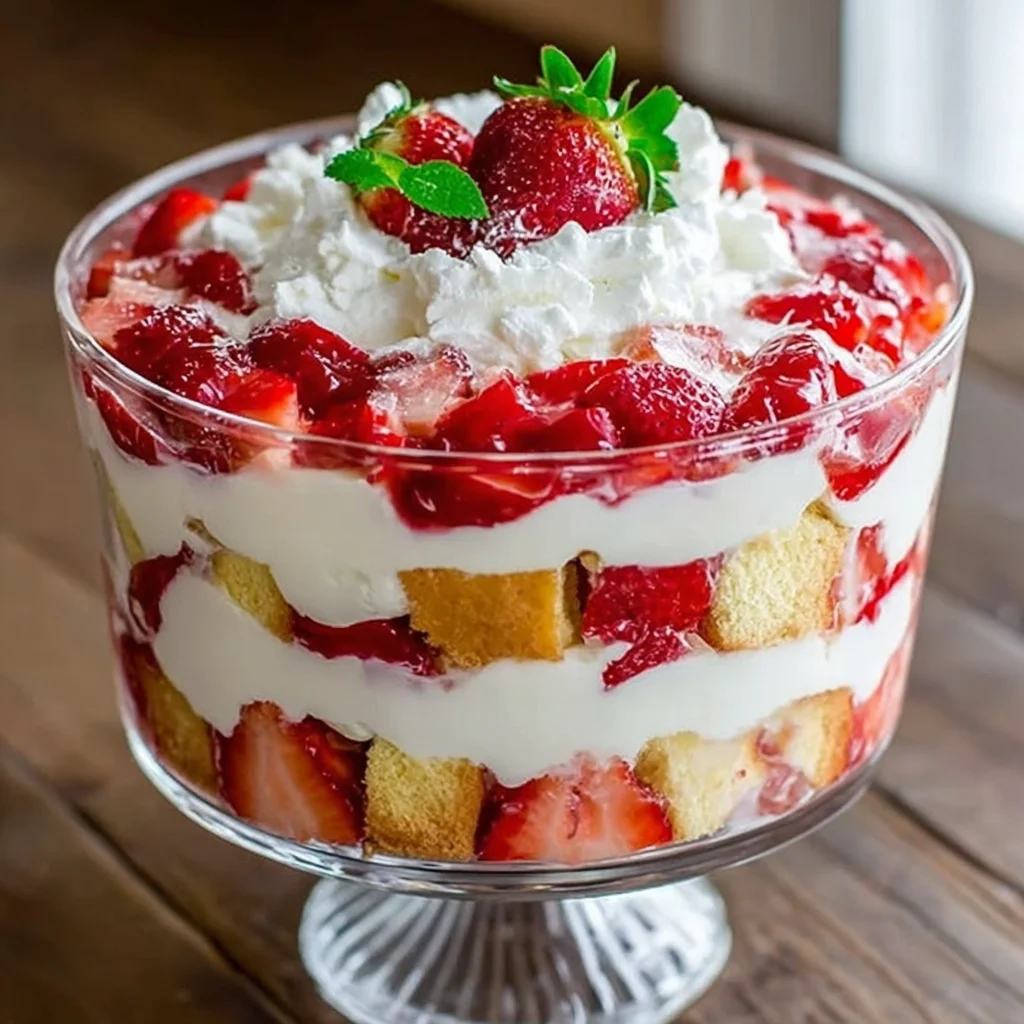
If there is one dessert that perfectly encapsulates the joy of warm weather, fresh berries, and absolutely zero oven time, it is the magnificent Strawberry Cheesecake Trifle. This show-stopping, layered creation combines three delightful elements: moist vanilla cake, plump, syrupy strawberries, and an ultra-creamy, light-as-air no-bake cheesecake filling. It’s elegant enough for a holiday table yet simple enough for a casual backyard BBQ. Forget complicated baking projects; this recipe is all about layering perfection and letting the refrigerator do the heavy lifting.
Our detailed guide ensures that even novice cooks can master this dessert. We focus on the crucial step of macerating the strawberries to create a rich, natural syrup, and we provide the secrets to a stable, lump-free cheesecake mousse. When chilled overnight, the Strawberry Cheesecake Trifle transforms into a cohesive, flavorful masterpiece where every spoonful delivers the refreshing tartness of berries alongside the decadent sweetness of cheesecake. Get ready to impress your guests with this stunning, irresistible centerpiece!
Why You’ll Love This Effortless Strawberry Cheesecake Trifle
The appeal of this dessert extends far beyond its stunning visual presentation. The synergy between its components makes it an absolute winner for entertaining, especially during the peak strawberry season. This no-bake cheesecake trifle solves so many common dessert dilemmas, making it a reliable and exciting addition to your recipe arsenal.
Firstly, the ease of preparation is unmatched. Traditional baked cheesecakes require water baths, careful cooling, and often, several hours of hands-on work. This Strawberry Cheesecake Trifle, however, utilizes a quick, fluffy cream cheese base folded into freshly whipped cream. The result is a cheesecake filling that sets beautifully in the fridge without any baking whatsoever. This means you can devote your attention to other parts of your meal, making hosting much less stressful.
Secondly, the flavor profile is perfectly balanced. We use fresh lemon juice (optional, but highly recommended) in the strawberry mixture. This small addition cuts through the richness of the cream cheese, ensuring the dessert feels refreshing rather than heavy. The combination of the sweet, tangy berries, the moist cake, and the creamy filling hits all the right notes sweet, tart, and deeply satisfying. Unlike some trifles that can become overly soggy, our technique ensures the cake absorbs just the right amount of strawberry syrup, maintaining a pleasing texture.
Thirdly, the scalability of the recipe is fantastic. Whether you are serving a small family gathering or a large party, you can easily adjust the quantities. For larger groups, simply double the recipe and use a wider or deeper trifle dish. Plus, assembling the trifle is incredibly fun, offering a wonderful opportunity to get children involved in the kitchen. Layering the ingredients in the transparent glass dish is the moment where the magic happens, transforming simple components into an edible work of art.
Finally, preparation time is highly flexible. Because this dessert absolutely requires chilling time (ideally overnight), it must be made ahead. This is a massive advantage when planning a major event. You can assemble the entire Strawberry Cheesecake Trifle the day before your party, allowing the flavors to truly marry and deepen, leaving you with one less item on your to-do list on the day of the event. Serving a chilled dessert on a hot day is always a welcome treat, and the light, airy texture of the filling is much more appealing than dense, heavy cakes in the summer months.
The Magic of Maceration: Why You Should Try This Layered Dessert
While the combination of strawberries and cheesecake is classic, what elevates this specific dessert the ultimate no-bake cheesecake in trifle form is the intentional preparation of the strawberries. Maceration is a simple technique that yields exponential flavor rewards, making this Strawberry Cheesecake Trifle truly stand out from standard layered desserts.
Maceration is the process of softening fruits by sprinkling them with sugar (and often a touch of acid, like lemon juice) and allowing them to sit. The osmotic pressure draws the natural water and juices out of the fruit. In the case of strawberries, this process creates a concentrated, deeply flavored syrup that coats the berries beautifully and, crucially, becomes the primary moistening agent for the cake layers.
If you skip this step, your cake layers might rely solely on the creaminess of the cheesecake filling, resulting in a drier overall texture. By using macerated berries and their syrup, you achieve several benefits:
- Intense Flavor: The syrup concentrates the natural sweetness of the strawberries, making the berry flavor pop against the rich cream cheese.
- Perfect Moisture: The cake cubes soak up the strawberry syrup, becoming wonderfully moist without becoming soggy or mushy, providing a delightful textural contrast to the airy cheesecake filling.
- Visual Appeal: The ruby-red syrup trickles down the sides of the glass dish, enhancing the visual appeal of the entire trifle, clearly defining the strawberry layers.
Beyond the technical benefits, trying this recipe guarantees a dessert that is a guaranteed crowd-pleaser. The concept of a trifle a visually stunning stack of complementary textures is inherently festive. Whether you call it a layered dessert, a no-bake cheesecake, or a summer trifle, this recipe delivers on all fronts: texture, flavor, and presentation. It’s an indispensable recipe for anyone who enjoys easy, impressive entertaining. Unlike demanding desserts, the assembly is quick, taking less than 30 minutes once the components are ready. Just remember the most important instruction: allow sufficient time for chilling. The patience you exercise during the chill phase will be rewarded with a dessert that holds its shape and offers perfectly blended flavors, ensuring that the Strawberry Cheesecake Trifle is always the star of the show.
Essential Ingredients and Utensils for the Perfect Strawberry Cheesecake Trifle
Success in creating the perfect Strawberry Cheesecake Trifle starts with understanding the role of each ingredient and having the right tools on hand. Precision matters, especially when dealing with the balance between the cream cheese base and the stabilized whipped cream.
Ingredients Breakdown: Achieving Layered Excellence
We break the ingredients down into three sections, ensuring you understand why certain items are crucial for the structure and flavor of this incredible no-bake dessert.
For the Cake Layer: The Foundation
- 1 (10.75 ounce) Store-Bought Pound Cake or Angel Food Cake: Using a store-bought cake is the ultimate time-saver in this no-bake recipe. Pound cake provides richness and density, while angel food cake offers a lighter, airier contrast. Ensure the cake is sliced into uniform 1-inch cubes for even absorption of the strawberry syrup.
- Alternatively: 1 Package of Crisp Vanilla Ladyfingers: Ladyfingers (Savoiardi biscuits) are a classic trifle substitute. They absorb moisture quickly and can be artfully arranged vertically around the glass dish for a more sophisticated presentation.
For the Strawberry Mixture: The Flavor Core
The quality of your berries directly dictates the quality of your finished Strawberry Cheesecake Trifle.
- 3 Pounds Fresh Strawberries: Aim for ripe, firm, and deeply red strawberries. Three pounds sounds like a lot, but they compress significantly during maceration and layering. Make sure they are thoroughly hulled (removing the green top) and thinly sliced.
- 1/4 Cup Granulated Sugar: This amount is a starting point. If your berries are already extremely sweet due to peak season ripeness, reduce it slightly. If they are tart, you may need a touch more. The sugar is essential for drawing out the juices.
- 1 Teaspoon Fresh Lemon Juice (Optional, but Highly Recommended): Lemon juice is the secret ingredient here. The acidity cuts the sweetness of the sugar and brightens the overall flavor, ensuring the finished trifle tastes vibrant and fresh, contrasting beautifully with the rich cheesecake filling.
For the Cheesecake Filling: The Creamy Heart
This is the most critical component for texture. Temperature control is key here.
- 2 (8 ounce) Packages Cream Cheese: It is absolutely mandatory that the cream cheese be fully softened to room temperature. Cold cream cheese will result in lumps, ruining the smooth texture of the filling. Use full-fat cream cheese for the best structure.
- 1 Cup Powdered Sugar (Confectioners’ Sugar): Powdered sugar dissolves seamlessly into the cream cheese, ensuring a smooth mouthfeel. It also contains cornstarch, which helps stabilize the filling.
- 1 Teaspoon Pure Vanilla Extract: Use high-quality vanilla for maximum flavor depth.
- 3 Cups Heavy Whipping Cream, Chilled: The cream must be very cold to whip properly into stiff peaks. This stabilized whipped cream is what gives the cheesecake filling its light, airy, mousse-like texture and prevents it from collapsing after chilling.
Essential Tools for Trifle Assembly
While this recipe is simple, a few specialized tools make the process seamless and ensure the best presentation.
- Large, Clear Glass Trifle Dish (4 to 5 quarts capacity): This is non-negotiable for presentation. The entire point of a trifle is to showcase the beautiful layers. A large glass bowl or clear punch bowl can work in a pinch, but a traditional straight-sided trifle dish is ideal.
- Electric Mixer (Handheld or Stand Mixer): Essential for both whipping the cream cheese base and achieving stiff peaks in the heavy cream. Attempting to whip 3 cups of heavy cream by hand is arduous and risks failure.
- Large Mixing Bowls: You will need at least two one for the cream cheese mixture and a separate, preferably chilled, bowl for the heavy cream.
- Rubber Spatula: Crucial for gently folding the whipped cream into the cream cheese base. This folding motion ensures the air remains in the mixture, resulting in that wonderfully light, mousse-like texture.
- Measuring Cups and Spoons: Accuracy in measuring the sugar, cream, and vanilla is important for the consistency of the final cheesecake filling.
- Sharp Knife and Cutting Board: For preparing the large quantity of strawberries and cubing the cake.
By preparing these high-quality ingredients and ensuring your tools are ready, you set the stage for a flawless Strawberry Cheesecake Trifle.
Step-by-Step Instructions: Mastering the Strawberry Cheesecake Trifle
The beauty of the trifle lies in its sequential assembly. Follow these detailed steps precisely to achieve perfect layers and the ideal balance of textures in your no-bake dessert.
Part 1: Prepare the Flavorful Strawberry Mixture
This critical step, maceration, should be completed first to allow the maximum time for the syrup to develop. Remember, this syrup is key to achieving a moist, flavorful cake base.
- Slice and Combine: Take your 3 pounds of hulled and sliced strawberries. Place them in a medium bowl. Add the 1/4 cup of granulated sugar and the optional (but highly recommended) teaspoon of fresh lemon juice.
- Gently Stir: Use a rubber spatula to gently stir the mixture. Be careful not to mash the berries; you only want to distribute the sugar evenly. You will notice the berries immediately start to glisten as the sugar begins to dissolve.
- Macerate: Set the bowl aside at room temperature for a minimum of 30 minutes, and up to 1 hour. During this time, the strawberries will release their juices, creating a rich, ruby-red syrup that will later soak into the cake layers, forming the backbone of the Strawberry Cheesecake Trifle flavor.
Part 2: Crafting the Luxurious Cheesecake Filling
The cheesecake filling is the structural component of this dessert. We are creating a stable, no-bake cheesecake mousse, which requires careful attention to mixing technique.
- Cream the Cream Cheese Base: In a large mixing bowl, place the two packages of fully room-temperature cream cheese. Use your electric mixer to beat the cream cheese on medium-high speed until it is perfectly smooth, fluffy, and voluminous this usually takes 2 to 3 minutes. Ensure there are absolutely no lumps remaining; this step is vital for a silky-smooth filling.
- Incorporate Sweeteners and Flavor: Reduce the mixer speed to low and gradually add the 1 cup of powdered sugar and 1 teaspoon of vanilla extract. Once the sugar is incorporated, increase the speed to medium and beat until the mixture is light and well combined, scraping down the sides of the bowl frequently. Set this cream cheese base aside.
- Whip the Heavy Cream: In a separate, very clean, and very cold bowl (a metal bowl works best), pour the 3 cups of chilled heavy whipping cream. Using clean beaters, beat the cream on high speed. Start slow and gradually increase speed. Continue beating until stiff peaks form. The peaks should hold their shape when the beater is lifted. Stop immediately at this point; over-beating turns the cream to butter.
- Fold to Create the Mousse: This is the crucial step for lightness. Using a large rubber spatula, gently incorporate about one-third of the whipped cream into the cream cheese base. This “lightens” the base, making it easier to fold in the rest.
- Finish Folding: Gently fold in the remaining two-thirds of the whipped cream using a lift-and-cut motion. Work quickly and gently, turning the bowl as you go, until the mixture is uniform, light, and airy. Do not over-mix, as this will deflate the mousse and result in a dense, heavy filling. The final product should be reminiscent of a thick, spreadable cloud.
Part 3: Layering the Trifle Dish (Presentation is Key)
Assembly should be done in your large, clear glass trifle dish (4 to 5 quarts) to showcase the distinct layers of this Strawberry Cheesecake Trifle.
- First Layer (Cake Base): Place half of the cubed pound cake pieces evenly across the bottom of the trifle dish. If using ladyfingers, arrange them vertically around the dish sides for a decorative edge, then fill the center space.
- Second Layer (Strawberry Syrup): Spoon half of the macerated strawberries and their resulting syrup evenly over the cake layer. Ensure the syrup soaks down into the cake pieces.
- Third Layer (Cheesecake Filling): Carefully spoon or pipe half of the prepared cheesecake filling mixture over the strawberries. Gently use the back of a spoon or spatula to smooth the surface, taking care not to push too hard, which could disturb the cake layer below.
- Fourth Layer (Repeat Cake): Place the remaining cubed cake pieces over the cheesecake layer.
- Fifth Layer (Repeat Strawberry): Spoon the rest of the strawberries and all remaining syrup over the second cake layer. Reserve a small handful of the most attractive berry slices for the final garnish.
- Sixth Layer (Top Filling): Gently spread the remaining cheesecake filling over the strawberries. Create a smooth top surface, or use a spatula to create light, decorative swirls for an elegant finish.
Part 4: Chill and Serve
- Chill: Cover the trifle dish tightly with plastic wrap, ensuring the plastic doesn’t touch the cheesecake top if possible (to prevent condensation). Refrigerate for a minimum of 6 hours, or ideally, overnight (12 hours). This chilling time is essential for the flavors to meld, the cake to absorb the syrup, and the cheesecake filling to set firmly.
- Garnish and Serve: Just before serving, garnish the top of the trifle with the reserved strawberry slices and, if desired, a light dusting of powdered sugar or a few fresh mint leaves. Serve the chilled Strawberry Cheesecake Trifle directly from the dish.
Tips, Troubleshooting, and Delicious Variations
While the Strawberry Cheesecake Trifle is forgiving, mastering a few techniques and knowing how to adapt the recipe can ensure perfection every time, whether you are making a creamy dessert or preparing a quick weeknight treat.
Avoiding Common Trifle Mistakes
- The Lumpy Filling: The single biggest mistake is not softening the cream cheese enough. If you find yourself with lumps, stop adding other ingredients, warm the mixture slightly (30 seconds in the microwave), and beat it again until smooth before incorporating the sugar and whipped cream.
- Deflated Mousse: This happens when the whipped cream is over-mixed or when the mixture is aggressively beaten during the folding step. Always use a large, flexible spatula and employ a gentle “cut-and-lift” motion when combining the two components to preserve the air.
- Too Soggy Cake: While moisture is good, mushiness is not. If you are using very thin cake slices or overly delicate angel food cake, reduce the maceration time for the strawberries to 20 minutes, yielding slightly less syrup. This will prevent the cake from disintegrating entirely.
- Serving Too Soon: A trifle served too soon will be soupy. The cheesecake filling needs hours in the cold to stabilize and firm up, and the cake needs time to fully absorb the syrup. Chill for a minimum of 6 hours.
Ingredient Swaps and Dietary Alternatives for the Layered Dessert
This recipe is incredibly versatile and can be adapted to suit various needs and flavor preferences:
- Flavor Variations: Swap strawberries for other soft fruits like raspberries, blueberries, or peaches. A mix of berries works exceptionally well in this no-bake cheesecake trifle. For a chocolate twist, add a drizzle of melted chocolate between the layers or swap the vanilla cake for a store-bought chocolate pound cake.
- Gluten-Free Trifle: Easily achieved by substituting the pound cake or ladyfingers with gluten-free vanilla cookies (such as vanilla wafers) or a prepared gluten-free cake mix baked into a sheet cake and cubed.
- Dairy-Free/Vegan Version: This requires slightly more effort but is achievable. Swap the cream cheese for a vegan cream cheese alternative (cashew-based works well). The heavy cream can be swapped for a canned full-fat coconut cream (chilled overnight, skimming off the thick cream) or a commercial vegan whipping cream alternative. Ensure the cake base is also certified vegan.
- Alcohol Addition (Traditional Trifle Style): For an adult version, lightly brush the cake layers with a dessert wine (like Marsala), a strawberry liqueur (like crème de fraise), or even a high-quality brandy before adding the strawberry mixture. This adds complex flavor and additional moisture.
- Adding Crunch: For textural contrast, sprinkle a layer of toasted almonds, crushed graham crackers, or vanilla wafer crumbs over the cheesecake filling layers before repeating the cake.
Experimentation is part of the fun of making a Strawberry Cheesecake Trifle. Whether you stick to the classic combination or introduce new flavors, this simple framework provides an impressive dessert foundation.
Nutritional Insights: Enjoying Your Indulgent Dessert
The Strawberry Cheesecake Trifle is undoubtedly an indulgent dessert, perfect for special occasions and celebrations. While precise nutritional values depend heavily on the specific brand of pound cake and cream cheese used, we can provide a general overview of the benefits and nutritional components of this layered dessert when based on approximately 16 servings.
As a rich dessert, the primary macronutrients come from fats and carbohydrates:
- Calories: Approximately 450–550 kcal per serving. This density comes primarily from the cream cheese, heavy cream, and sugar content in both the filling and the cake.
- Fats: Approximately 30–35g per serving. A significant portion of this is saturated fat derived from the full-fat dairy (cream cheese and heavy whipping cream).
- Carbohydrates: Approximately 40–50g per serving, combining the sugars added to the strawberries and filling, and the carbohydrates present in the cake layer.
- Protein: Approximately 5–7g per serving, primarily sourced from the dairy components (cream cheese).
While this is clearly a celebratory dish rather than a daily staple, the inclusion of fresh strawberries does offer valuable micronutrients and health benefits:
- Vitamin C: Strawberries are an exceptional source of Vitamin C, a powerful antioxidant essential for immune function and skin health. Even when macerated, the high Vitamin C content remains intact.
- Antioxidants and Flavonoids: Berries are known for their high antioxidant capacity, which helps combat oxidative stress and inflammation in the body.
- Fiber: The strawberries contribute dietary fiber, aiding in digestive health.
- Calcium: The cream cheese and heavy cream provide a moderate amount of calcium, essential for bone health.
Enjoying a moderate portion of Strawberry Cheesecake Trifle as part of a balanced diet allows for mindful indulgence. Because the recipe relies on fresh, whole fruit and homemade filling (as opposed to highly processed store-bought creams), you maintain control over the quality of the ingredients and minimize artificial additives. This is a dessert designed to be shared and enjoyed during moments of celebration, offering a delightful blend of flavor, texture, and natural goodness from the fresh seasonal berries. The effortless assembly means you can focus on savoring every bite.
Frequently Asked Questions (FAQs) about Strawberry Cheesecake Trifle
How far in advance can I make a Strawberry Cheesecake Trifle?
You can fully assemble the Strawberry Cheesecake Trifle up to 24 hours in advance. This allows the cake to fully absorb the strawberry syrup and the cheesecake filling to set perfectly. While you can make it 48 hours ahead, the cake base might begin to become too soft after the second day. Always reserve the final garnish until just before serving.
Can I use frozen strawberries instead of fresh ones for this recipe?
While fresh strawberries are highly recommended for the best flavor and texture, you can use frozen ones if necessary. If using frozen berries, thaw them completely first and drain off any excess water before adding the sugar and proceeding with the maceration step. Be aware that thawed frozen strawberries may be softer and yield more syrup, so adjust the chilling time accordingly.
How do I prevent the cheesecake filling from becoming runny?
A runny filling is usually due to two things: using cold cream cheese or over-folding. Ensure your cream cheese is completely soft before mixing to avoid lumps. Most importantly, when folding in the whipped cream, be gentle. The stiffly beaten heavy cream is the stabilizer for this no-bake cheesecake; aggressively mixing will deflate the air and cause the filling to lose its structure.
What is the best type of cake to use for a Strawberry Cheesecake Trifle?
The best cake is a sturdy one that can hold its shape while soaking up the syrup. Pound cake is ideal because it is dense and slightly dry, acting like a sponge. Angel food cake works well for a lighter texture, but you must be careful not to oversaturate it. Avoid very moist layer cakes, as they can turn mushy quickly once layered.
How long does Strawberry Cheesecake Trifle last in the refrigerator?
When stored properly covered in the refrigerator, this dessert is best consumed within 3 to 4 days. After the fourth day, the cake may become too saturated and mushy. Because of the fresh dairy components, freezing this trifle is not recommended, as the cheesecake mousse texture will break upon thawing.
Conclusion: The Perfect No-Fuss Centerpiece
The Strawberry Cheesecake Trifle stands as a testament to the fact that the most impressive desserts are often the ones that require the least amount of fuss. By focusing on simple, high-quality ingredients perfectly macerated strawberries, a light vanilla cake, and a silky, no-bake cheesecake filling we have created a showstopper that guarantees “oohs” and “aahs” at any gathering. This recipe offers the decadent flavor of a baked cheesecake combined with the refreshing ease of a summer berry dessert.
We’ve walked through the key techniques, from achieving lump-free cream cheese to the gentle folding required for a fluffy mousse, ensuring your layered masterpiece holds its shape and delivers on flavor. Remember the golden rule of trifle making: patience during the chilling phase is paramount. Allowing this dessert to rest overnight transforms the individual components into a cohesive, flavorful experience where the strawberry syrup beautifully moistens the cake and the filling sets to perfection.
Whether you need a quick dessert for an impromptu party or a stunning focal point for a holiday buffet, this Strawberry Cheesecake Trifle is your perfect solution. It eliminates the stress of baking and replaces it with the simple pleasure of layering and chilling. Now that you have the definitive guide to mastering this recipe, it’s time to head to the kitchen, grab your fresh strawberries, and start layering! We encourage you to try this recipe, share your assembly photos, and let us know what variations you enjoyed in the comments below. For more delicious, easy-to-follow Spanish and international recipes, be sure to check out our blog, like this guide to making the perfect Tortilla de Patatas or a rich Crema Catalana.
Decadent Strawberry Cheesecake Trifle
Ingredients
Equipment
Method
- In a medium bowl, combine the sliced strawberries, the 1/4 cup of granulated sugar, and the optional lemon juice.
- Gently stir the mixture until the sugar is dissolved and coats the berries evenly. Set the bowl aside at room temperature for at least 30 minutes. This maceration process creates a rich syrup that will moisten the cake layers.
- In a large mixing bowl, use an electric mixer to beat the fully softened cream cheese until it is completely smooth and fluffy, ensuring there are absolutely no lumps remaining.
- Add the powdered sugar and vanilla extract to the cream cheese. Beat on medium speed until the mixture is light and well combined, scraping down the sides of the bowl as needed. Set this cream cheese base aside.
- In a separate, very cold bowl, pour the 3 cups of heavy whipping cream. Beat the cream on high speed until stiff peaks form. Be careful not to over-beat or the cream will turn to butter.
- Gently fold approximately one-third of the whipped cream into the cream cheese mixture using a rubber spatula to lighten it. Once incorporated, fold in the remaining two-thirds of the whipped cream until the mixture is uniform, light, and airy. Do not over-mix, as this will deflate the mousse.
- First Layer (Cake Base): Place half of the cubed pound cake pieces evenly across the bottom of the trifle dish. (If using ladyfingers, arrange them vertically around the sides of the dish, then fill the bottom space.)
- Second Layer (Strawberry Syrup): Spoon half of the macerated strawberries and their resulting syrup evenly over the cake layer. Ensure the syrup soaks into the cake pieces.
- Third Layer (Cheesecake Filling): Carefully spread half of the prepared cheesecake filling mixture over the strawberries, gently smoothing the surface without disturbing the layers below.
- Fourth and Fifth Layers (Repeat): Place the remaining cubed cake pieces over the cheesecake layer. Then spoon the rest of the strawberries and syrup over this second cake layer. Reserve a small handful of the most attractive berry slices for the final garnish.
- Sixth Layer (Top Filling): Gently spread the remaining cheesecake filling over the strawberries. Create a smooth top surface, or use a spatula to create light, decorative swirls.
- Cover the trifle dish tightly with plastic wrap and refrigerate for a minimum of 6 hours, or ideally overnight. Chilling allows the flavors to meld and the cake to fully saturate.
- Just before serving, garnish the top of the trifle with the reserved strawberry slices.


