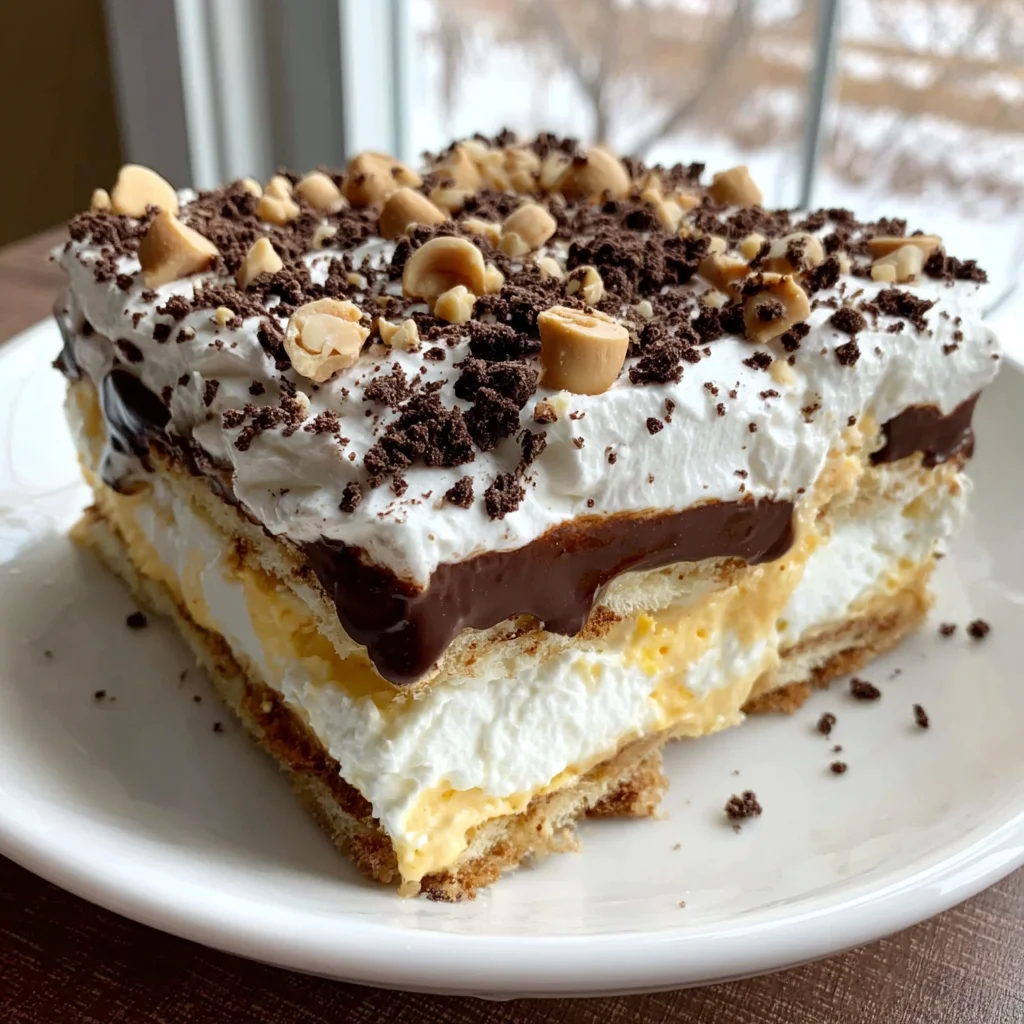
If there is one thing better than a classic chocolate eclair cake, it’s transforming that rich, creamy classic into a decadent fusion of flavor with everyone’s favorite salty-sweet combination: peanut butter and chocolate. Welcome to the world of the Peanut Butter Chocolate Eclair Cake. This no-bake masterpiece layers crispy graham crackers with a ridiculously light and airy peanut butter cream filling, all capped off with a shiny, silky chocolate glaze. Forget turning on your oven this recipe requires only a handful of ingredients, minimal effort, and delivers maximum flavor payoff. It is the perfect make-ahead dessert for parties, potlucks, or simply satisfying that late-night craving for something truly extraordinary. Get ready to discover your new favorite dessert that is as easy to make as it is impossible to resist.
Why You’ll Absolutely Love This Decadent Peanut Butter Chocolate Eclair Cake
The appeal of the Peanut Butter Chocolate Eclair Cake is multi-faceted. It perfectly balances the complex textures and flavors that define truly great comfort food. This isn’t just another chilled dessert; it’s an experience built on simplicity and payoff. Here are the core reasons why this recipe will earn a permanent spot in your rotation.
The Magic of the No-Bake Technique
In the heat of summer, or when time is short, the last thing anyone wants to do is preheat an oven. This no-bake dessert is revolutionary in its ease. The chilling process the essential component of this recipe replaces baking entirely. As the cake rests in the refrigerator overnight, the graham crackers transform. They absorb the moisture from the creamy peanut butter filling, softening into a luscious, spongy texture that mimics the delicate choux pastry traditionally used in eclairs. This textural shift is truly magical, offering all the satisfaction of a baked good without the fuss.
A Flavor Profile That Can’t Be Beat
Peanut butter and chocolate are an undisputed classic combination for a reason. In this cake, we take those classic flavors and elevate them. The filling isn’t just straight peanut butter; it’s a blend of instant vanilla pudding, creamy peanut butter, and light whipped topping. This yields a filling that is sweet, salty, deeply nutty, yet incredibly light on the palate. The density of the peanut butter is beautifully countered by the light airiness of the whipped topping. Topping it all off is a homemade chocolate glaze not too sweet, and with just the right amount of richness to cut through the peanut butter, ensuring that every single bite is perfectly balanced.
Perfect for Feeding a Crowd
This recipe utilizes a standard 9×13 inch baking dish, making it the ideal potluck or party dessert. It yields generous portions (easily serving 12-15 people) and holds up remarkably well in the refrigerator. Unlike many other layered desserts that require delicate slicing, the structured nature of the graham cracker layers ensures that the cake holds its shape beautifully once chilled, making serving stress-free. If you are looking for a showstopper dessert that everyone, from kids to adults, will devour, this Peanut Butter Chocolate Eclair Cake is the definitive choice.
Why You Should Try This Effortless No-Bake Dessert Today
Beyond its delicious flavor and simple execution, trying the Peanut Butter Chocolate Eclair Cake offers significant practical advantages for the home cook. Whether you are a baking novice or a seasoned pastry chef looking for a quick win, this recipe is designed for success.
Beginner-Friendly and Foolproof
Many complex desserts are intimidating, requiring multiple stages of baking, precise temperatures, or delicate folding techniques. This easy eclair cake eliminates those barriers. If you can whisk instant pudding and gently fold in whipped topping, you have the skills necessary to master this recipe. The structure is forgiving the graham crackers hide any slight imperfections in the filling spread, and the rich chocolate glaze covers the entire top, ensuring a polished, professional finish every time. This recipe is a confidence booster in the kitchen.
A Superior Make-Ahead Option
One of the greatest benefits of this recipe is its requirement for extended chilling. Unlike desserts that must be served immediately, this graham cracker dessert actually tastes better the day after it’s made. This makes it an ideal choice for holiday gatherings, busy weekends, or special events, as all the heavy lifting can be done 8 to 24 hours in advance. Knowing you have a show-stopping dessert ready and waiting reduces stress significantly. The extended rest time allows the flavors to deepen and the textures to meld completely, resulting in a cohesive, cake-like consistency that is truly sublime.
Customization and Versatility
While the classic Peanut Butter Chocolate Eclair Cake is perfect as written, the framework is incredibly versatile. You can easily adapt the flavor profile to suit dietary needs or personal preferences. For instance, swapping the vanilla pudding for chocolate pudding or adding crushed peanuts to the glaze offers immediate variation. The simplicity of the core ingredients means you are only limited by your imagination. It offers a nostalgic, yet elevated, take on the classic eclair or layered dessert, proving that complex flavors don’t require complex techniques. For other simple, yet satisfying desserts, you might enjoy trying an easy homemade Tarta de Queso Vasca (Basque Cheesecake), though this eclair cake remains the quickest no-bake option.
Cost-Effective Ingredients
This recipe relies primarily on pantry staples: graham crackers, instant pudding mix, milk, peanut butter, and basic glaze ingredients. These items are generally affordable and accessible, making the Peanut Butter Chocolate Eclair Cake an economical choice when compared to purchasing gourmet desserts or ingredients for scratch baking. It proves that luxury desserts don’t have to carry a luxury price tag.
Essential Ingredients and Tools for the Perfect Peanut Butter Chocolate Eclair Cake
Success with this easy eclair cake hinges on using the correct ingredients, particularly when dealing with the structure of the filling. Pay close attention to the specifications, especially regarding the peanut butter and pudding mix, to ensure stability and the best creamy texture.
Ingredients Breakdown: Precision for Perfection
For the Graham Cracker Base and Layers:
- 1 (14.4 ounce) box of Honey Graham Crackers (approximately 48 full sheets): These form the backbone of the cake. Do not substitute these with other types of cookies (like vanilla wafers) if you want the traditional eclair cake texture, as graham crackers absorb moisture better and quickly.
For the Creamy Peanut Butter Filling:
- 2 (3.4 ounce) boxes instant vanilla pudding mix (or French vanilla): Crucial Tip: Ensure it is INSTANT pudding, not the cook-and-serve variety. The instant mix contains stabilizers necessary to set the filling quickly and firmly, providing the structural integrity for the entire cake.
- 3 cups cold whole milk (or 2% milk): The milk must be cold to properly activate the instant pudding mixture and help it set swiftly.
- 1 cup creamy peanut butter: Avoid using natural-style peanut butter that separates (the oil floats to the top). The excess oil in natural peanut butter will destabilize the filling, preventing it from setting properly and resulting in a runny mess. Stick to standard creamy peanut butter (like Jif or Skippy) for guaranteed stability.
- 1/2 cup powdered sugar (optional, adds stability and sweetness to the filling): While optional, we strongly recommend including this, as it improves the texture of the peanut butter mix before it joins the pudding, reducing separation and enhancing the overall flavor.
- 1 (8 ounce) container frozen whipped topping (Cool Whip), thawed completely: The whipped topping is what gives the filling its signature airy, cloud-like texture, contrasting perfectly with the dense graham crackers and rich chocolate glaze. Make sure it is fully thawed before folding it in.
For the Silky Chocolate Glaze:
This rich, homemade glaze provides the classic eclair topping and is far superior to store-bought canned frosting.
- 1 cup semi-sweet chocolate chips (or milk chocolate chips): Semi-sweet offers a deeper, more sophisticated cocoa flavor, balancing the extreme sweetness of the peanut butter filling. Milk chocolate can be used if you prefer a sweeter topping.
- 1/4 cup unsalted butter: The butter provides necessary fat content, ensuring the glaze is glossy and smooth.
- 1 teaspoon vanilla extract: A small addition that drastically enhances the overall flavor profile of the chocolate.
- 3 tablespoons cold milk (or heavy cream): Cold liquid helps the glaze thicken slightly after it leaves the heat, providing the perfect pourable consistency. Heavy cream makes a richer, darker glaze.
- 1 cup powdered sugar, sifted: Sifting the powdered sugar is non-negotiable! This step ensures your glaze remains perfectly smooth and lump-free.
Recommended Tools and Utensils
While you don’t need any high-tech gadgets, having the right basic tools will make assembling your Peanut Butter Chocolate Eclair Cake much smoother and faster.
Kitchen Essentials:
- 9×13 Inch Baking Dish: Standard size is crucial for layer height.
- Large Mixing Bowl: For whisking the pudding base.
- Medium Mixing Bowl: For preparing the peanut butter mixture.
- Balloon Whisk: Necessary for quickly mixing the instant pudding.
- Rubber Spatula or Offset Spatula: Essential for gently folding the whipped topping into the filling and for spreading the filling and glaze evenly without disturbing the cracker layers.
- Small Saucepan: For melting the chocolate glaze ingredients over low heat.
- Fine-Mesh Sifter: Needed for sifting the powdered sugar for the glaze.
- Measuring Cups and Spoons: Accuracy is key in no-bake desserts.
Using these specific tools will help ensure the Peanut Butter Chocolate Eclair Cake sets beautifully, delivering the creamy, structured slices you desire.
Detailed Recipe Steps for Assembling Your Peanut Butter Chocolate Eclair Cake
Follow these steps precisely to achieve the perfect texture and flavor balance in your Peanut Butter Chocolate Eclair Cake. The key is in gentle mixing and patient chilling.
Step 1: Prepare the Pan and Cracker Base
- Lightly grease a standard 9×13 inch baking dish. This prevents sticking, although generally, the finished dessert lifts out easily.
- Arrange a single, solid layer of graham crackers on the bottom of the prepared dish.
- Key Tip: You will need to break or cut the crackers to fit the corners and edges completely. The goal is to cover the bottom entirely, creating a solid base without overlapping the crackers, as overlapping will prevent them from softening evenly. Set the remaining crackers aside; you will need two more full layers.
Step 2: Make the Instant Pudding Base
- In a large mixing bowl, whisk together the two packages of instant vanilla pudding mix and the 3 cups of cold milk.
- Whisk vigorously for about two minutes. You will notice the mixture starts to thicken substantially and quickly.
- Crucial Step: Let the pudding mixture sit undisturbed for 5 minutes. This allows the stabilizing agents to fully set the mixture. The pudding should be quite thick, almost gelatinous, before proceeding.
Step 3: Create the Creamy Peanut Butter Filling
- In a separate medium bowl, combine the 1 cup of creamy peanut butter and the 1/2 cup of powdered sugar. Stir this vigorously until the mixture is smooth and slightly malleable. This pre-mix helps integrate the peanut butter smoothly into the pudding.
- Add the peanut butter mixture directly to the set vanilla pudding. Stir gently until the mixture is mostly combined but still slightly streaky. Do not fully combine yet. This initial light stirring prevents the peanut butter from collapsing the volume of the whipped topping.
- Gently fold in the entire container of thawed whipped topping. Use a rubber spatula and cut down the middle of the mixture, folding the bottom layers over the top. Continue this until the filling is uniform, light, and creamy. Stop immediately when no white streaks remain. Overmixing the whipped topping will deflate the volume, resulting in a dense, heavy filling instead of the desired light, airy consistency.
Step 4: Assemble the First Layer
- Pour half (approximately 3 cups) of the luscious peanut butter filling over the graham cracker base layer in the 9×13 inch dish.
- Use a rubber spatula or the back of a spoon to gently spread the filling into an even layer. Work carefully, pushing the filling gently to the edges and corners without dragging the spatula too hard on the crackers below, which might cause them to shift or break.
Step 5: Add the Middle and Top Layers
- Arrange a second layer of graham crackers directly on top of the first peanut butter filling layer. Again, ensure there are no gaps or overlaps.
- Pour the remaining half of the creamy peanut butter filling on top of the second cracker layer. Spread it smoothly and evenly.
- Place a third and final layer of graham crackers directly on top of the remaining filling. This top layer will serve as the canvas for your chocolate glaze.
Step 6: Prepare the Chocolate Glaze
- In a small saucepan over low heat, combine the 1 cup of chocolate chips and the 1/4 cup of butter.
- Stir constantly until the chocolate and butter are fully melted and perfectly smooth. Watch the heat carefully; chocolate burns easily!
- Remove the mixture from the heat. Stir in the vanilla extract and the 3 tablespoons of cold milk (or heavy cream).
- Gradually whisk in the 1 cup of sifted powdered sugar until the glaze is smooth, shiny, and lump-free. If the glaze is too thick to pour easily, add milk 1 teaspoon at a time until it reaches a thick, pourable consistency, similar to slightly runny honey.
Step 7: Glaze and Chill
- Pour the slightly warm (not hot!) chocolate glaze evenly over the top layer of graham crackers.
- Use a knife or offset spatula to gently spread the glaze, ensuring the entire top surface is covered right to the edges. Do not press down into the crackers.
- Cover the dish tightly with plastic wrap. Important: Create a small tent so the plastic wrap does not directly touch the glaze. If the plastic touches the glaze, it will pull off the beautiful shine when removed.
- Refrigerate the Peanut Butter Chocolate Eclair Cake for a minimum of 8 hours, or preferably overnight (12-24 hours). The extended chilling time is non-negotiable, as it allows the graham crackers to fully soften and absorb moisture, creating the signature cake-like texture.
Step 8: Serve
- Once the cake is fully chilled and the crackers are soft, slice and serve.
- The cake can be kept refrigerated for up to 4 days, though it rarely lasts that long! Enjoy this effortless no-bake dessert.
Tips, Variations, and Troubleshooting Your Peanut Butter Chocolate Eclair Cake
While this recipe is straightforward, a few expert tips can ensure spectacular results. Furthermore, we offer creative variations to adapt the Peanut Butter Chocolate Eclair Cake to any occasion or dietary requirement.
Achieving the Perfect Filling and Glaze
Troubleshooting the Filling (Too Runny):
- Check your pudding: Did you use instant pudding? Cook-and-serve types will never set the filling properly.
- Cold Milk is Critical: If the milk wasn’t cold enough, the stabilizers in the instant mix might not have activated fully.
- Peanut Butter Type: Using natural peanut butter that separates oil is the number one cause of a runny filling. The oil prevents the pudding from setting. Always use standard, stabilized creamy peanut butter.
Troubleshooting the Glaze (Too Thick or Too Thin):
- Glaze Too Thick: If the glaze becomes too stiff upon cooling, add 1/2 teaspoon of milk or cream at a time, mixing thoroughly, until it reaches a spreadable consistency.
- Glaze Too Thin: If the glaze is too runny, whisk in another tablespoon of sifted powdered sugar until it thickens slightly. Remember, it will firm up further in the refrigerator.
- Lumps in the Glaze: This usually happens if the powdered sugar wasn’t sifted. If you end up with lumps, gently reheat the glaze over very low heat while whisking constantly until the lumps dissolve, then remove and cool slightly before applying.
Delicious Ingredient Variations
Feel free to put your own spin on this easy eclair cake. The basic structure is resilient and supports many creative changes:
- Dark Chocolate Intensity: Substitute semi-sweet chocolate chips with dark chocolate chips (70% cocoa) for a less sweet, more intense cocoa experience. This pairs wonderfully with the salty peanut butter filling.
- Cookie Crunch: Instead of regular honey graham crackers, try using chocolate graham crackers or even vanilla wafers for a slightly different texture and flavor base.
- Spiced Filling: Add 1/2 teaspoon of ground cinnamon or a dash of nutmeg to the peanut butter filling for a warm, fall-inspired dessert flavor.
- Alternative Toppings: Sprinkle the finished glaze immediately with chopped peanuts, mini peanut butter cups, or a pinch of flaky sea salt before chilling for added texture and visual appeal. You can find more decorative ideas on my Pinterest dessert board.
Dietary Alternatives for the Peanut Butter Chocolate Eclair Cake
- Gluten-Free Version: Easily substitute the honey graham crackers with certified gluten-free graham crackers (available in most large grocery stores). The assembly and chilling instructions remain the same.
- Dairy-Free/Vegan Option: Replace the whole milk with a creamy plant-based milk (like cashew or oat milk). Use dairy-free chocolate chips and swap the Cool Whip for a vegan whipped topping (often soy- or coconut-based). You must also ensure the instant pudding mix you use is dairy-free, as some contain milk solids.
- Lower Sugar Version: Look for sugar-free instant vanilla pudding mix. You can also reduce the powdered sugar in the filling and use sugar substitutes in the chocolate glaze, though adjusting the glaze texture may take careful experimentation.
Remember, patience is the final ingredient in this recipe. Waiting the full 8-12 hours for the Peanut Butter Chocolate Eclair Cake to chill is vital for its transformation into a true “cake.” Just like a good Spanish stew, such as Fabada Asturiana, time allows the elements to merge into one cohesive, delicious dish.
Nutritional Overview and Ingredient Benefits
While the Peanut Butter Chocolate Eclair Cake is, first and foremost, an indulgent dessert, its core ingredients offer some surprisingly beneficial components when enjoyed in moderation.
Estimated Nutritional Information
Please note that nutritional values are estimates and can vary based on the specific brands of peanut butter, milk fat content, and pudding mix used. These estimates are based on 15 servings of the final Peanut Butter Chocolate Eclair Cake.
| Nutrient (per serving) | Estimate Value |
|---|---|
| Calories | ~450 – 550 kcal |
| Protein | ~8 – 10g |
| Total Fat | ~25 – 30g |
| Saturated Fat | ~10 – 12g |
| Total Carbohydrates | ~55 – 65g |
| Sugar (Added & Natural) | ~40 – 50g |
Benefits of Key Ingredients
Understanding the core components of this dessert highlights the unique contributions of each ingredient:
- Peanut Butter (Protein and Healthy Fats): Peanuts are an excellent source of plant-based protein, which is essential for muscle repair and satiety. They also contain monounsaturated and polyunsaturated fats the “good fats” which support heart health. Furthermore, peanut butter provides essential vitamins and minerals like Vitamin E, magnesium, and phosphorus.
- Milk (Calcium and Vitamin D): The whole milk used in the pudding base is a primary source of calcium, vital for bone health, and often fortified with Vitamin D, which aids in calcium absorption and supports immune function.
- Chocolate (Antioxidants): Particularly if you opt for semi-sweet or dark chocolate chips in the glaze, chocolate contains potent antioxidants called flavonoids. These compounds have been linked to improving blood flow and reducing oxidative stress. While this is a sweetened dessert, the presence of real cocoa contributes these beneficial compounds.
- Graham Crackers (Fiber): While primarily carbohydrate-based, graham crackers often contain a small amount of whole grain flour, offering a touch of dietary fiber, which aids in digestion.
Enjoying a slice of Peanut Butter Chocolate Eclair Cake is a delightful indulgence that satisfies a deep craving. When paired with the simplicity of execution, it becomes a perfect celebration dessert, providing both comfort and convenience.
Frequently Asked Questions (FAQ) about the Peanut Butter Chocolate Eclair Cake
How long does the Peanut Butter Chocolate Eclair Cake need to chill, and can I eat it sooner?
This cake requires a minimum of 8 hours, and ideally 12 hours or overnight, to chill completely. This time is critical because it allows the graham crackers to absorb moisture from the creamy peanut butter filling, which transforms them into a soft, cake-like texture. If you eat it sooner, the crackers will still be hard and crunchy, disrupting the traditional eclair cake texture.
Can I freeze this Peanut Butter Chocolate Eclair Cake?
Yes, the Peanut Butter Chocolate Eclair Cake freezes remarkably well! Wrap the chilled, glazed cake tightly in plastic wrap, followed by a layer of aluminum foil. It can be stored in the freezer for up to 2 months. To serve, thaw it overnight in the refrigerator. Note that the texture of the filling may become slightly firmer after freezing and thawing.
Why did my chocolate glaze turn out dull instead of shiny?
A dull glaze often results from adding the powdered sugar before the butter and chocolate mixture has cooled slightly, or if the sugar wasn’t sifted, which can lead to rapid crystallization. Ensure you remove the mixture from the heat before adding the powdered sugar. For a guaranteed shine, also ensure the plastic wrap does not touch the glaze while chilling.
Can I use homemade whipped cream instead of store-bought whipped topping?
While homemade whipped cream offers a superior flavor, it is less stable than commercial whipped topping (like Cool Whip) which contains stabilizers. If you use homemade whipped cream, ensure you use a whipped cream stabilizer (like unflavored gelatin or a pudding stabilizer) to prevent the filling from weeping or becoming too watery as it chills within the Peanut Butter Chocolate Eclair Cake.
How should I store leftover Peanut Butter Chocolate Eclair Cake?
Store any leftover slices of the Peanut Butter Chocolate Eclair Cake tightly covered in the original 9×13 inch dish, or transfer slices to an airtight container. Keep the cake refrigerated. It remains fresh and delicious for up to 4 days, with the crackers becoming progressively softer over time.
Conclusion: The Easiest, Most Decadent No-Bake Dessert
The Peanut Butter Chocolate Eclair Cake is truly the ideal dessert for anyone seeking maximum flavor with minimal effort. It embodies the perfect marriage of creamy, salty peanut butter filling and rich, glossy chocolate glaze, all built upon a magically softened graham cracker foundation. This recipe proves that you don’t need complicated techniques or hours in the kitchen to achieve a dessert that looks and tastes like it came straight from a gourmet bakery.
From the critical importance of using instant pudding to ensuring your peanut butter is stabilized, every detail in this guide is designed to guarantee your success. The lengthy chilling time is a small price to pay for the incredible payoff a moist, decadent, perfectly structured slice every time. Whether you’re hosting a summer barbecue, bringing a dish to a holiday potluck, or simply looking for a sweet treat to enjoy throughout the week, this no-bake dessert delivers unparalleled satisfaction.
We encourage you to try this recipe today! It is far simpler than whipping up complex European sweets, like a perfect Crema Catalana, yet equally impressive. Once you experience the ease and flavor of this Peanut Butter Chocolate Eclair Cake, it will undoubtedly become a staple in your recipe collection. Share your results with us in the comments below, and let us know your favorite variations! Happy no-baking!
Peanut Butter Chocolate Eclair Cake (No-Bake)
Ingredients
Equipment
Method
- Lightly grease a standard 9x13 inch baking dish. Arrange a single, solid layer of graham crackers on the bottom of the prepared dish. Break or cut the crackers as needed to cover the bottom completely, without overlapping. Set the remaining crackers aside.
- In a large mixing bowl, whisk together the two packages of instant vanilla pudding mix and the 3 cups of cold milk for about two minutes, until the mixture starts to thicken substantially. Let the pudding mixture sit undisturbed for 5 minutes to fully set.
- In a separate medium bowl, combine the 1 cup of creamy peanut butter and the 1/2 cup of powdered sugar. Stir well until the mixture is smooth and slightly malleable. Add the peanut butter mixture to the set vanilla pudding. Stir gently until the mixture is mostly combined but still slightly streaky.
- Gently fold in the entire container of thawed whipped topping until the filling is uniform, light, and creamy. Do not overmix, or the volume will deflate.
- Pour half (approximately 3 cups) of the peanut butter filling over the graham cracker base layer in the 9x13 inch dish. Use a spatula to gently spread the filling into an even layer.
- Arrange a second layer of graham crackers directly on top of the peanut butter filling. Pour the remaining half of the peanut butter filling on top of the second cracker layer and spread it smoothly. Place a third and final layer of graham crackers directly on top of the remaining filling.
- In a small saucepan over low heat, combine the 1 cup of chocolate chips and the 1/4 cup of butter. Stir constantly until the chocolate and butter are fully melted and smooth. Remove the mixture from the heat.
- Stir in the vanilla extract and the 3 tablespoons of cold milk (or cream). Gradually whisk in the 1 cup of sifted powdered sugar until the glaze is smooth, shiny, and lump-free. If the glaze is too thick, add milk 1 teaspoon at a time.
- Pour the warm chocolate glaze evenly over the top layer of graham crackers, spreading gently with a knife or offset spatula. Cover the dish tightly with plastic wrap (ensuring it does not touch the glaze). Refrigerate the cake for a minimum of 8 hours, or preferably overnight, to allow the crackers to soften.
- Slice and serve the chilled cake. The cake can be stored refrigerated for up to 4 days.


