Welcome to the ultimate guide for making the most adorable and irresistibly delicious cookies you will ever bake: the Peanut Butter Paw Print Cookies. If you are searching for a dessert that combines the classic comfort of homemade peanut butter cookies with an unforgettable visual appeal, your quest ends here. These cookies are thick, chewy, slightly crumbly at the edges, and burst with rich peanut flavor, perfectly balanced by sweet chocolate chips. But what truly sets them apart is their charming design each cookie is lovingly decorated to resemble a little paw print, making them a massive hit for birthday parties, bake sales, or just a cozy afternoon treat.
In this comprehensive article, we will walk you through every step, from selecting the perfect peanut butter to mastering the crucial timing of adding the “paw pads.” Whether you are an experienced baker or just starting out, this recipe for Peanut Butter Paw Print Cookies is straightforward, fun, and guarantees a stunning result that tastes as good as it looks. Get ready to preheat your oven and enjoy the comforting aroma of peanut butter goodness filling your kitchen!
Why You’ll Fall in Love with These Peanut Butter Paw Print Cookies
There is a special kind of magic that happens when you combine the robust, slightly savory flavor of peanut butter with the melt-in-your-mouth sweetness of chocolate. But these aren’t just any peanut butter chocolate chip cookies; they are specifically designed for maximum delight and visual impact. Here is an in-depth look at exactly why the Peanut Butter Paw Print Cookies are destined to become a permanent fixture in your baking rotation.
First and foremost is the texture. We have carefully balanced the ingredients specifically the ratio of sugars and fats to ensure these cookies achieve the perfect trifecta: crispy edges, a delightfully soft and chewy interior, and a moist core. Unlike thin, crispy cookies, these have a satisfying heft. The use of both packed light brown sugar and granulated sugar is key here. Brown sugar provides molasses, which adds depth of flavor and retains moisture, resulting in that wonderfully soft chewiness, while the granulated sugar helps the edges spread slightly and crisp up beautifully. Every bite of these Peanut Butter Paw Print Cookies offers a textural adventure.
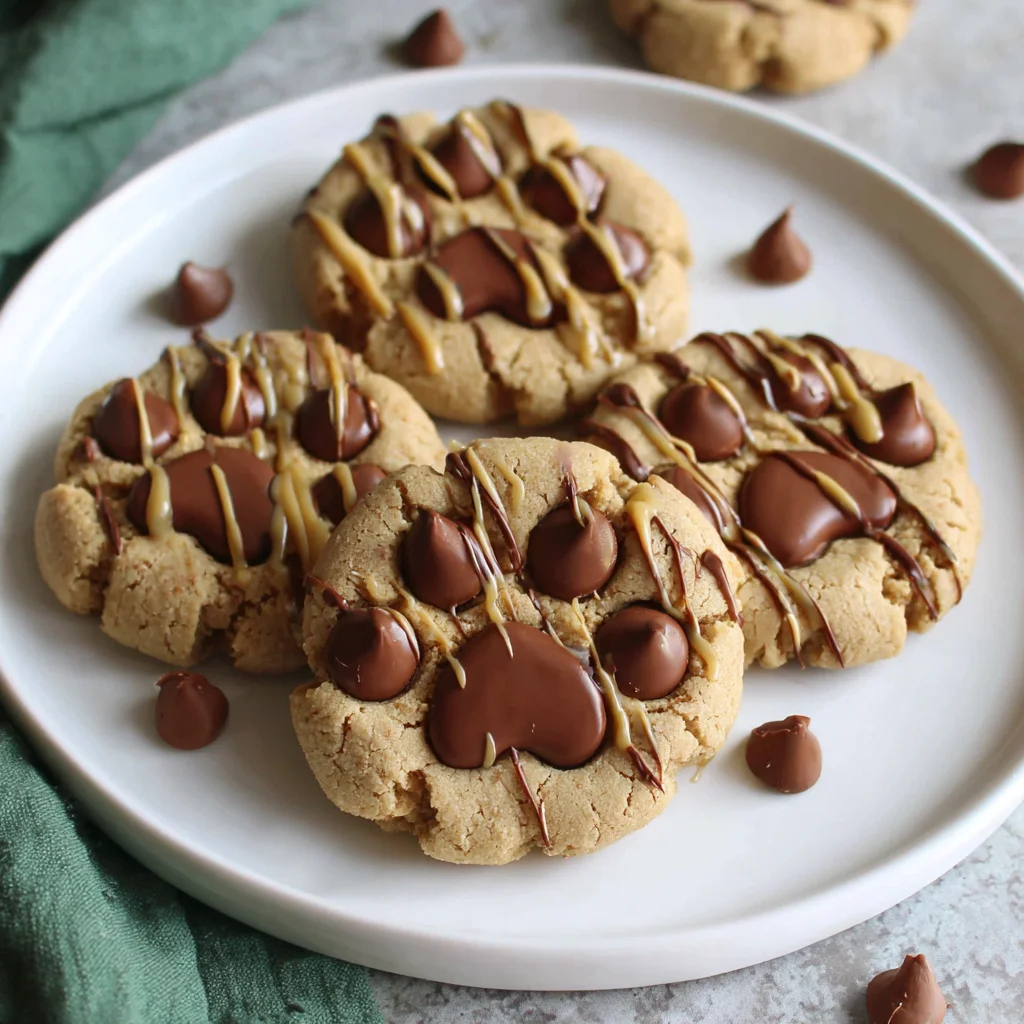
Beyond the fundamental flavor and texture, the visual appeal is undeniable. In a world saturated with standard drop cookies, the paw print design provides a unique, whimsical element. This design isn’t just aesthetic; the addition of the chocolate chips one standard chip for the main pad and three mini chips for the toes introduces pockets of semi-sweet melted goodness precisely where you want them. The trick of adding the chips immediately after they come out of the oven ensures the chocolate melts slightly and adheres perfectly, setting into the cookie dough as it cools. This technique is much more effective than baking the chocolate into the dough, preserving the clean look of the paw print.
Furthermore, this recipe is remarkably robust and forgiving. It’s designed for consistency. The recipe relies on simple, pantry-staple ingredients, meaning you can whip up a batch of these glorious Peanut Butter Paw Print Cookies whenever a craving strikes. The dough handles beautifully, making the rolling and sugar-coating steps enjoyable rather than frustrating. This high reliability makes them a fantastic choice for new bakers who want professional-looking results without a complex process.
Finally, these cookies cater universally to all ages. Peanut butter is a classic comfort flavor, deeply nostalgic for many. Children adore the cute shape, and adults appreciate the perfect balance of sweet and salty notes. They are ideal for gifting, as they travel well and maintain their freshness for several days when stored properly in an airtight container. If you’re looking for a recipe that combines comfort food nostalgia with creative presentation, these Peanut Butter Paw Print Cookies are the definitive answer.
The Perfect Blend of Sweet and Salty
The secret to the irresistible flavor profile of the Peanut Butter Paw Print Cookies lies in the quality of your peanut butter and the balance of salt. We recommend using creamy, conventional peanut butter (like Jif or Skippy) for the best texture and stability in the dough. Natural peanut butter, while often healthier, tends to separate and can result in a drier, more fragile cookie. The salt in the recipe not only balances the sweetness of the sugars and chocolate but also enhances the natural roasted flavor of the peanut butter, ensuring the cookie is savory and rich, not cloyingly sweet.
The chocolate chips are the finishing touch, providing a necessary counterpoint. Semi-sweet chocolate provides enough bitterness to cut through the richness of the peanut butter, creating a harmonious and addictive bite. The precision of placing the main pad (standard chip) and the three mini toes adds bursts of chocolate exactly where they are needed, cementing these as the best peanut butter paw print cookies you will ever make.
Why You Must Try This Paw Print Cookie Recipe Today
If you need convincing beyond sheer deliciousness, consider the practical and emotional benefits of adding this recipe to your repertoire. Baking is not just about the end product; it’s about the process, the shared experience, and the joy of creating something beautiful and comforting. The Peanut Butter Paw Print Cookies offer a unique opportunity to achieve all of this.
Ideal for Family Baking Sessions
This recipe is particularly excellent for baking with children. The steps mixing, rolling the balls, sugar-coating, and most importantly, adding the chocolate paw prints are highly engaging and manageable for small hands. It teaches precision and patience, especially the delicate art of placing those mini chocolate toes immediately after the cookies emerge from the heat. The immediate gratification of seeing the raw dough transform into an adorable baked treat is a fantastic experience for young bakers. If you’re looking for a comforting activity that rivals the simplicity of making a classic Spanish tortilla de patatas, but results in a sweet American classic, this is it.
A Unique Holiday or Gifting Idea
Tired of giving out standard sugar cookies? The novelty of the paw print design makes these Peanut Butter Paw Print Cookies an outstanding and memorable gift. They are perfect for pet lovers, veterinarians, adoption events, or themed parties. Packaging a dozen of these cookies in a cellophane bag tied with a ribbon transforms them into a thoughtful, handmade present. They also stand out beautifully on a dessert platter, proving that creativity doesn’t have to mean complexity.
Mastering the Immediate Chocolate Chip Technique
One of the most valuable techniques you will learn here is the immediate application of chocolate chips. Unlike many cookies where chips are folded into the dough, here they are pressed in post-bake. This is a critical skill for any baker looking to decorate with chocolate. It requires speed and confidence, as the cookies must still be hot and malleable. This ensures the chocolate melts slightly into the surface, bonding securely without sinking to the bottom. Mastering this step will elevate all your future chocolate chip cookie projects.
If you enjoy simple recipes that yield impressive results, much like a delicious homemade empanada, then embracing the Peanut Butter Paw Print Cookies is a logical next step. They offer high reward for relatively low effort, delivering flavor, texture, and visual charm simultaneously.
Furthermore, these cookies are incredibly versatile. While the primary design is the paw print, you can adapt the chocolate placement for different looks, or even use white chocolate chips for a variation. They store well, freeze well as dough balls, and thaw perfectly, making them excellent for meal prepping desserts. Prepare a large batch of the cookie dough ahead of time, freeze the sugared balls, and you can bake off a fresh batch of warm, chewy peanut butter paw print cookies anytime you need a quick sweet fix.
Ingredients and Essential Tools for Peanut Butter Paw Print Cookies
Success in baking is built on precise measurements and quality ingredients. To create the chewiest, most flavorful Peanut Butter Paw Print Cookies, adhere strictly to these quantities and use the recommended tools. This section details why each item is essential to the final product and provides valuable tips on measuring techniques.
The Necessary Ingredients (Precision is Key)
We are aiming for about 36 cookies, so accurate measurement of the following ingredients is crucial. For best results, ensure your dairy products (butter and egg) are at room temperature, as this promotes smooth emulsification, leading to a lighter, fluffier dough.
- 1 ¾ cups All-Purpose Flour: The structural backbone of the cookie. Use the spoon-and-level method: spoon the flour into your measuring cup and level off the excess with a straight edge. Never scoop directly from the bag, as this compacts the flour, resulting in a dense, dry cookie.
- 1 teaspoon Baking Soda: This is the primary leavening agent. It reacts with the acidic brown sugar and moisture to create carbon dioxide gas, which causes the cookies to rise and spread slightly, achieving that classic chewy texture.
- ½ teaspoon Salt: Essential for balancing the sweetness and intensifying the peanut butter flavor. Do not skip this!
- ½ cup (1 stick) Unsalted Butter, softened: Must be truly softened not melted. It should yield easily when pressed but still hold its shape. Room-temperature butter is necessary for proper creaming with the sugars and peanut butter.
- ½ cup Creamy Peanut Butter: As discussed, use conventional, oil-stabilized creamy peanut butter for consistency. The fat content here dictates the richness and moisture of the final Peanut Butter Paw Print Cookies.
- ½ cup Granulated Sugar, plus extra for rolling: Provides sweetness, aids in spreading, and creates a beautifully crisp, sparkling exterior when rolled before baking.
- ½ cup Packed Light Brown Sugar: Crucial for chewiness and depth of flavor due to its molasses content. Ensure it is firmly packed into the measuring cup.
- 1 large Egg: Acts as a binder and adds richness. Ensure it is at room temperature for better incorporation into the creamed mixture.
- 1 teaspoon Vanilla Extract: A flavor enhancer that complements both the peanut butter and chocolate. Use pure vanilla extract for the best aroma and taste.
- 36 Standard Semi-Sweet Chocolate Chips (for the main pad): Used immediately after baking. Standard size works best for the central “pad.”
- 108 Mini Semi-Sweet Chocolate Chips (for the toes): The smaller size is necessary to accurately represent the tiny toe pads and ensures they adhere without cracking the delicate surface of the hot cookie.
Understanding the Role of Sugars in Peanut Butter Paw Print Cookies
The success of the texture profile in these Peanut Butter Paw Print Cookies hinges on the equal ratio of brown sugar to granulated sugar (1:1). If you increase the granulated sugar, your cookies will spread more and become crisper. If you increase the brown sugar, they will be extremely moist, potentially thicker, and less likely to set perfectly at the edges. Stick to the ½ cup of each for the optimal chewy-yet-crisp result.
The extra granulated sugar for rolling is also non-negotiable. This sugar bath helps keep the dough from sticking to your hands, creates a beautiful crystalline crust, and contributes to the defined perimeter of the cookie, enhancing the visual distinction once the paw print is added.
Recommended Tools and Utensils
Having the right equipment streamlines the baking process, especially when timing is critical (like adding the chocolate chips). Investing in these tools ensures consistent, perfect Peanut Butter Paw Print Cookies every time.
Mixing and Measuring
- Stand Mixer with Paddle Attachment (or Hand Mixer): While you can mix this dough by hand, a mixer is highly recommended for achieving the crucial “light and fluffy” creaming stage (Step 3). The paddle attachment ensures proper aeration.
- Medium Bowl: For whisking the dry ingredients. This step ensures the leavening agent (baking soda) and salt are evenly distributed throughout the flour mixture.
- Rubber Spatula: Essential for scraping down the sides of the mixing bowl, ensuring all ingredients are fully incorporated a vital step often missed!
- Measuring Cups and Spoons: Use both dry and liquid measuring cups for accuracy.
Baking and Shaping
- Two Large Baking Sheets: Using two sheets prevents overcrowding and ensures even heat circulation.
- Parchment Paper or Silicone Baking Mats: Absolutely crucial for preventing sticking, promoting even baking, and making cleanup a breeze. They also help the bottoms of the Peanut Butter Paw Print Cookies brown lightly without scorching.
- Standard Tablespoon or 1.5-inch Small Cookie Scoop: A scoop is the best way to guarantee uniform size (about 1.5 inches in diameter). Uniform cookies bake evenly, ensuring that when the timer goes off, all 36 cookies are perfectly ready for the paw print stage.
- Wire Cooling Rack: Necessary for the final cooling stage, allowing air to circulate around the cookies to prevent the bottoms from steaming and becoming soggy.
- Shallow Dish: For holding the extra granulated sugar used for rolling the dough balls.
Remember, preparing your mise en place having all ingredients measured and tools ready before starting is the foundation for baking success. Once the cookies come out of the oven, you need to be ready to act quickly!
Detailed Recipe Steps: Crafting Perfect Peanut Butter Paw Print Cookies
This recipe is straightforward, but the timing of the last few steps is paramount to the cute paw print result. Follow these instructions closely for the best results, paying special attention to the mixing times and post-bake decoration.
Phase 1: Preparation and Dry Ingredients
- Preheat and Prep: Preheat your oven to a precise 350°F (175°C). Temperature control is critical; if the oven is too hot, the cookies will brown too quickly before the center cooks. Line two large baking sheets with parchment paper or silicone baking mats. This step ensures non-stick perfection.
- Combine Dry Ingredients: In your medium bowl, whisk together the flour, baking soda, and salt. Whisk thoroughly for about 30 seconds. Setting this aside prevents you from rushing later and ensures the leavening is well distributed.
Phase 2: Creaming and Dough Mixing
- Cream Fats and Sugars: This is perhaps the most important mixing step. In the bowl of a stand mixer (or using a hand mixer), cream together the softened butter, creamy peanut butter, granulated sugar, and brown sugar. Beat on medium-high speed until the mixture is visibly light and fluffy. This typically takes 3 to 4 minutes. You are incorporating air here, which gives the Peanut Butter Paw Print Cookies their structure and airy texture. Scrape down the sides of the bowl frequently to ensure everything is evenly combined.
- Add Egg and Vanilla: Reduce the speed to medium. Beat in the large, room-temperature egg until it is just combined. Then, stir in the vanilla extract. Overmixing after the egg is added can develop the gluten too much, leading to tough cookies.
- Mix Dough: Gradually add the dry ingredient mixture (flour, salt, soda) to the wet ingredients. Mix on the lowest speed necessary until the dough comes together. Stop mixing immediately once no streaks of flour remain. A soft dough is desired. If you overmix now, your Peanut Butter Paw Print Cookies will be tough and dense.
Practical Tip: If your kitchen is very warm, the dough might be too soft to handle. If necessary, cover the bowl and chill the dough for 15-20 minutes. Do not chill for too long, or the dough will be too firm to roll easily.
Phase 3: Shaping and Baking
- Roll the Dough: Pour a small amount of the extra granulated sugar into a shallow dish for rolling. Using your small cookie scoop (or a standard tablespoon), scoop out portions of dough, about 1.5 inches in diameter. Roll each portion into a smooth, uniform ball.
- Sugar Coat and Place: Lightly roll each dough ball in the extra granulated sugar, ensuring the surface is fully coated. This gives the cookies a beautiful sparkle and crunch. Place the dough balls onto the prepared baking sheets, ensuring they are spaced approximately 2 inches apart to allow for proper spreading.
- Bake: Bake the Peanut Butter Paw Print Cookies for 10 to 12 minutes. The exact time depends on your oven. Look for visual cues: the edges should be set and lightly golden brown, but the center must still look slightly soft and puffy. A slightly underbaked center ensures that wonderful chewy texture once cooled.
Want more baking inspiration? Check out my Pinterest board for daily recipes and tips: Noelia’s Recipe Board on Pinterest.
Phase 4: The Paw Print Transformation (Act Fast!)
- Create the Paw Prints (Immediate Action): This step is time-sensitive! As soon as the cookies come out of the oven, while they are still piping hot and pliable, gently press one standard semi-sweet chocolate chip into the center of each cookie. This forms the main pad of the paw. Press just hard enough so that the chip adheres and melts slightly into the surface.
- Add the Toes: Immediately follow this by pressing three mini semi-sweet chocolate chips above the standard chip. These form the smaller toe pads. Arrange them in a slight arc, ensuring they are gently pressed into the dough. If you wait too long (even 60 seconds), the cookies will set, and the chips will crack the surface instead of melding into it.
- Cool: Allow the decorated Peanut Butter Paw Print Cookies to cool completely on the baking sheet for 5 minutes before attempting to move them. This cooling time on the sheet is vital as it allows the still-hot center to finish cooking, helps the structure set, and, most importantly, allows the newly melted chocolate paw prints to adhere firmly to the dough.
- Transfer and Finish: After the initial 5 minutes, carefully transfer the cookies to a wire rack to finish cooling completely. This ensures the bottoms do not become soggy.
- Serve: Once fully cooled, your adorable and delicious Peanut Butter Paw Print Cookies are ready to be shared and devoured!
Tips, Troubleshooting, and Delicious Variations
Even the simplest recipes can benefit from expert advice. Here are some essential tips to guarantee success with your Peanut Butter Paw Print Cookies, along with variations for different dietary needs and flavor preferences.
Troubleshooting Common Cookie Issues
My cookies spread too much:
- Check your butter temperature: If the butter was too soft or partially melted, the cookie will collapse and spread excessively. It should be pliable, not greasy.
- Refrigerate the dough: If your kitchen is warm or the dough feels excessively sticky after mixing, chill the rolled and sugared balls for 15 minutes before baking.
- Measure your flour correctly: Too little flour results in a wet dough that spreads rapidly. Always use the spoon-and-level method.
My cookies are dry and crumbly:
- You overmixed the dough: Overmixing, especially after the flour is added, develops gluten, leading to a tough, dry texture. Mix only until the flour disappears.
- You overbaked them: If the cookies are fully brown across the center, they are likely overbaked. Remember, they should look slightly soft in the middle when they come out of the oven.
The chocolate chips aren’t sticking:
You waited too long! The window for placing the chips is extremely short seconds matter. Have your chips pre-counted or in a bowl right next to the oven so you can act immediately upon removal. If the chips seem to shatter the surface, the cookies have already set too much.
Flavor and Ingredient Variations for Peanut Butter Paw Print Cookies
While the classic recipe is divine, you can easily adapt these Peanut Butter Paw Print Cookies to suit various tastes or dietary requirements.
Gluten-Free Variation
Swap the all-purpose flour for a high-quality 1:1 gluten-free baking blend that contains xanthan gum. Ensure the rest of the ingredients (especially the vanilla extract) are certified gluten-free. GF cookies sometimes need an extra minute of baking time to set properly, so watch the edges closely.
Vegan Adaptation
Substitute the dairy butter with a high-quality vegan butter stick (avoid spreads, as they contain too much water). Replace the large egg with a flax egg (1 tablespoon ground flaxseed mixed with 3 tablespoons water, rested for 5 minutes). Ensure your chocolate chips are certified dairy-free, as many semi-sweet chips contain milk fat.
Nut Butter Alternatives
While this recipe shines with peanut butter, you can use other creamy nut butters like almond butter or cashew butter. Be aware that the texture may vary slightly, especially if using a very oily, natural butter. For almond butter cookies, consider slightly reducing the baking soda by ¼ teaspoon if the dough seems oilier than usual.
Chocolate Alternatives
Use different types of chips for a twist:
- White Chocolate Paw Prints: Offers a stark, high-contrast look that is especially striking.
- Butterscotch Chips: Adds a rich, caramelized flavor dimension to your Peanut Butter Paw Print Cookies.
- Caramel or Peanut Butter Chips: Use these small chips for the ‘toes’ to intensify the buttery or peanut flavor.
Making Dough Ahead of Time
You can prepare the dough in advance! Mix the dough completely, roll it into balls, coat them in sugar, and then place them on a parchment-lined tray. Flash freeze them until solid (about 1 hour), then transfer the frozen dough balls to a zip-top freezer bag. When ready to bake, place the frozen balls on the sheet and bake immediately, adding 2-4 minutes to the total baking time. This allows you to have warm Peanut Butter Paw Print Cookies ready in minutes!
Nutritional Values and Benefits of Peanut Butter Paw Print Cookies
While cookies are undeniably a treat and should be enjoyed in moderation, it’s worth understanding the components that make up these delicious Peanut Butter Paw Print Cookies. Nutritional analysis provides a general overview of the energy and macronutrients provided by this recipe (note: precise calculations vary based on ingredient brand and scoop size).
A typical homemade peanut butter cookie contains a significant blend of carbohydrates, fats, and protein, offering a satisfying energy boost.
General Nutritional Breakdown (Per Cookie, Estimated for 36 servings):
| Nutrient | Estimated Value |
|---|---|
| Calories | 120–150 kcal |
| Total Fat | 6–8 g |
| Saturated Fat | 3–4 g |
| Cholesterol | 15–20 mg |
| Sodium | 70–90 mg |
| Total Carbohydrates | 14–18 g |
| Dietary Fiber | <1 g |
| Total Sugars | 9–12 g |
| Protein | 3–4 g |
Benefits of Key Ingredients
Peanut Butter (The Star)
Peanut butter contributes crucial nutritional value to the Peanut Butter Paw Print Cookies. Peanuts are rich in plant-based protein, which helps keep you feeling satisfied. They are also packed with healthy monounsaturated and polyunsaturated fats (the good fats), which support heart health. Furthermore, peanuts are a good source of Niacin (Vitamin B3), which is important for energy production, and Vitamin E, an antioxidant.
Healthy Fat Content: Although we use conventional peanut butter for texture in baking, the inherent healthy fats from the peanuts contribute significant energy density, making these cookies quite filling.
Eggs
The large egg in the recipe adds a small boost of high-quality protein and provides essential micronutrients like Choline, which is vital for brain and nerve function. In baking, eggs also help emulsify the fats and liquids, contributing to a smooth, uniform crumb structure.
Chocolate (The Treat)
Semi-sweet chocolate chips, while primarily a source of sugar and fat, contain cocoa solids. Cocoa is known to be rich in antioxidants, particularly flavonoids, which have been linked to potential cardiovascular benefits. Eating your Peanut Butter Paw Print Cookies provides a small dose of this delightful ingredient!
Ultimately, these cookies are a dessert meant for enjoyment. Baking your own treats, like these adorable Peanut Butter Paw Print Cookies, allows you to control the quality of ingredients, ensuring you use real butter, pure vanilla, and fresh eggs, offering a superior experience compared to most mass-produced store-bought alternatives. Enjoy the flavor and the fun!
FAQs About Peanut Butter Paw Print Cookies
Frequently Asked Questions About Baking Peanut Butter Paw Print Cookies
Can I use natural peanut butter for the Peanut Butter Paw Print Cookies recipe?
It is highly recommended that you stick to conventional, stabilized creamy peanut butter (like Skippy or Jif) for this recipe. Natural peanut butter tends to be too oily and separated, which can result in a dough that is fragile, spreads excessively, and yields a dry, crumbly cookie texture. Conventional peanut butter ensures the proper fat-to-solid ratio needed for chewy perfection.
How do I prevent my Peanut Butter Paw Print Cookies from spreading too much?
To control spreading, ensure your butter is only softened, not greasy or melted, before creaming. Also, accurately measure your flour using the spoon-and-level method. If your kitchen is hot, chill the rolled dough balls for 10-15 minutes before baking. Baking on parchment paper or silicone mats also helps regulate spreading compared to baking directly on greased metal.
Why do I have to add the chocolate chips immediately after the cookies come out of the oven?
Adding the chocolate chips immediately is crucial because the cookie surface must be hot and pliable. This allows the chocolate to slightly melt into the dough, bonding permanently and creating that defined paw print look. If you wait even one minute, the cookies begin to set, and pressing the chips in will cause the surface to crack or crumble, preventing the smooth adherence needed for the paw design.
What is the best way to store these adorable Peanut Butter Paw Print Cookies?
Once the cookies are completely cooled, store your Peanut Butter Paw Print Cookies in an airtight container at room temperature. They will retain their freshness and soft texture for 3 to 5 days. For longer storage, the baked cookies can be frozen for up to 3 months; thaw them at room temperature before serving.
Can I use different sized chocolate chips if I don’t have mini ones?
While the standard chip works well for the main paw pad, the mini chips are essential for creating the delicate toe pads. If you only have standard chips, you may need to slice them carefully into smaller pieces to achieve the correct scale and arc for the toes. Too large of a chip for the toe pads will overwhelm the cookie design.
Conclusion: The Ultimate Comfort of Peanut Butter Paw Print Cookies
The journey to baking the perfect batch of Peanut Butter Paw Print Cookies is a simple, joyous one, culminating in a dessert that is as charming to look at as it is rewarding to eat. We have covered the critical steps: mastering the creaming process for that ultimate chewy texture, understanding the role of combined sugars, and, of course, executing the all-important, time-sensitive paw print technique immediately after baking.
These cookies offer the perfect balance of salty, sweet, and nutty flavors, encapsulated in a soft, satisfying bite. Whether you are baking for a school event, looking for a cozy Sunday afternoon project, or simply need a dose of comforting nostalgia, this recipe for Peanut Butter Paw Print Cookies guarantees success.
Remember that baking should be fun. Don’t be afraid to experiment with the flavor variations suggested perhaps adding a sprinkle of sea salt before the chips set or trying the vegan alternative. The fundamental technique remains robust and reliable. Once you experience the delight of watching that melted chocolate settle into the warm peanut butter dough, forming the cutest little paw prints, you’ll understand why these cookies are truly special.
We encourage you to roll up your sleeves, grab your stand mixer, and create a batch today. Don’t forget to share your beautifully decorated Peanut Butter Paw Print Cookies with friends and family! If you enjoyed this recipe, please leave a comment below and share your photos. For more delicious baking ideas and global cuisine inspiration, be sure to explore more recipes here on the blog, such as the fantastic main recipe page!
Peanut Butter Paw Print Cookies
Ingredients
Equipment
Method
- Preheat your oven to 350°F (175°C). Line two large baking sheets with parchment paper or silicone baking mats.
- In a medium bowl, whisk together the flour, baking soda, and salt. Set the dry mixture aside.
- In the bowl of a stand mixer fitted with the paddle attachment, cream together the softened butter, peanut butter, granulated sugar, and brown sugar until the mixture is light and fluffy, scraping down the sides of the bowl as needed (about 3 to 4 minutes).
- Beat in the large egg until just combined, then stir in the vanilla extract.
- Gradually add the dry ingredient mixture to the wet ingredients, mixing on low speed until the dough comes together and no streaks of flour remain. Be careful not to overmix the dough.
- Place a small amount of extra granulated sugar in a shallow dish for rolling. Scoop the dough using a small cookie scoop (about 1.5 inches in diameter). Roll each portion into a smooth ball.
- Lightly roll each dough ball in the extra granulated sugar to coat, then place the dough balls onto the prepared baking sheets, spacing them approximately 2 inches apart.
- Bake for 10 to 12 minutes, or until the edges are set and lightly golden brown, but the center still looks slightly soft.
- Create the Paw Prints (Immediate Action): As soon as the cookies come out of the oven, while they are still hot, gently press one standard semi-sweet chocolate chip into the center of each cookie to form the main pad of the paw.
- Add the Toes: Immediately follow by pressing three mini semi-sweet chocolate chips above the standard chip to form the smaller toe pads. Arrange them in a slight arc, pressing gently so they adhere firmly.
- Cool: Allow the cookies to cool completely on the baking sheet for 5 minutes before transferring them to a wire rack to finish cooling. Serve once the chocolate chips have fully set.


