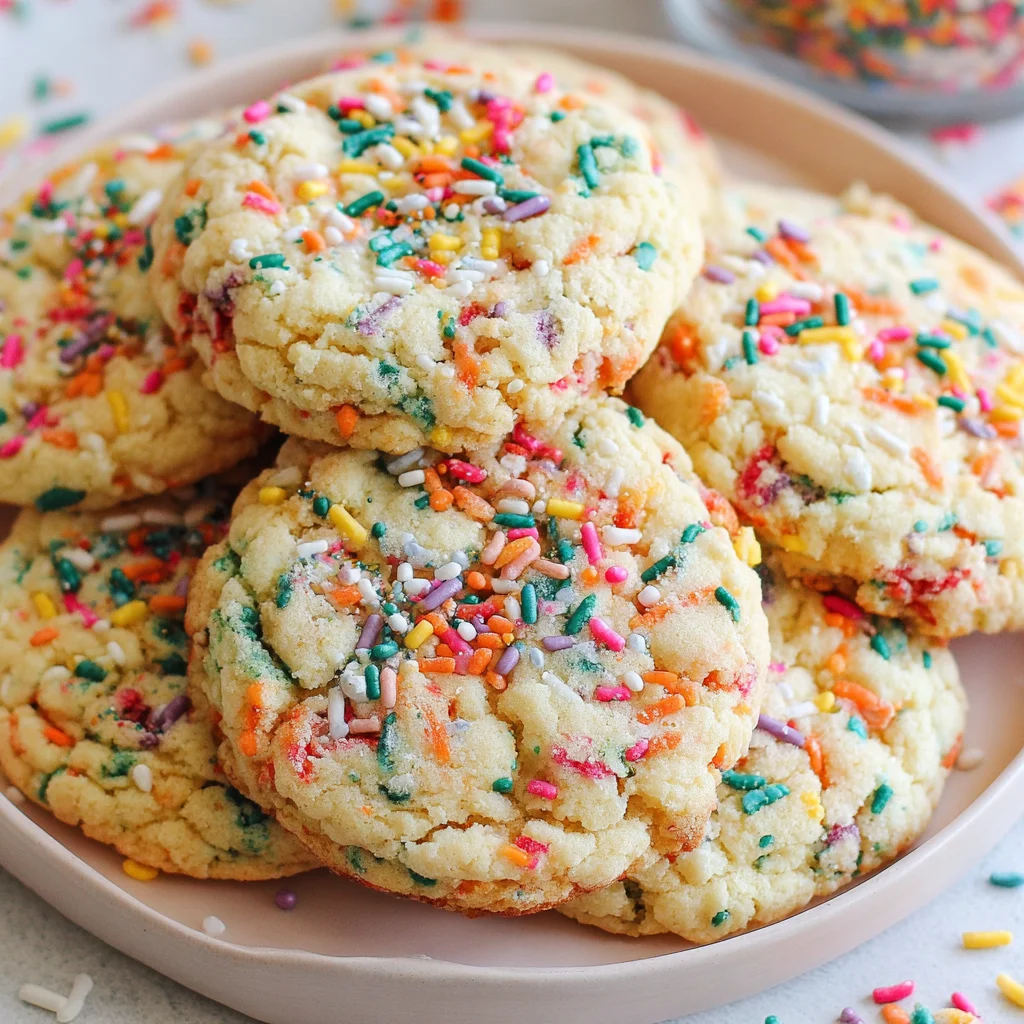
Welcome to the ultimate guide for baking the most perfect, soft, and chewy Funfetti Cookies you will ever taste. If the mere mention of rainbow sprinkles transports you back to childhood birthday parties, then this recipe is your golden ticket to nostalgia. Forget the dry, cakey boxed mix cookies we are making bakery-style, thick, buttery, and supremely colorful treats from scratch. These aren’t just cookies; they are edible celebrations, guaranteed to bring a smile to anyone’s face. Our recipe focuses on achieving that quintessential chewy center and slightly crisp edge, perfectly studded with vibrant rainbow jimmies that stay bright and beautiful through the baking process.
Baking homemade Funfetti Cookies is surprisingly straightforward, provided you follow a few critical steps chief among them ensuring your ingredients are at the correct temperature and avoiding the dreaded sin of overmixing. We delve deep into the science behind the creamed butter, the importance of accurate flour measurements, and the secret technique that keeps the sprinkles from bleeding their color into the dough. Get ready to transform simple pantry staples into a batch of joyful, vibrant, and utterly irresistible treats. Whether you’re celebrating a birthday, brightening a Tuesday afternoon, or simply craving that perfect vanilla-butter flavor, this Funfetti Cookies recipe is about to become your new favorite. Let’s sprinkle some magic into your kitchen!
Why You’ll Love This Funfetti Cookies Recipe (More Than Just Sprinkles!)
The appeal of Funfetti Cookies goes far beyond their colorful aesthetics. While the vibrant jimmies certainly catch the eye, the true magic lies in the texture and flavor profile we achieve using this specific method. This recipe consistently delivers results that surpass store-bought or even many bakery versions, making it a favorite among seasoned bakers and beginners alike. Here are the core reasons why these homemade chewy Funfetti Cookies will steal your heart:
Unbeatable Texture: Chewy Centers and Crisp Edges
Unlike cakey cookies, which rely on more moisture and leavening, our recipe is designed to produce a cookie that is thick, chewy, and slightly underbaked in the very center. We achieve this texture through a precise ratio of flour to fat and the crucial step of incorporating room-temperature ingredients. When butter and sugar are creamed properly (a step often rushed), they create tiny air pockets that provide lift without becoming airy or spongy. This foundation ensures the cookie maintains its structure while developing those sought-after wrinkles and chewiness as it cools. The edges bake up just golden enough to offer a satisfying, slight crispness, providing the perfect textural contrast to the soft interior. Achieving the perfect texture is key to any memorable baked good, whether you are mastering these cookies or attempting the ideal crumb in something more savory like a classic Spanish Empanada.
Intense Vanilla Flavor Profile
Many Funfetti recipes overlook the importance of flavor beyond the sweetness. These Funfetti Cookies are built on a robust vanilla base. By using a full tablespoon of high-quality pure vanilla extract, the vanilla notes are amplified, complementing the richness of the butter and the simplicity of the sugar. This isn’t a cookie that tastes merely sweet; it offers a sophisticated, creamy, almost buttery vanilla profile that truly mimics the nostalgic flavor of classic birthday cake batter. Quality ingredients matter here; swapping pure extract for imitation vanilla will noticeably diminish the complexity and depth of flavor.
A Guaranteed Mood Booster
Let’s face it: rainbow sprinkles instantly equate to happiness. Baking these Funfetti Cookies is an experience that elevates the mood, and sharing them creates instant joy. They are the perfect treat for any low-effort celebration. The visual vibrancy makes them inherently appealing, especially to children and those young at heart. Furthermore, because we use specific ‘Jimmies’ type sprinkles, which are generally waxy and hold their color better, the final baked product is stunningly bright, without the muddy, graying effect that can happen when inferior sprinkles bleed color into the dough.
Scalable and Freezable
This recipe yields a substantial batch of cookies, which makes it excellent for parties, gatherings, or stocking your freezer. The dough is incredibly freezer-friendly. You can scoop the dough balls, freeze them on a tray, and then transfer them to an airtight container. This means you are always just 15 minutes away from freshly baked chewy Funfetti Cookies, minimizing effort while maximizing satisfaction. This convenience makes these cookies a powerful staple in any baker’s repertoire, ready to be deployed for impromptu cravings or unexpected guests.
Why You Should Try This Recipe Now: The Secret to No-Fuss Fun
In a world of complicated desserts, the beauty of the homemade Funfetti Cookies lies in their accessible simplicity and huge flavor payoff. You don’t need specialized techniques or exotic ingredients to create something truly spectacular. This recipe is designed to be foolproof, reliable, and above all, fun! If you’ve been hesitant to bake from scratch, let this be the recipe that builds your confidence. It follows fundamental baking rules (creaming, mixing dry, folding) that are applicable to almost all drop cookies.
Perfect for Every Occasion
While often associated with birthdays, Funfetti Cookies transcend specific holidays. They are adaptable comfort food. Hosting a casual gathering? A plate of these cookies disappears instantly. Need a comforting treat on a cold afternoon, perhaps paired with a warm beverage, much like the perfect pairing of Churros con Chocolate? These cookies fit the bill. Their inherent celebratory nature makes them a wonderful item to package and gift. The vibrant colors make them seasonally flexible, standing out brightly whether it’s summer or the middle of winter.
Mastering the Fundamentals of Baking
Successfully executing this Funfetti Cookies recipe requires mastery of the creaming method the foundational technique for many classic American baked goods. By focusing on beating the butter and sugar until truly light and fluffy, you learn to incorporate air mechanically, which contributes significantly to the cookie’s final texture and lift. This practice translates directly into improved skills across all your baking endeavors, from cakes to other drop cookies. It is a fantastic entry point for new bakers who want to understand the chemistry of simple ingredients working together.
The Importance of Quality Ingredients
This recipe emphasizes ingredient quality, which is paramount in simple recipes where flavors have nowhere to hide. Using good unsalted butter (ideally 82% fat content or higher) and pure vanilla extract elevates the final taste dramatically. When you invest in these core components, the resulting Funfetti Cookies taste richer, cleaner, and undeniably homemade. This commitment to quality transforms the cookie from merely sweet to truly gourmet, demonstrating that a focus on sourcing the best ingredients provides the ultimate flavor advantage.
Furthermore, the minor step of chilling the dough (though optional, highly recommended) ensures the cookies bake up thicker and chewyer, preventing excessive spreading. This small act of patience yields significant rewards in texture, creating a robust, satisfying cookie bite. This recipe isn’t just a guide; it’s an invitation to elevate a classic childhood favorite into a sophisticated, highly satisfying home-baked delight that is guaranteed to impress.
Ingredients and Essential Tools for Funfetti Cookies Success
The secret to these fantastic chewy Funfetti Cookies lies in balancing the simple ratios of flour, sugar, and fat, coupled with the proper handling of the rainbow sprinkles. Below is a detailed breakdown of the ingredients, their function, and the necessary equipment to ensure your baking session is smooth and successful. Remember, accurate measurement and temperature control are the pillars of great baking.
Ingredient Breakdown for the Best Funfetti Cookies
Here is what you need to create this masterpiece, with notes on why each ingredient is crucial:
| Item | Quantity | Notes on Function and Accuracy |
|---|---|---|
| Unsalted Butter, softened | 1 cup (2 sticks) | Must be truly softened to room temperature (about 68-70°F). Cold butter won’t cream properly, and melted butter will result in greasy, flat cookies. Butter provides flavor, tenderness, and structure. |
| Granulated White Sugar | 1 ½ cups | Provides sweetness, contributes to the spread, and, most critically, creates aeration when creamed with the butter. |
| Large Eggs | 2 | Acts as a binder, adds richness, and contributes structure. Room temperature eggs emulsify better into the creamed butter/sugar mixture, resulting in a smoother batter. |
| Pure Vanilla Extract | 1 Tablespoon | This high quantity is intentional. Vanilla is the primary flavor carrier, making the cookie taste like classic cake batter. Use pure extract, not imitation. |
| All-Purpose Flour | 3 cups | The structural backbone. Crucial Tip: Always measure flour accurately by spooning it into a measuring cup and leveling it off. Scooping the cup directly into the bag compacts the flour, adding too much weight, leading to dry, dense cookies. |
| Baking Soda | 1 teaspoon | The primary leavening agent. It reacts with the slight acidity of the brown sugar (if added in variations, though not here) and the fats to create lift and aid in browning, giving the cookies a beautiful lift. |
| Salt | ½ teaspoon | Fine grain. Balances the sweetness and enhances all the other flavors (especially the vanilla and butter). Do not skip this! |
| Rainbow Sprinkles (Jimmies) | ½ cup | The fun factor! Use Jimmies (rod-shaped). Avoid nonpareils (tiny spheres) as they are prone to bleeding their color into the dough during mixing and baking, turning your dough grey or muddy. |
This recipe hinges on the perfect balance of ingredients. For instance, using 1.5 cups of sugar, combined with the creaming process, ensures the cookies spread just the right amount, resulting in that beautiful crinkled edge and gooey center. When discussing fundamental ingredients, we often link back to the core principles of quality baking, just as we value the perfect consistency of ingredients in savory dishes like a great Spanish meal preparation.
The Critical Role of Room Temperature Ingredients
If you take one piece of advice from this entire article, let it be this: Use room temperature ingredients.
- Butter: Softened butter (not melted!) holds air effectively during the creaming process. If the butter is cold, it won’t trap air, resulting in a dense cookie.
- Eggs: Room temperature eggs mix smoothly with the creamed butter and sugar, creating a homogeneous, stable emulsion. Cold eggs can cause the mixture to curdle or separate, yielding a less predictable final product. If your eggs are cold, submerge them in warm (not hot) water for 5–10 minutes before use.
Essential Baking Gear for Perfect Funfetti Cookies
Having the right tools streamlines the process and ensures consistent results:
- Stand Mixer or Hand Mixer: While these cookies can be made by hand, the creaming process (Step 2) requires high speed and duration, making an electric mixer highly recommended for achieving the necessary fluffiness. Use the paddle attachment on a stand mixer.
- Rubber Spatula: Essential for scraping down the bowl during mixing and, most importantly, for gently folding in the sprinkles without crushing them or overworking the dough.
- Measuring Cups and Spoons: Accuracy is key. Use dry measuring cups for flour and wet measuring cups (with a spout) for liquids like vanilla.
- Baking Sheets: Two large, light-colored baking sheets are ideal. Light-colored sheets prevent the bottoms of the cookies from browning too quickly.
- Parchment Paper or Silicone Mats: Non-negotiable! This prevents sticking, ensures even baking, and makes cleanup effortless.
- Cookie Scoop (1.5 to 2 Tablespoons): Using a scoop guarantees uniform size, leading to consistent baking times across the whole batch. This tool is the secret weapon for professional-looking, round Funfetti Cookies.
Step-by-Step Guide: Crafting the Perfect Chewy Funfetti Cookies
Follow these detailed steps carefully, paying close attention to mixing times and temperatures, to achieve the ultimate chewy, vibrant Funfetti Cookies.
Step 1: Preparation is Key
- Preheat the Oven: Preheat your oven to 350°F (175°C). Ovens fluctuate, so if you have an oven thermometer, use it to ensure precision.
- Prep Your Pans: Line two large baking sheets with parchment paper or silicone baking mats. This prevents sticking and promotes even heat distribution.
- Check Ingredients: Confirm the butter and eggs are truly at room temperature. This is essential for the creaming process in Step 2.
Step 2: The Creaming Method: Building Air and Texture
- Beat the Butter: In the bowl of your stand mixer (or a large bowl with a hand mixer), beat the softened butter until it is light and creamy. Start on low speed, then increase to medium, beating for about 1 minute.
- Add the Sugar: Introduce the 1 ½ cups of granulated sugar. Now, increase the speed to medium-high. You must beat this mixture for 3 to 4 full minutes. This duration is critical. The mixture will transition from dense yellow to a much lighter, paler yellow, almost white, and significantly fluffier consistency. This is the stage where air is incorporated, which gives the cookie its desirable lift and tenderness.
- Incorporate Wet Ingredients: Scrape down the sides and bottom of the bowl thoroughly. Add the eggs, one at a time, mixing only until each egg is fully incorporated before adding the next. Overmixing the eggs can destabilize the creamed mixture.
- Add Vanilla: Stir in the generous 1 Tablespoon of pure vanilla extract until fully combined. The mixture should now look smooth and creamy.
Practical Baking Tip: If the butter and sugar mixture looks separated or chunky after adding the eggs, it likely means your ingredients were not at the same temperature. Don’t panic the flour addition in the next step will usually bring it back together, but it stresses the importance of using truly room-temperature ingredients next time.
Step 3: Combine Dry Ingredients and Gentle Mixing
- Whisk the Dry: In a separate medium bowl, whisk together the 3 cups of accurately measured all-purpose flour, 1 teaspoon of baking soda, and ½ teaspoon of salt. Whisking ensures the leavening agent and salt are evenly distributed.
- Mix Wet and Dry: With your mixer running on the lowest speed, gradually add the dry mixture to the wet mixture. Mix only until barely combined. Stop the mixer the moment you see the last streaks of flour disappearing. The dough will look soft and shaggy.
- DO NOT OVERMIX: Overmixing develops the gluten in the flour too much, which results in tough, dense, and cakey cookies instead of soft, chewy ones.
Step 4: The Fun! Folding in the Sprinkles
- Remove from Mixer: Take the bowl off the stand mixer. You want to control the mixing speed now.
- Fold in Sprinkles: Add the ½ cup of rainbow sprinkles (Jimmies). Using a rubber spatula, gently fold the sprinkles into the dough using an under-and-over motion. Only mix until the sprinkles are evenly distributed.
- Prevent Bleeding: Be quick and gentle during this stage. Excessive contact with the wet dough can cause the color of the jimmies to start leaching out, potentially turning your beautiful cookie dough shades of gray or brown.
Step 5: Scoop and Chill (Optional but Recommended)
- Chill (The Secret to Thickness): For significantly thicker, less-spreading Funfetti Cookies, cover the dough and chill in the refrigerator for 30 minutes. Chilling solidifies the butter, helping the cookies hold their shape better in the oven. If time is short, you may skip this, but expect flatter cookies.
- Scoop and Roll: Use a medium cookie scoop (1.5 to 2 tablespoons) to portion the dough. Roll the portions into smooth, uniform balls.
- Space Them Out: Place the dough balls two inches apart on the prepared baking sheets.
Step 6 and 7: Bake and Cool
- Bake: Bake only one sheet at a time in the preheated 350°F (175°C) oven for 9 to 12 minutes. Rotation is unnecessary if your oven heats evenly.
- Check for Doneness: The key to chewiness is slightly underbaking. The cookies are done when the edges look set and lightly golden brown, but the centers still look pale, puffy, and slightly underbaked or shiny.
- Cool on Tray: Remove the baking sheet from the oven and allow the cookies to cool completely on the tray for 5 minutes. This residual heat finishes the cooking process gently and allows the soft centers to set without drying out.
- Transfer: Carefully transfer the partially cooled cookies to a wire rack to cool completely.
- Store: Once fully cooled, store your chewy Funfetti Cookies in an airtight container at room temperature for up to 5 days.
Tips, Troubleshooting, and Delicious Funfetti Cookies Variations
Achieving the perfect Funfetti Cookies is easy, but a few common issues can arise. Understanding how to troubleshoot and how to adapt the recipe ensures consistent success and opens the door to creative variations.
Troubleshooting Common Funfetti Mistakes
Why are my cookies flat and crispy?
Flat cookies usually result from too much spread. This can happen for several reasons: 1) The butter was too soft or partially melted; 2) You skipped chilling the dough; 3) Too much leavening agent (baking soda) was used; or 4) Your flour was not measured correctly (too little flour allows for too much spread). Solution: Ensure ingredients are accurately measured and always aim for the recommended 30-minute chill time.
Why did my sprinkles bleed?
Color bleeding occurs when the water-soluble coloring of the sprinkles is exposed to the moisture in the dough for too long or if the sprinkles are crushed. Solution: Always use Jimmies (rod-shaped) and never nonpareils (tiny round spheres). Most importantly, fold them in gently with a spatula only right before baking, minimizing contact time.
My cookies are too cakey.
Cakey cookies usually stem from overmixing the flour, which develops gluten and incorporates too much air. Solution: Only mix the flour until just combined. Also, ensure you are pulling the cookies out of the oven when the center still looks slightly underbaked.
Storage and Freezing
These chewy Funfetti Cookies store beautifully. Once cooled, keep them in an airtight container at room temperature for up to 5 days. For longer storage, you have two great options:
- Freezing Baked Cookies: Place completely cooled cookies in a freezer bag or airtight container, separated by parchment paper. They will last 2–3 months. Thaw at room temperature.
- Freezing Cookie Dough: Scoop the dough balls as directed in the recipe. Place them on a parchment-lined tray and freeze until solid (about 1 hour). Transfer the frozen dough balls to a heavy-duty freezer bag. Bake directly from frozen, adding 2–3 minutes to the total bake time.
For more visual inspiration on baking techniques and presentations, be sure to check out our collection of delicious desserts on Pinterest.
Delicious Funfetti Cookies Variations
While the classic version is perfect, these Funfetti Cookies adapt well to different dietary needs or flavor boosts:
- Gluten-Free Funfetti Cookies: Replace the all-purpose flour with a high-quality 1:1 gluten-free baking blend (one that contains xanthan gum). Follow the recipe steps exactly.
- Brown Sugar Twist: Replace ½ cup of the granulated white sugar with light brown sugar. This increases moisture and adds a subtle molasses flavor, enhancing the chewiness even further.
- Vegan Funfetti Cookies: Substitute the butter with a high-quality, plant-based butter substitute (like Miyoko’s or Earth Balance sticks). Substitute the two eggs with two flax eggs (2 tbsp ground flaxseed mixed with 6 tbsp water, allowed to sit for 5 minutes). Note that the texture may be slightly denser.
- Chocolate Chip Funfetti: For an extra layer of flavor, fold in ½ cup of white chocolate chips along with the sprinkles in Step 4.
Nutritional Values and the Benefits of Baking
While Funfetti Cookies are definitely a treat, understanding their composition and appreciating the non-caloric benefits of baking is important. This recipe yields approximately 30 medium cookies.
Estimated Nutritional Values (Per Medium Cookie, using standard ingredients)
Please note that these values are estimates and can vary based on the specific brand of ingredients used, especially butter fat content and sprinkle composition. We have estimated these based on the full recipe yield:
- Calories: 180–200 kcal
- Total Fat: 9–11g
- Saturated Fat: 5–7g
- Carbohydrates: 22–25g
- Sugars: 13–15g
- Protein: 2–3g
These Funfetti Cookies are calorie-dense due to the rich concentration of butter and sugar, which is typical for a classic, chewy drop cookie designed for maximum flavor and texture. When integrating treats like this into a balanced diet, moderation is key.
The Therapeutic Benefits of Baking
Beyond the simple nutritional composition, baking provides significant mental and emotional benefits:
- Stress Reduction: The rhythmic actions of mixing, kneading, and scooping are often meditative and calming. Following a recipe provides a positive focus, redirecting mental energy away from stressors.
- Sensory Engagement: Baking engages multiple senses the softness of the butter, the smell of vanilla, the vibrant colors of the sprinkles, and the warmth of the oven. This sensory input is grounding and enjoyable.
- A Sense of Accomplishment: Transforming basic, raw ingredients into a beautiful, delicious final product like these perfect Funfetti Cookies provides a tangible sense of achievement, boosting self-esteem and creativity.
- Nostalgia and Connection: Funfetti is inherently nostalgic, invoking memories of childhood and celebrations. Sharing baked goods is a powerful way to connect with friends and family, fostering warmth and goodwill.
This recipe, focused on quality and precision, ensures that the end result is worthy of the effort, making the entire baking process, from ingredient prep to that first warm bite, a rewarding experience. It’s a reminder that simple pleasures, like a perfect homemade cookie, are often the most satisfying. Just as taking the time to prepare a truly authentic Tortilla Española is a labor of love, so is mastering the art of the perfect cookie.
Frequently Asked Questions (FAQ) about Funfetti Cookies
What is the difference between Funfetti and regular vanilla cookies?
The primary difference is aesthetic and textural. While both start with a vanilla-flavored dough base, Funfetti Cookies incorporate rainbow sprinkles (jimmies) for visual flair, mimicking the flavor and look of classic birthday cake batter. Texturally, this recipe is formulated for maximum chewiness, often being slightly thicker than a standard drop cookie.
Why do I need to use Jimmies and not Nonpareils for Funfetti Cookies?
Nonpareils (the tiny round ball sprinkles) are notorious for bleeding their color into the dough when mixed or baked, especially since they have a higher surface-area-to-volume ratio. Jimmies (rod-shaped sprinkles) have a waxier coating that seals the color better, ensuring your dough remains bright white or pale yellow without turning gray or muddy after baking.
How do I achieve that perfect chewy center in my Funfetti Cookies?
Chewiness is achieved through three key steps: proper creaming (Step 2) for aeration, accurate flour measurement to prevent dryness, and most importantly, slightly underbaking the cookies. You should remove the Funfetti Cookies from the oven when the edges are set and lightly golden, but the center still appears soft and slightly undercooked. Allowing them to cool on the warm tray finishes the baking process.
Can I double this recipe for a large party batch of Funfetti Cookies?
Yes, this recipe doubles exceptionally well. Ensure your stand mixer bowl is large enough to handle the volume of dough. When creaming the butter and sugar, give the mixture a little extra time (up to 5 minutes) to ensure proper aeration since the volume is doubled. Always bake one sheet at a time for even heat distribution.
Conclusion: Your New Favorite Funfetti Cookies Recipe
You now hold the keys to baking the absolute best, chewiest, and most vibrant Funfetti Cookies imaginable. By focusing on the foundational techniques specifically using room-temperature ingredients, mastering the 3-to-4-minute creaming process, accurately measuring the flour, and gently folding in the proper type of sprinkles you ensure a final product that is far superior to any store-bought alternative. These cookies offer the perfect balance of buttery richness, intense vanilla flavor, and that delightful soft chewiness everyone craves.
Baking should be a joyous experience, and the simplicity of this Funfetti Cookies recipe makes it ideal for sharing the love. Whether you are using them to celebrate a milestone, brighten a school lunchbox, or simply treat yourself to a moment of sugary nostalgia, these rainbow-studded treats are a guaranteed hit. Don’t let the simplicity fool you; the precision detailed in these steps is what elevates these from basic sugar cookies to true bakery-quality delights. We encourage you to start your mixer, get those sprinkles ready, and enjoy the delicious results of this classic recipe. Once you try these homemade Funfetti Cookies, you won’t look back!
We love seeing your creations! If you bake these perfect chewy Funfetti Cookies, please share your photos and tell us what you thought in the comments below. Happy baking!
Classic Chewy Funfetti Cookies
Ingredients
Equipment
Method
- Preheat your oven to 350°F (175°C).
- Line two large baking sheets with parchment paper or silicone baking mats. Set aside. Ensure the butter and eggs are at room temperature.
- In the bowl of a stand mixer fitted with the paddle attachment (or using a hand mixer), beat the softened butter until creamy (about 1 minute).
- Add the granulated sugar to the butter. Beat on medium speed for 3 to 4 minutes until the mixture is light, fluffy, and pale yellow. Scrape down the sides of the bowl as needed.
- Beat in the eggs, one at a time, mixing well after each addition. Stir in the vanilla extract until fully combined.
- In a separate medium bowl, whisk together the all-purpose flour, baking soda, and salt.
- With the mixer running on low speed, gradually add the dry ingredients to the wet ingredients. Mix only until just combined. Do not overmix.
- Remove the bowl from the mixer. Gently fold in the ½ cup of rainbow sprinkles using a rubber spatula until they are evenly distributed. Avoid excessive mixing to prevent color bleeding.
- Use a medium cookie scoop (about 1.5 to 2 tablespoons) to portion the dough. Roll the dough into smooth balls and place them two inches apart on the prepared baking sheets. (Optional: Chill the dough for 30 minutes for thicker cookies.)
- Bake one sheet at a time in the preheated 350°F (175°C) oven for 9 to 12 minutes. The edges should be set and lightly golden, but the centers should still look soft.
- Allow the cookies to cool on the baking sheet for 5 minutes before carefully transferring them to a wire rack to cool completely. Repeat with remaining dough.


