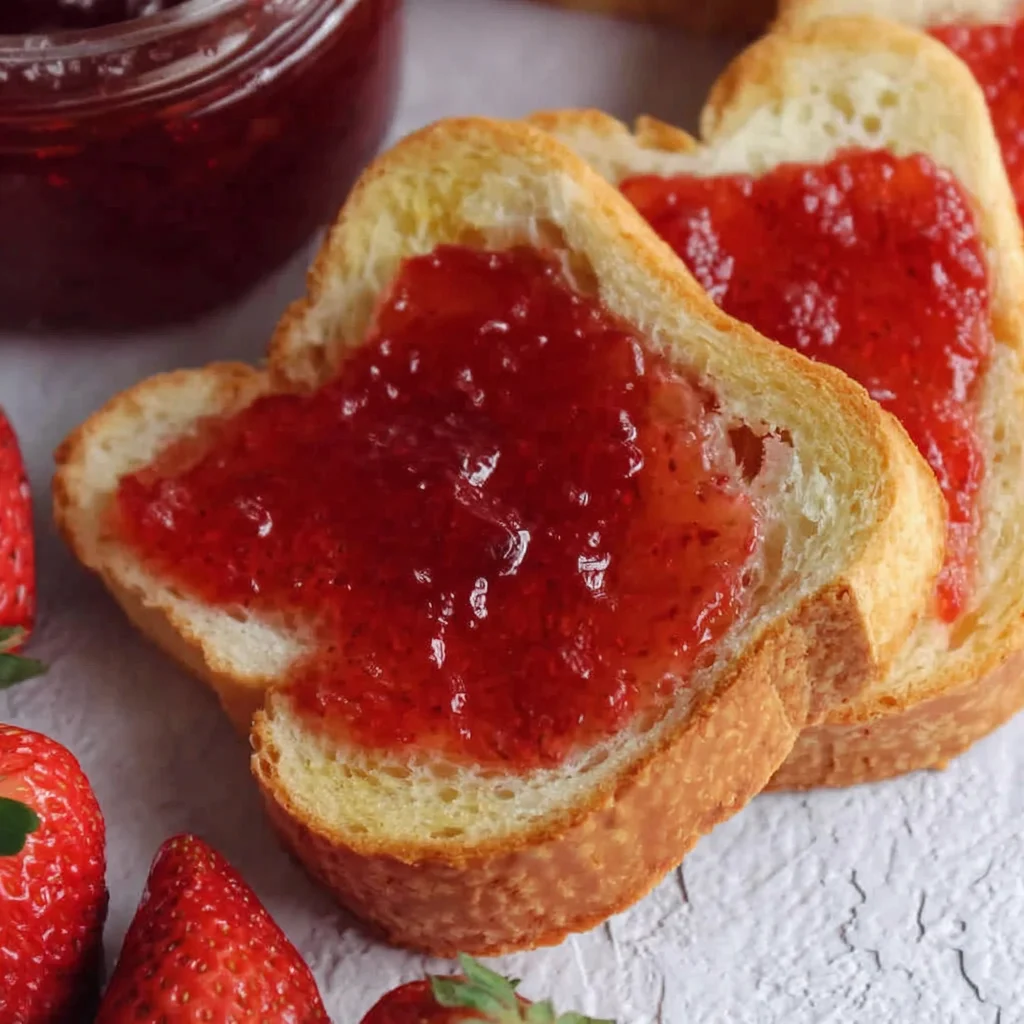
Summer’s bounty of sweet, juicy strawberries is begging to be transformed into something truly special: homemade strawberry jam! This Homemade Strawberry Jam Recipe is not just a recipe; it’s a journey into the heart of summer, capturing the vibrant taste and color of freshly picked strawberries in a jar. Forget the store-bought versions laden with preservatives and artificial ingredients. This recipe allows you to control every aspect, ensuring a jam that’s bursting with natural sweetness and the fragrant aroma of ripe strawberries. Imagine spreading this homemade goodness on warm toast, biscuits, or even using it as a delightful filling for your favorite pastries. The anticipation alone is enough to make your mouth water! This isn’t just about making jam; it’s about creating a delicious memory, a taste of summer that you can savor throughout the year. Let’s embark on this flavorful adventure together and learn how to make the most delicious Homemade Strawberry Jam Recipe you’ve ever tasted.
Why You’ll Love This Homemade Strawberry Jam Recipe
This Homemade Strawberry Jam Recipe is more than just a simple recipe; it’s an experience. There’s something incredibly satisfying about creating something delicious from scratch, especially when the result is as rewarding as this vibrant jam. Here’s why you’ll absolutely adore making and enjoying this recipe:
- Unparalleled Flavor: The taste of freshly picked strawberries, perfectly preserved in its purest form. No artificial flavors or preservatives can ever match the depth and complexity of flavor you get from making jam at home.
- Complete Control over Ingredients: You choose the quality of strawberries, the amount of sugar, and even add your own creative twists, resulting in a perfectly customized jam tailored to your preference. For example, if you prefer a less sweet jam, you can easily adjust the sugar quantity accordingly.
- Cost-Effective: Making your own jam is often significantly cheaper than buying it from the store, especially considering the superior quality and the absence of unnecessary additives.
- A Rewarding Process: The entire process from selecting ripe strawberries to sealing the finished jars is an incredibly therapeutic and rewarding experience. It’s a wonderful activity for a weekend afternoon, involving the whole family, or even a peaceful solo project.
- Perfect Gift: Imagine the joy of gifting your homemade strawberry jam to friends and family. It’s a unique and thoughtful present that shows you care, far surpassing any store-bought alternative. A personalized touch, like a charming hand-tied ribbon, elevates the gift even further.
- Versatility: This strawberry jam is incredibly versatile. It’s not just for toast; use it in baked goods, yogurt, ice cream, or even as a glaze for meats! The possibilities are endless.
Making this Homemade Strawberry Jam Recipe is an investment in quality, taste, and a wonderfully rewarding culinary experience. It’s a chance to connect with nature’s goodness and create something truly special with your own two hands. This recipe transforms simple ingredients into a delicious and unforgettable culinary treasure.
Why You Should Try This Homemade Strawberry Jam Recipe
In a world of mass-produced goods, making your own Homemade Strawberry Jam Recipe offers a unique opportunity to reconnect with the simple pleasures of cooking and appreciate the wholesome goodness of nature. Here are compelling reasons to give this recipe a try:
- Superior Quality: Homemade jam guarantees superior quality compared to store-bought options. You have complete control over the ingredients, ensuring only fresh, ripe strawberries and natural sweeteners are used, resulting in a rich and flavorful jam devoid of artificial additives.
- Healthier Option: By eliminating artificial preservatives, high fructose corn syrup, and other questionable ingredients, you create a healthier and more natural spread for yourself and your loved ones. A homemade option is much more suitable for a healthy lifestyle.
- Personalized Taste: Adjust the sweetness and add other ingredients according to your preference. Love a bit of spice? Add a pinch of cinnamon or a few drops of vanilla extract. This recipe is your blank canvas for culinary creativity. The Homemade Strawberry Jam recipe is flexible to your taste!
- Wonderful Sensory Experience: The entire process of making jam is a delight for the senses. From the fragrant aroma of simmering strawberries to the satisfying texture of the finished product, this recipe engages you in a fulfilling culinary adventure.
- A Great Gift or Keepsake: This Homemade Strawberry Jam Recipe isn’t just for personal enjoyment; it makes a wonderful gift. Imagine sharing the fruits of your labor with family and friends, creating lasting memories and sharing the taste of homemade goodness.
- Improves your cooking skills: It’s a fun and relatively straightforward recipe, perfect for beginners to hone their culinary skills and build confidence in the kitchen. This Homemade Strawberry Jam Recipe is perfect for all skill levels!
This Homemade Strawberry Jam Recipe is more than just a recipe; it’s a gateway to a more flavorful, healthier, and personally fulfilling culinary experience. Take the plunge, and you’ll be surprised by how much you enjoy the process and the delicious results.
Ingredients and Necessary Utensils for Your Homemade Strawberry Jam Recipe
This Homemade Strawberry Jam Recipe requires simple ingredients and readily available kitchen tools. Having everything prepared beforehand ensures a smooth and efficient process.
Ingredients for Homemade Strawberry Jam:
- 4 cups fresh strawberries: The star of the show! Choose ripe, fragrant strawberries for the best flavor. Avoid using strawberries that are bruised or moldy. Consider using organic strawberries for a truly natural product. See our Pinterest board for strawberry inspiration!
- 3 cups granulated sugar: The sugar helps to preserve the jam and balances the tartness of the strawberries. You can experiment with less sugar, but keep in mind that this might affect the shelf life of the jam.
- 1/4 cup lemon juice: Lemon juice adds acidity, which acts as a natural preservative and enhances the flavor of the jam. It also helps to brighten the color of the jam.
- 1 (1-inch) piece lemon peel (optional): Finely grated lemon peel adds a subtle zest and enhances the overall aroma of the jam. Be sure to use only the zest, avoiding the white pith, which can make the jam bitter.
Utensils and Equipment You’ll Need:
- Large, heavy-bottomed saucepan: This is crucial for even heating and preventing burning. Avoid using a non-stick pan for making jam as it may not withstand high heat.
- Wooden spoon or spatula: Use a wooden spoon or spatula for stirring to avoid scratching your saucepan.
- Measuring cups and spoons: Accurate measurements are essential for consistent results.
- Strainer or colander: For washing and straining the strawberries.
- Small bowl: For holding the lemon juice and lemon zest.
- Jam thermometer (optional): A jam thermometer makes checking the setting point easier and more accurate.
- Chilled plate or saucer: For the wrinkle test to check the setting point.
- Sterilized jars and lids (optional): If you plan on canning your jam, you will need sterilized jars and lids to ensure safe storage.
- Canning pot and rack (optional): For water bath canning.
- Jar lifter (optional): To safely remove hot jars from the canning pot.
Gathering all the necessary ingredients and tools before you begin will make the jam-making process much more enjoyable and efficient. This Homemade Strawberry Jam Recipe is best made with high-quality ingredients and equipment. Having the right tools helps!
Detailed Steps for Making Your Homemade Strawberry Jam Recipe
Follow these steps carefully for perfect Homemade Strawberry Jam every time.
Step 1: Prepare the Strawberries
- Wash the strawberries thoroughly under cold running water. Remove the green caps (hulls) using a paring knife or a strawberry huller.
- Slice the strawberries into halves or quarters, depending on their size. Smaller pieces cook more evenly and break down better.
- If using lemon peel, finely grate it using a zester or microplane grater. Be careful to grate only the yellow part of the peel and avoid the white pith, which can add bitterness.
Step 2: Combine Ingredients
- In a large, heavy-bottomed saucepan, combine the sliced strawberries, granulated sugar, lemon juice, and optional lemon peel.
- Gently stir the mixture to combine all the ingredients.
Step 3: Macerate the Strawberries
- Let the mixture stand for at least 30 minutes, or up to an hour. This allows the strawberries to release their juices and the sugar to dissolve partially. Stir occasionally during this time. **This maceration step is crucial for developing a rich, flavorful jam.**
Step 4: Cook the Jam
- Bring the mixture to a rolling boil over medium-high heat, stirring frequently to prevent sticking. **Make sure it’s a full rolling boil, where the bubbles are constantly rising and breaking the surface.**
- Once boiling, reduce the heat to medium-low and continue to boil gently, stirring occasionally. Skim off any foam that rises to the surface.
Step 5: Check for Setting Point
- The jam is ready when it reaches the setting point. You can test this using the wrinkle test: place a small amount of jam on a chilled plate. Let it cool for a minute, then push the jam with your finger. If the surface wrinkles, it’s ready.
- Alternatively, you can use a jam thermometer; the jam should reach 220°F (104°C). This is a more precise method for determining the setting point.
Step 6: Remove from Heat and Can (Optional)
- Once the jam reaches the setting point, remove it from the heat. If canning, carefully ladle the hot jam into sterilized jars, leaving about 1/4 inch of headspace. **Proper headspace is important for preventing spoilage.**
- Wipe the rims clean, seal the jars, and process according to your preferred canning method (water bath canning is recommended). Follow the instructions on your chosen canning method carefully.
Step 7: Cool and Store
- If not canning, let the jam cool completely in the saucepan before transferring it to sterilized jars or containers. Allow the jam to cool completely to prevent unwanted bacterial growth.
- Store in the refrigerator for up to 3 weeks. For longer storage, use the canning method outlined above.
Following these detailed steps ensures you create a delicious and safely preserved Homemade Strawberry Jam. Remember to be patient during the cooking process and always prioritize safety when canning.
Tips and Variations for your Homemade Strawberry Jam Recipe
This Homemade Strawberry Jam Recipe is incredibly versatile. Here are some tips and variations to help you customize your jam:
- Sugar Alternatives: While granulated sugar is traditional, you can experiment with alternative sweeteners like honey or maple syrup. Keep in mind that the sweetness and setting point may vary.
- Spice it Up: Add a pinch of cinnamon, cardamom, or even a dash of chili flakes for a unique twist.
- Herbal Infusion: Include a few sprigs of fresh basil or mint for a refreshing and aromatic jam.
- Berry Blend: Combine strawberries with other berries like raspberries, blueberries, or blackberries for a delightful mixed berry jam.
- Reduce Sugar: For a less sweet jam, you can reduce the amount of sugar, but be aware that this may affect the shelf life and consistency of the jam.
- Avoid Overcooking: Overcooking can result in a tough and less flavorful jam. Follow the setting point instructions carefully.
- Proper Sterilization: If canning, ensure your jars and lids are properly sterilized to prevent spoilage. Proper sanitation practices are paramount to safe and delicious Homemade Strawberry Jam.
Experiment and have fun with this recipe! The possibilities are endless when it comes to creating your own unique blend of flavors. These tips and variations will help you to create a truly exceptional Homemade Strawberry Jam.
Nutritional Values and Health Benefits of Homemade Strawberry Jam
While jam is a sweet treat, this Homemade Strawberry Jam Recipe, when made with natural ingredients, offers some nutritional benefits:
Approximate Nutritional Information (per 100g, may vary based on ingredients and sugar content):
- Calories: Approximately 250-300
- Protein: Low
- Fat: Low
- Carbohydrates: High (mostly from sugar)
Health Benefits:
- Strawberries: Rich in Vitamin C, antioxidants, and fiber. Antioxidants help protect cells from damage and contribute to overall health.
- Lemon Juice: A good source of Vitamin C and contributes to the acidity that acts as a natural preservative. The vitamin C in the lemons boosts the immune system.
Important Note: While strawberries and lemon juice offer some nutritional value, jam is high in sugar. It should be consumed in moderation as part of a balanced diet. Consider reducing the sugar content in the Homemade Strawberry Jam recipe if you want to lower the sugar intake.
FAQs about Homemade Strawberry Jam Recipe
How long does homemade strawberry jam last?
Can I use frozen strawberries to make jam?
What is the best type of sugar to use for homemade strawberry jam?
How do I know if my homemade strawberry jam has set properly?
What should I do if my homemade strawberry jam is too runny?
Conclusion: Your Homemade Strawberry Jam Journey Awaits!
This Homemade Strawberry Jam Recipe is more than just a guide to making a delicious spread; it’s an invitation to a fulfilling culinary adventure. From the fragrant aroma of simmering strawberries to the satisfaction of creating something delicious and wholesome from scratch, this recipe promises an experience that goes beyond the simple act of cooking. Remember to share your Homemade Strawberry Jam experience with us in the comments below! Did you add any unique twists to your jam? What’s your favorite way to enjoy it? Don’t forget to share your culinary creations on social media and tag us – we’d love to see your delicious results! And, if you’re looking for more delicious recipes, check out our other amazing recipes at Noeliarecipes.com, like our easy empanada recipe. Happy Jamming!
Homemade Strawberry Jam: A Simple & Delicious Recipe
Ingredients
Equipment
Method
- Wash and hull the strawberries. Slice into halves or quarters.
- If using lemon peel, finely grate it. Combine strawberries, sugar, lemon juice, and lemon peel (if using) in a large saucepan.
- Let the mixture stand for at least 30 minutes to macerate. Stir occasionally.
- Bring the mixture to a rolling boil over medium-high heat, stirring frequently. Reduce heat to medium-low and continue to boil gently, stirring occasionally, until it reaches setting point (about 220°F/104°C on a thermometer, or wrinkles when tested on a chilled plate).
- Remove from heat. If canning, carefully ladle the hot jam into sterilized jars, leaving 1/4 inch headspace. Wipe rims, seal, and process according to your canning method.
- If not canning, let cool completely in the saucepan before transferring to sterilized jars. Store in the refrigerator for up to 3 weeks.


