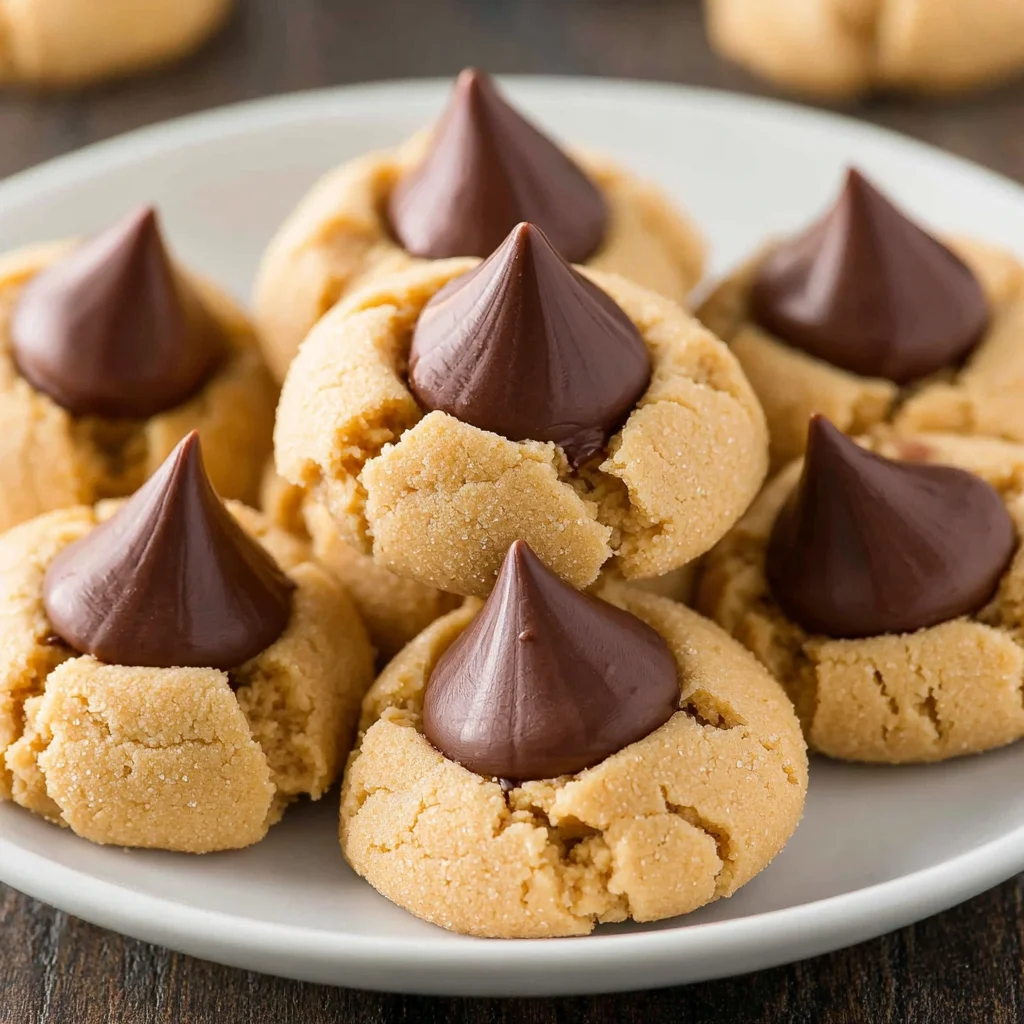
There are few cookies that evoke the sheer joy and comfort of childhood holidays quite like the Perfect Peanut Butter Blossoms. These iconic treats, instantly recognizable by their soft, crackled peanut butter base crowned with a creamy, melted Hershey’s Kiss, are a staple on every Christmas cookie tray and a favorite year-round snack. More than just a recipe, this is a rite of passage for any home baker.
While the concept seems simple a peanut butter cookie with chocolate pressed into the center achieving the Perfect Peanut Butter Blossoms requires precision. We’re not aiming for a dry, crumbly cookie here. We want a dough that is rich, chewy, slightly salty to enhance the sweetness, and holds its shape perfectly, allowing that chocolate kiss to nestle snugly into the warm embrace of the dough. This comprehensive guide will walk you through every step, ensuring your batch is flawless, delivering that quintessential nostalgic flavor and texture that makes them truly perfect.
Forget the recipes that leave you with hard edges or overly spreading cookies. We dive deep into the science of creaming the butter and sugar, the essential role of both granulated and brown sugar, and the exact moment to pull these beauties from the oven. If you’ve been searching for the definitive recipe for this legendary cookie, look no further. Get ready to bake the absolute best batch of Perfect Peanut Butter Blossoms you’ve ever tasted, ready to share with friends, family, or simply savor yourself with a tall glass of milk. Let’s make cookie magic!
Why You’ll Fall Head Over Heels for These Perfect Peanut Butter Blossoms
The enduring popularity of the Perfect Peanut Butter Blossoms isn’t just about tradition; it’s about undeniable, delicious engineering. This cookie hits all the necessary notes: sweet, salty, chewy, and chocolatey. If you are debating what cookie to bake next, here are several reasons why this recipe deserves the top spot on your baking list.
A Symphony of Texture and Flavor
The structure of a perfect blossom is non-negotiable. The cookie must be soft and tender in the center, chewy around the edges, and possess that satisfyingly rough sugar coating on the outside. Our recipe achieves this balance by utilizing a precise ratio of both granulated white sugar and light brown sugar. The brown sugar introduces moisture and a hint of molasses, ensuring the finished cookie remains soft long after it has cooled. The rich, nutty flavor of the peanut butter is perfectly balanced by a touch of salt, which acts as a flavor multiplier, preventing the overall taste from becoming overwhelmingly sweet. This savory-sweet contrast is what elevates these from standard cookies to truly Perfect Peanut Butter Blossoms.
The Ultimate Chocolate Delivery System
The Hershey’s Kiss isn’t merely a topping; it’s the defining characteristic. The magic happens the moment the hot cookie meets the cold chocolate. As the chocolate begins to melt slightly, it creates a soft, creamy pillow in the center of the cookie, offering a delightful textural change. This is similar to the comforting feeling you get when you enjoy a Spanish classic like churros con chocolate, where the crisp exterior gives way to warm, molten chocolate. Timing is everything here the warm dough gently softens the chocolate without fully dissolving it, leaving you with a creamy, structured chocolate peak once cooled. This visual appeal, combined with the taste, makes them irresistible.
Unmatched Ease and Speed
Despite their sophisticated look, this recipe for Perfect Peanut Butter Blossoms is surprisingly easy and quick to execute. It requires no chilling time, meaning you can go from craving to cookie in under 30 minutes. This efficiency makes them ideal for last-minute gatherings, spontaneous baking sessions, or when you simply need a reliable, crowd-pleasing dessert that delivers maximum payoff with minimal fuss. Whether you are an experienced baker or just starting out, the straightforward steps ensure success every time.
Why You Should Try This Classic Peanut Butter Blossom Recipe Today
If you have ever made a batch of peanut butter cookies only to find them dry, flat, or lacking in that essential peanut butter punch, this recipe is your redemption. We have optimized every variable to ensure consistency and flavor dominance. Trying this specific recipe for Perfect Peanut Butter Blossoms guarantees a superior product, surpassing standard recipes found elsewhere.
The Secret to Preventing Spreading
One of the most common pitfalls in cookie baking is excessive spreading, which leads to thin, crunchy results rather than soft, elevated blossoms. Our recipe utilizes a high ratio of all-purpose flour and baking soda relative to the fat content. Crucially, the simple act of rolling the dough balls in granulated sugar before baking serves two purposes: it creates a beautiful, sparkling crust, and the sharp edges of the sugar crystals help prevent the cookie from spreading too rapidly, encouraging vertical lift. This technique ensures that your Perfect Peanut Butter Blossoms maintain their ideal 1-inch diameter and substantial height, ready to cradle the Hershey’s Kiss.
Beginner-Friendly Baking
This recipe is an excellent starting point for new bakers looking to build confidence. The ingredients are simple pantry staples, and the process is forgiving. The use of an electric mixer simplifies the creaming process, which is often the hardest part of cookie dough preparation. Plus, the visual cue of the lightly golden edges tells you precisely when they are done, removing much of the guesswork associated with baking. Just like mastering the perfect technique for a Spanish classic such as the tortilla de patatas, understanding these foundational cookie steps will elevate all your future baking projects.
A Tradition Worth Keeping
Peanut Butter Blossoms have secured their place in the culinary hall of fame, deeply rooted in American holiday baking traditions since the 1950s. By mastering the Perfect Peanut Butter Blossoms, you are not just making a dessert; you are contributing to a legacy. They are fantastic for gifting, for cookie swaps, or just for filling your own kitchen with the warm, comforting aroma of peanut butter and vanilla. This recipe ensures that the tradition continues with the highest quality result, guaranteeing that your cookies will be the most sought-after item on any platter.
Gathering Your Essentials: Ingredients and Recommended Utensils
Baking is a science, and successful baking relies heavily on precise measurements and quality ingredients. Before you begin crafting your batch of Perfect Peanut Butter Blossoms, ensure all your ingredients are measured out and that your butter and egg are at the proper temperature. This preparation step, often called “mise en place,” is crucial for ensuring a smooth baking process and perfect results.
Ingredients for the Perfect Peanut Butter Blossoms
This recipe yields approximately 4 dozen cookies (48 blossoms).
- Unsalted Butter (1/2 cup or 1 stick): Must be softened to room temperature. This allows it to cream properly with the sugars, incorporating air which gives the cookie its lift and tender texture.
- Creamy Peanut Butter (1/2 cup): Use a standard, commercially processed peanut butter (like Jif or Skippy) that is non-natural. Natural peanut butter (the kind that separates oil) has too much oil and will cause the cookies to spread excessively. Ensure it is creamy, not chunky.
- Granulated White Sugar (1/2 cup dough + 1/4 cup coating): Used both inside the dough for structure and sweetness, and externally for the sparkling, crusty coating.
- Packed Light Brown Sugar (1/2 cup): Essential for moisture retention, chewiness, and that slight molasses depth of flavor. Make sure you pack it firmly into the measuring cup.
- Large Egg (1): Also needs to be at room temperature. A room-temperature egg mixes more seamlessly into the creamed fats, preventing the mixture from separating.
- Vanilla Extract (1 teaspoon): Enhances all the other flavors. Use pure vanilla for the best aroma and taste.
- All-Purpose Flour (1 3/4 cups): The primary dry structural component. Ensure it is spooned and leveled, not scooped directly from the bag (which can compact it, leading to a heavy, dry cookie).
- Baking Soda (1 teaspoon): The leavening agent responsible for the lift and slight puffiness. Make sure your baking soda is fresh for maximum effect.
- Salt (1/2 teaspoon): Crucial for balancing the sweetness and intensifying the peanut butter flavor.
- Hershey’s Kisses Milk Chocolates (48, unwrapped): The star topping. Make sure they are completely unwrapped before starting the baking process!
The Role of Sugar in Cookie Perfection
Many novice bakers underestimate the complexity of sugar. In this Perfect Peanut Butter Blossoms recipe, the dual use of sugars is key:
Granulated Sugar: Structure and Coating
Granulated sugar helps provide a crisp texture to the cookie’s edge. When rolled on the outside, it crystallizes, creating a beautiful shine and adding a delightful crunch. It also slightly insulates the dough, helping the cookie retain moisture during baking.
Brown Sugar: Chewiness and Moisture
Brown sugar contains molasses, which is naturally acidic and hygroscopic (water-attracting). This ensures the cookie remains soft and chewy in the center. If you were to use only white sugar, the cookie would likely be crispier and potentially drier. The blend is essential for the ideal blossom texture.
Recommended Tools for Baking Success
While you can certainly mix this dough by hand, specific tools make achieving the Perfect Peanut Butter Blossoms much easier and more consistent:
- Electric Mixer (Handheld or Stand Mixer): Absolutely essential for Step 2 (creaming). It ensures the butter and sugars are properly aerated, which directly affects the cookie’s texture and rise.
- Mixing Bowls (Large and Medium): One large bowl for the wet mixture and one medium bowl for whisking the dry ingredients.
- Rubber Spatula or Scraper: Necessary for scraping down the sides of the bowl during mixing to ensure all ingredients are evenly incorporated.
- Parchment Paper or Silicone Baking Mats: Highly recommended. These prevent sticking, encourage even baking, and make cleanup a breeze.
- Cookie Scoop (1-tablespoon size/Small): Using a scoop ensures every cookie is uniform in size, which guarantees they all bake and finish at the same time. Consistency is key to the Perfect Peanut Butter Blossoms.
- Wire Cooling Rack: Needed for cooling the cookies completely, allowing air circulation underneath to prevent steaming and sogginess.
Step-by-Step Guide to Baking the Perfect Peanut Butter Blossoms
Follow these precise steps to create a batch of beautifully domed, soft, and chewy peanut butter blossoms that are guaranteed to impress. Remember, timing and temperature control are your most crucial allies.
Step 1: Prepare the Oven and Equipment
Preheat your oven to 375°F (190°C). This slightly higher temperature helps the edges set quickly, encouraging the cookie to rise rather than spread. Line two large baking sheets with parchment paper or silicone baking mats. This preparation ensures easy release and quick transition between batches.
Critical Prep Note: Unwrap all 48 Hershey’s Kisses immediately and set them aside in a cool location. Once the cookies come out, you will have mere seconds to press the Kisses, and fumbling with wrappers will cost you valuable time and result in less-than-perfect melted chocolate.
Step 2: Cream the Wet Ingredients (The Foundation)
In a large mixing bowl, combine the softened butter, creamy peanut butter, granulated white sugar (1/2 cup), and light brown sugar (1/2 cup). Using an electric mixer (stand or handheld), beat them together on medium speed.
Practical Tip: You must cream this mixture until it is noticeably light and fluffy, usually taking 2 to 3 minutes. The color should lighten considerably, and the texture should resemble whipped frosting. This process incorporates air, which is vital for the final cookie structure. If you skip or rush this step, your cookies will be dense.
Step 3: Add Egg and Vanilla for Binding
Beat the room-temperature large egg into the creamed mixture until just combined. Overmixing the egg can toughen the resulting cookie. Stir in the vanilla extract until fully incorporated. Always stop the mixer and scrape down the sides of the bowl at this stage to ensure there are no pockets of unmixed butter or sugar.
Step 4: Whisk Dry Ingredients for Even Leavening
In a separate medium bowl, combine the all-purpose flour, baking soda, and salt. Use a wire whisk to thoroughly mix these dry ingredients for at least 30 seconds. This step is non-negotiable! It ensures that the salt and, most importantly, the baking soda, are distributed evenly throughout the flour. Without this, you might end up with randomly spotted cookies that rise unevenly.
Step 5: Combine Wet and Dry (The Delicate Balance)
Gradually add the dry ingredient mixture to the wet mixture. Start mixing on the lowest speed possible. Mix only until the dough just comes together and no streaks of dry flour remain. This is a quick process, perhaps 30 to 45 seconds.
Crucial Warning: Do Not Overmix! Once the flour is added, developing the gluten network will make the cookie tough. Stop mixing the second the ingredients are combined. The resulting peanut butter cookie dough should be soft, slightly sticky, and easy to roll. This precise mixing technique is key to achieving truly Perfect Peanut Butter Blossoms.
Step 6: Roll the Cookie Dough and Coat
Pour the reserved 1/4 cup of granulated white sugar into a shallow bowl. Using your 1-tablespoon cookie scoop, portion the dough into 1-inch balls. Roll each portion smoothly between your palms to form a uniform sphere.
Next, roll each dough ball thoroughly in the shallow sugar bowl until it is completely coated. This sugar coating is vital for both texture and visual appeal.
Step 7: Bake the Cookies to Perfection
Place the sugar-coated dough balls onto the prepared baking sheets, ensuring they are spaced about 2 inches apart to allow for minimal spreading. Bake in the preheated 375°F (190°C) oven for 8 to 10 minutes.
How to Know They Are Done: The edges should be lightly golden brown, but the center of the cookie should look set yet still slightly soft and puffy. A fully baked cookie will be firm and dry. We want these to retain moisture, so look for a small crackling appearance on top but maintain a soft look in the middle.
Step 8: Press the Kisses (The Defining Moment)
This is the fastest, most time-sensitive step! As soon as the baking sheet is removed from the oven, immediately and firmly press one unwrapped Hershey’s Kiss into the center of each hot cookie. You must apply enough pressure so the kiss sinks down, causing the edges of the warm cookie to crackle and rise slightly around the chocolate base. This forms the signature blossom shape.
If you wait even 30 seconds, the surface of the cookie will have set too much, and the Kiss will not adhere properly or create the desired crackle effect.
Step 9: Cool and Serve
Allow the cookies to remain on the hot baking sheet for 5 minutes. This residual heat helps the cookie finish setting while the chocolate begins to soften. After 5 minutes, carefully transfer the Perfect Peanut Butter Blossoms to a wire rack using a thin spatula to cool completely. The chocolate must set fully before storing or serving, which usually takes about 20 to 30 minutes at room temperature, or slightly faster in a cooler spot. Store cooled cookies in an airtight container at room temperature for up to one week.
Tips, Tricks, and Exciting Variations for Your Peanut Butter Blossoms
Achieving the perfect outcome requires a few insider secrets. These tips will help you avoid common mistakes, and the variations will keep your Perfect Peanut Butter Blossoms interesting batch after batch.
Avoiding Common Peanut Butter Blossom Mistakes
Problem: Spreading Too Flat
Solution: Ensure your butter is softened, not melted. Using butter that is too warm introduces too much liquid too soon, causing the cookies to collapse. Additionally, verify you are using commercial, non-natural peanut butter, as the oil in natural varieties guarantees spreading. Finally, make sure your oven temperature is accurate a low oven causes slow spreading.
Problem: The Kiss Falls Off
Solution: You waited too long! The cookie must be piping hot, straight out of the oven, for the chocolate to adhere effectively. If your Kiss doesn’t stick, gently press it down and hold for a few seconds. If the cookie has cooled slightly, you can place it back in the oven for 30 seconds to reheat the center before pressing the Kiss again.
Problem: Dry or Crumbly Cookies
Solution: You likely overbaked them or added too much flour. Remember the 8–10 minute timeframe; aim for the lower end if your oven runs hot. Always spoon and level the flour, and remember the importance of brown sugar for moisture. If your dough feels too dry before baking, try incorporating a teaspoon of milk or water.
Creative Variations to Customize Your Blossoms
Alternative Chocolate Toppings
While the classic milk chocolate Kiss is traditional, don’t hesitate to experiment:
- Dark Chocolate: Use dark chocolate Kisses or specialty dark chocolate squares for a richer, less sweet blossom.
- Caramel Center: Try Rolo candies instead of Kisses for a gooey, caramel center.
- Peppermint Twist: During the holiday season, use peppermint Kisses for a festive flavor combination.
Dietary Adjustments
If you need to cater to specific dietary needs, these simple substitutions can still result in delicious Perfect Peanut Butter Blossoms:
- Gluten-Free Blossoms: Substitute the all-purpose flour with a 1:1 gluten-free baking blend that contains xanthan gum. The cookie may be slightly more delicate, but the flavor will remain excellent.
- Vegan Option: Replace the butter with a vegan butter stick (avoid margarine tubs) and use a flax egg (1 tablespoon ground flaxseed mixed with 3 tablespoons water, let rest 5 minutes) instead of the large egg. Ensure your granulated sugar is certified vegan.
For more baking inspiration and delicious treats, be sure to check out our Pinterest board for holiday baking ideas.
Extra Texture and Flavor
Instead of rolling the dough in plain sugar, try rolling it in:
- Cinnamon Sugar: Mix 1/4 cup sugar with 1 teaspoon cinnamon for a spicy kick.
- Finely Chopped Nuts: Roll the dough in finely ground peanuts or pecans before baking for an extra layer of crunch and nuttiness. This works especially well if you are aiming for a cookie that is as complex and rich as a perfected Spanish dish, like our classic Tortilla Española.
Nutritional Insights and the Simple Benefits of Perfect Peanut Butter Blossoms
While cookies are undeniably a treat meant for enjoyment, understanding the components of Perfect Peanut Butter Blossoms can provide context on their nutritional value. As always, these values are estimates and should be consumed as part of a balanced diet.
Estimated Nutritional Breakdown (Per Cookie, approx. 48 servings)
| Component | Estimated Value | Notes |
|---|---|---|
| Calories | ~90-100 kcal | Dependent on the size of the Kiss and dough ball. |
| Protein | ~2 grams | Contributed primarily by the peanut butter and egg. |
| Total Fat | ~5 grams | Sourced from butter, peanut butter, and chocolate. |
| Saturated Fat | ~2.5 grams | |
| Carbohydrates | ~10-12 grams | Includes fiber and sugar. |
| Sugar | ~7-8 grams | From added sugars and the milk chocolate Kiss. |
The Benefits of Peanut Butter in Baking
Peanut butter is the foundational ingredient that gives the Perfect Peanut Butter Blossoms their depth and nutritional boost compared to many other purely flour and sugar cookies:
Protein and Satiety
Peanut butter is a respectable source of plant-based protein. While two grams of protein per cookie might seem small, it contributes to satiety. The combination of protein and fat helps slow down the digestion of the sugars, making these cookies feel more satisfying than those based primarily on refined carbohydrates.
Essential Minerals
Peanuts are naturally high in various minerals, including magnesium, phosphorus, zinc, and vitamin E (a powerful antioxidant). Although the processing and baking reduce some vitamin content, the inclusion of peanut butter adds these micronutrients that are often lacking in traditional sugar cookie recipes.
Energy Source
The blend of complex carbohydrates (from flour), simple sugars, and healthy fats (from peanuts) makes these cookies an efficient source of energy. They are ideal for a mid-afternoon snack or as a fuel boost for active individuals. Enjoying one or two of these Perfect Peanut Butter Blossoms in moderation offers a balanced indulgence that supports your energy needs while satisfying your sweet tooth.
Frequently Asked Questions (FAQs) About Perfect Peanut Butter Blossoms
Can I freeze the dough for Perfect Peanut Butter Blossoms?
Yes, the dough freezes beautifully! Roll the dough into balls, coat them in sugar, and place them on a baking sheet to flash freeze. Once solid, transfer the dough balls to a freezer-safe bag or container for up to 3 months. When ready to bake, place the frozen dough balls directly on the prepared sheet and add 2–3 minutes to the baking time.
Why do I need both brown and white sugar in the Perfect Peanut Butter Blossoms recipe?
The combination is essential for achieving the perfect texture. Brown sugar contains molasses, which adds moisture, ensuring the cookie remains chewy and soft. White granulated sugar provides spread control and crispness on the edges. Using only one type will result in a cookie that is either too crispy (only white sugar) or too soft and crumbly (only brown sugar).
How do I store Perfect Peanut Butter Blossoms to keep them fresh?
Store cooled cookies in an airtight container at room temperature for up to one week. To prevent the chocolate Kisses from sticking to the lid or each other, place parchment paper between layers of cookies. Avoid refrigerating the cookies, as this can dry them out quickly and affect the texture of the peanut butter base.
Can I use crunchy peanut butter instead of creamy peanut butter?
While creamy peanut butter is preferred for the soft texture of the Perfect Peanut Butter Blossoms, you can substitute crunchy peanut butter if you enjoy added texture. Be aware that the crunchy variety may slightly alter the dough’s consistency and make the final cookie less smooth and uniform.
What happens if my butter is too cold when I start mixing?
If your butter is too cold, it will not properly cream with the sugars. This means insufficient air will be incorporated into the dough, leading to a denser, flatter cookie that lacks the desired soft, chewy crumb. Ensure the butter is truly softened (press your finger into it; it should indent easily).
Conclusion: Your New Go-To Recipe for Perfect Peanut Butter Blossoms
The search for the definitive peanut butter blossom recipe ends here. By adhering to the precise measurements, utilizing room-temperature ingredients, and mastering the crucial timing of pressing the Hershey’s Kiss, you are guaranteed to produce a batch of Perfect Peanut Butter Blossoms that stand tall, boast a chewy center, and deliver that ultimate balance of salty peanut butter and creamy milk chocolate.
This cookie is more than just a sweet treat; it’s a vessel for memories and a dependable recipe for any occasion, from festive holiday gatherings to a simple weeknight dessert. The ease of preparation, coupled with the impressive final result, makes this a mandatory addition to your personal recipe arsenal. It proves that sometimes, the simplest recipes, when executed with perfection, are the most transcendent.
We encourage you to roll up your sleeves and dive into this classic baking project. We promise the aroma that fills your kitchen and the joy these little blossoms bring will be worth every minute of effort. Once you try this guide, you’ll never look for another peanut butter blossom recipe again. Did you try this recipe? Let us know in the comments below how your batch of Perfect Peanut Butter Blossoms turned out, and don’t forget to share this guide with fellow cookie enthusiasts!
Classic Perfect Peanut Butter Blossoms
Ingredients
Equipment
Method
- Preheat your oven to 375°F (190°C). Line two large baking sheets with parchment paper or silicone baking mats. Unwrap all 48 Hershey's Kisses and set them aside in a cool location.
- In a large mixing bowl, using an electric mixer, cream together the softened butter, creamy peanut butter, 1/2 cup granulated white sugar, and light brown sugar until the mixture is light and fluffy (about 2 to 3 minutes).
- Beat the large egg into the creamed mixture until just combined. Stir in the vanilla extract until fully incorporated. Scrape down the sides of the bowl as needed.
- In a separate medium bowl, whisk together the all-purpose flour, baking soda, and salt. Whisk thoroughly for about 30 seconds to distribute the leavening agents evenly.
- Gradually add the dry ingredient mixture to the wet mixture, mixing on low speed until the dough just comes together. Do not overmix. The dough should be soft and easy to handle.
- Place the reserved 1/4 cup of granulated white sugar in a shallow bowl. Scoop the cookie dough and roll it into small balls, approximately 1 inch in diameter (about 1 tablespoon of dough per cookie). Roll each dough ball thoroughly in the sugar until it is completely coated.
- Place the sugar-coated dough balls onto the prepared baking sheets, leaving about 2 inches of space between each cookie. Bake in the preheated oven for 8 to 10 minutes, or until the edges are lightly golden brown and the center of the cookie looks set but still soft.
- As soon as the cookies are removed from the oven, immediately and firmly press one unwrapped Hershey’s Kiss into the center of each hot cookie. The chocolate will soften and melt slightly around the edges.
- Allow the cookies to cool on the baking sheet for 5 minutes before carefully transferring them to a wire rack to cool completely. The chocolate needs time to set fully before storing (about 20-30 minutes). Store cooled cookies in an airtight container at room temperature.


