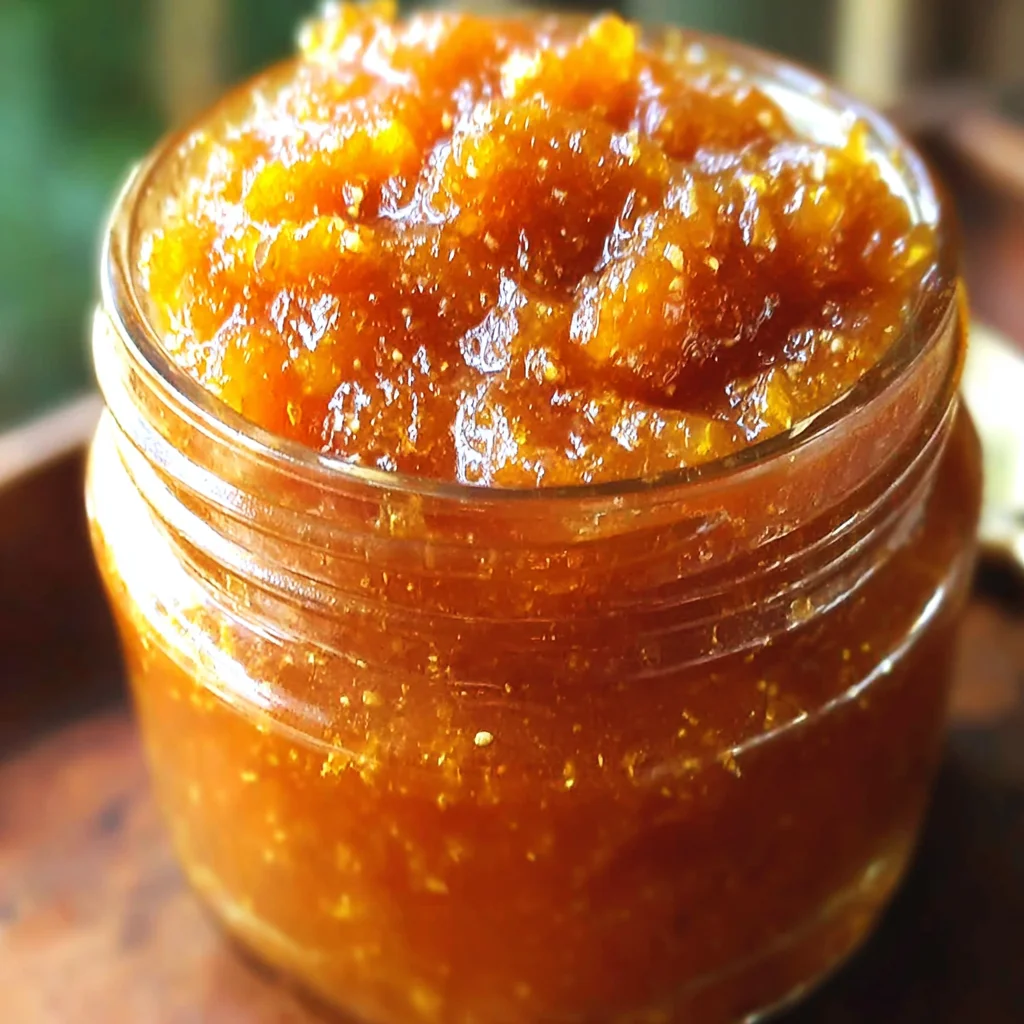
Summer’s bounty is at its peak, and what better way to capture its sweetness than with a batch of homemade peach jam? This Quick Peach Jam Recipe is perfect for beginners and seasoned jam makers alike. Forget long, complicated processes; this recipe delivers delicious, homemade jam in under an hour. Imagine the vibrant color, the sweet-tart flavor bursting with fresh peach essence, spread generously on warm toast, or dolloped atop your favorite pastries. This isn’t just a recipe; it’s a journey to the heart of summer, captured in a jar. The aroma alone will transport you to sun-drenched orchards, ripe peaches clinging to the branches, ready for harvest. Prepare to be amazed by how easily you can create this delectable treat, perfect for gifting, sharing, or simply savoring on your own.
Why You’ll Love This Quick Peach Jam Recipe
This Quick Peach Jam Recipe isn’t your grandmother’s jam recipe (although your grandmother would probably love it too!). It’s designed for the modern cook who appreciates efficiency without sacrificing quality. Several aspects make this recipe a standout:
- Speed and Simplicity: This recipe prioritizes speed. From start to finish, you can have delicious jam within an hour, significantly less time than traditional methods. This makes it perfect for busy schedules.
- Fresh, Vibrant Flavor: Using fresh, ripe peaches is key. This recipe showcases the natural sweetness and tartness of the peaches, without overwhelming them with complicated additions. The result is a truly authentic peach flavor.
- Minimal Ingredients: We keep it simple with just four main ingredients (plus an optional spice). This allows the fresh peach flavor to shine through. No obscure ingredients or complicated techniques needed!
- Perfect Consistency: The recipe provides clear instructions for achieving the perfect jam consistency, ensuring a smooth, spreadable result every time. You’ll learn to gauge the thickness by testing it with a spoon.
- Easy Canning (Optional): While you can enjoy this jam immediately, the recipe includes optional instructions for canning, enabling you to preserve your summer harvest for months to come. Learn to can like a pro without feeling intimidated!
- Versatile Use: This peach jam is incredibly versatile. Enjoy it on toast, biscuits, scones, or use it as a filling for pies, tarts, or even as a glaze for meats.
This quick peach jam recipe is not only about the amazing taste but also the satisfaction of creating something delicious from scratch. Imagine the joy of gifting homemade jam to friends and family, a delightful present that speaks volumes about your care and culinary skills. It’s a perfect way to preserve summer’s sweetness and share it throughout the year. This recipe is a testament to the magic of simple ingredients, expertly combined to create an extraordinary result. You’ll be amazed by how easy it is to achieve professional-level results at home.
Why You Should Try This Quick Peach Jam Recipe
Beyond the undeniable deliciousness, there are numerous reasons to try this Quick Peach Jam Recipe:
- Cost-Effective: Making your own jam is often more affordable than buying store-bought varieties, especially when using seasonal fruits. You control the quality and quantity, avoiding unnecessary additives.
- Healthier Choice: Homemade jam allows you to control the sugar content and avoid artificial preservatives, colors, and flavors often found in commercially produced jams. You know exactly what’s going into your jam!
- A Fun, Rewarding Experience: Jam making is a fun and rewarding activity, perfect for a weekend project or a fun family activity. It’s a great way to connect with food and create something special.
- Perfect Gift: A jar of homemade peach jam makes a thoughtful and delicious gift for friends, family, neighbors, or colleagues. It’s a unique and personalized present that shows you care.
- Preserving Summer’s Flavors: Peach season is fleeting. Making jam allows you to preserve the fresh, vibrant flavor of ripe peaches to enjoy year-round. Enjoy the taste of summer long after the last peach has been picked.
- Skill Development: This recipe is a great starting point for learning basic canning and preserving techniques. Once you master this recipe, you’ll be ready to experiment with other fruits and flavors.
This recipe empowers you to take control of your food, ensuring quality and freshness. It’s a chance to escape the mundane and embrace the joy of creating something delicious from scratch. It’s an investment in your health, your skills, and your happiness. And let’s not forget the sheer pleasure of spreading a spoonful of homemade peach jam on your toast, knowing you made it yourself!
Ingredients and Necessary Utensils for Your Quick Peach Jam Recipe
This section details the precise quantities of each ingredient, along with recommended tools and utensils for successful jam making.
Ingredients:
- 4 cups peeled and sliced ripe peaches (about 4-5 medium peaches). Keyword: ripe peaches. Look for peaches that are slightly soft to the touch and fragrant. Avoid peaches that are bruised or overly hard.
- 3 cups granulated sugar. Keyword: granulated sugar. Granulated sugar is the best choice for jam making because it dissolves easily and contributes to a smooth texture.
- 1/4 cup lemon juice. Keyword: lemon juice. Freshly squeezed lemon juice is preferred for its vibrant flavor and pectin content, which helps with thickening. Bottled lemon juice works in a pinch.
- 1/2 teaspoon ground cinnamon (optional). Keyword: ground cinnamon. A dash of cinnamon adds warmth and complexity to the flavor, but it’s entirely optional.
Utensils:
- Large, heavy-bottomed saucepan: A heavy-bottomed saucepan distributes heat evenly, preventing scorching and ensuring even cooking of the jam. Keyword: heavy-bottomed saucepan
- Wooden spoon or spatula: Use a wooden spoon or spatula for stirring to avoid scratching the pan. Keyword: wooden spoon
- Potato peeler or vegetable peeler: For efficiently peeling the peaches. Keyword: vegetable peeler
- Cutting board and sharp knife: For slicing the peaches. Keyword: sharp knife
- Measuring cups and spoons: For accurate measurements of ingredients. Keyword: measuring cups
- Jars and lids (for canning, optional): Choose jars with a wide mouth for easier filling. Keyword: canning jars. Sterilize the jars and lids before use for long-term storage.
- Jar lifter (for canning, optional): A jar lifter helps to safely remove hot jars from boiling water.
- Large pot and canning rack (for canning, optional): For the boiling water bath process.
- Clean kitchen towels: For drying jars and handling hot jars.
Having these tools on hand will make the jam-making process smoother and more efficient. Investing in quality equipment will make a difference in the final product. Remember safety first, especially when handling hot liquids. Always use oven mitts or pot holders when dealing with hot saucepans and jars. Check out our other amazing recipes on Noeli’s Recipes!
Detailed Steps for Your Quick Peach Jam Recipe
Follow these detailed steps to create your perfect batch of peach jam.
Step 1: Preparing the Peaches
Wash the peaches thoroughly under cold running water. To easily peel the peaches, score an “X” at the bottom of each peach. Blanch them in boiling water for about 30 seconds, then immediately transfer them to an ice bath. The skins will easily slip off. This method is much quicker and easier than peeling them individually with a knife. Once peeled, slice the peaches into approximately 1/2-inch thick slices. Consistency is key here for even cooking.
Step 2: Combining the Ingredients
In a large, heavy-bottomed saucepan, combine the sliced peaches, granulated sugar, lemon juice, and cinnamon (if using). Stir well to ensure the sugar coats the peaches thoroughly. This helps the sugar dissolve evenly and prevents sticking during cooking. Let the mixture sit for about 15 minutes to allow the sugar to begin dissolving and the peaches to release their juices.
Step 3: Cooking the Jam
Bring the mixture to a rolling boil over medium-high heat, stirring frequently to prevent sticking. Once boiling, reduce the heat to medium-low and continue to cook, stirring occasionally, for about 15-20 minutes, or until the jam has thickened to your desired consistency. The jam will thicken as it cools. Use a spoon to test for consistency; it should coat the back of the spoon nicely. This takes practice, so don’t be discouraged if your first batch isn’t perfect.
Step 4: Sterilizing Jars (Optional but Recommended)
While the jam is cooking, sterilize your jars and lids. Wash them in hot, soapy water, rinse thoroughly, and then place them in a boiling water bath for 10 minutes. Let them air dry upside down on a clean kitchen towel. Proper sterilization is essential for long-term storage. This helps prevent spoilage and ensures the safety of your homemade jam.
Step 5: Filling the Jars
Carefully ladle the hot jam into the sterilized jars, leaving about 1/4 inch headspace at the top. Wipe the rims of the jars clean with a damp cloth. Leaving headspace is crucial to allow for expansion during cooling and prevents the jars from breaking.
Step 6: Sealing the Jars
Place the lids and rings on the jars and tighten them fingertip tight. Do not over-tighten. Over-tightening can prevent proper sealing.
Step 7: Processing Jars (Optional but Recommended for Long-Term Storage)
For longer shelf life, process the filled jars in a boiling water bath for 10 minutes. Ensure the jars are completely submerged in water. Remove the jars and let them cool completely. You should hear a “pop” sound as the jars seal. This step is crucial for long-term storage, ensuring your jam remains safe and delicious for months.
Step 8: Cooling and Storage
Let the jars cool completely. Check the seals; the lids should be concave (pushed down). Store in a cool, dark place. Enjoy! Your delicious homemade jam will last for months if properly canned, allowing you to savor the taste of summer throughout the year. For additional recipe ideas, check out our delicious Spanish recipes.
Tips and Variations for Your Quick Peach Jam Recipe
Here are some helpful tips and variations to enhance your jam-making experience:
- Peach Varieties: Experiment with different peach varieties. Freestone peaches are easiest to peel, but clingstone peaches also work well. The flavor profile will vary slightly depending on the peach variety.
- Sugar Adjustment: Adjust the sugar to your liking. If you prefer a less sweet jam, reduce the sugar by 1/2 cup. Taste the jam towards the end of the cooking process to fine-tune the sweetness.
- Spice Variations: Experiment with other spices like cardamom, allspice, or ginger for unique flavor combinations.
- Citrus Variations: Substitute orange or lime juice for lemon juice for a different flavor profile.
- Adding Other Fruits: Combine peaches with other fruits like raspberries, blueberries, or strawberries for a delicious mixed fruit jam.
- Avoid Overcooking: Overcooked jam can be tough and rubbery. Cook the jam until it reaches the desired thickness, but don’t continue cooking beyond that point.
- Proper Sealing: Ensure proper sealing of the jars to prevent spoilage. Check the seals after processing and cooling. Any jars that did not seal should be refrigerated and consumed quickly.
Remember, this Quick Peach Jam Recipe is a guideline. Feel free to experiment and personalize it to your preferences! Don’t be afraid to try different variations. Every batch of jam will be slightly unique, reflecting the nuances of the peaches and your personal touch. The beauty of homemade jam is its adaptability and the satisfaction of creating something truly your own.
Nutritional Values and Benefits of Your Quick Peach Jam Recipe
While this is a sweet treat, it does offer some nutritional benefits, especially when compared to commercially produced jams often loaded with added sugars and preservatives. Please note that the exact nutritional information varies based on the specific peaches used and the amount of sugar added. This is an approximate nutritional profile per serving (about 1 tablespoon):
- Calories: Approximately 50-70 calories
- Protein: Minimal
- Fat: Negligible
- Carbohydrates: Primarily from sugar and natural fruit sugars
- Fiber: A modest amount from the peaches themselves
- Vitamins: Peaches are a good source of Vitamin C and Vitamin A.
Peaches are a good source of antioxidants, which contribute to overall health. The lemon juice adds Vitamin C, further enhancing the nutritional profile. However, remember that this is a high-sugar food, so it’s important to enjoy it in moderation. This jam offers a more natural sweetness compared to commercially produced versions laden with refined sugars and additives. It’s a balanced treat that allows you to indulge in the sweetness while keeping some healthy elements of the fruit intact.
FAQs
How long does this Quick Peach Jam Recipe take to make?
Can I use frozen peaches for this Quick Peach Jam Recipe?
How long will my Quick Peach Jam Recipe last?
What happens if my jars don’t seal properly?
Can I adjust the sweetness in this Quick Peach Jam Recipe?
Is this Quick Peach Jam Recipe suitable for canning beginners?
Conclusion
This Quick Peach Jam Recipe is a delightful blend of speed, simplicity, and deliciousness. It’s a recipe that empowers you to capture the essence of summer in a jar. From the vibrant color to the burst of sweet-tart flavor, this jam is a culinary masterpiece achievable even for the busiest of cooks. Remember the tips and tricks shared, and don’t hesitate to experiment with variations based on your taste preferences. Share your creations and experiences with us in the comments below! Don’t forget to pin this recipe to your Pinterest board for future reference. Check out our Pinterest page for more inspiration! Now, go forth and make some delicious jam! For even more delectable options, explore our other recipes on Noeli’s Recipes website.

Quick & Easy Peach Jam
Ingredients
Equipment
Method
- Wash, peel, and slice the peaches. Blanch in boiling water for 30 seconds, then plunge into ice water to easily remove skins.
- In a large saucepan, combine the sliced peaches, sugar, lemon juice, and cinnamon (if using). Stir well to coat the peaches.
- Bring the mixture to a rolling boil over medium-high heat, stirring frequently to prevent sticking.
- Reduce heat to medium-low and simmer, stirring occasionally, for 15-20 minutes, or until the jam thickens. It should coat the back of a spoon.
- While the jam cooks, sterilize jars and lids by boiling them in water for 10 minutes. Let air dry.
- Ladle the hot jam into the sterilized jars, leaving 1/4 inch headspace. Wipe rims clean.
- Seal jars with lids and rings. Process in a boiling water bath for 10 minutes for long-term storage (optional).
- Cool completely. Check seals; lids should be concave. Store in a cool, dark place.


