Indulge in the irresistible combination of creamy cheesecake and rich salted caramel with this decadent Salted Caramel Cheesecake recipe. This recipe isn’t just about creating a delicious dessert; it’s about crafting an experience. Imagine the first bite: the crisp graham cracker crust giving way to the luxuriously smooth cheesecake filling, all topped with a swirl of sweet and salty salted caramel. It’s a symphony of textures and flavors that will leave you craving more. This Salted Caramel Cheesecake is perfect for special occasions, holidays, or simply treating yourself to a moment of pure indulgence. Whether you’re a seasoned baker or a kitchen novice, this recipe is designed to be achievable, guiding you step-by-step to create a show-stopping dessert that will impress even the most discerning palates. Get ready to embark on a culinary adventure that will tantalize your taste buds and leave you feeling utterly satisfied.
Why You’ll Love This Salted Caramel Cheesecake Recipe
This Salted Caramel Cheesecake recipe is more than just a dessert; it’s an experience. What sets it apart from other cheesecake recipes? Let’s delve into the reasons why this recipe will quickly become a favorite in your recipe book:
- Unbeatable Flavor Combination: The classic tanginess of the cheesecake perfectly complements the rich sweetness of the homemade salted caramel. The subtle saltiness adds a surprising complexity that elevates the entire dessert to a new level. It’s the perfect balance of sweet and salty, creating an unforgettable taste sensation.
- Easy-to-Follow Instructions: Even if you’re a beginner baker, this recipe’s detailed instructions and helpful tips will guide you through every step. You’ll be amazed at how simple it is to create a restaurant-quality dessert at home.
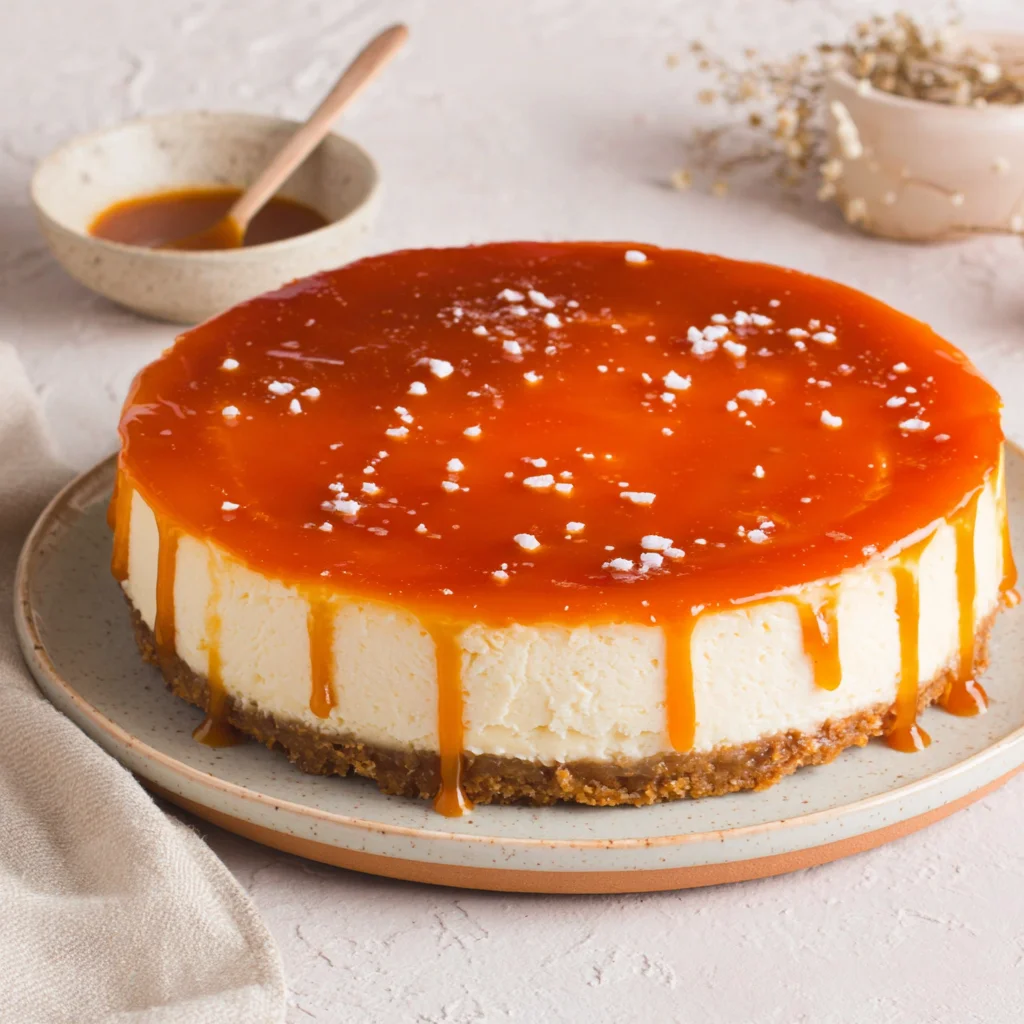
- Impressive Presentation: This Salted Caramel Cheesecake is a showstopper. Its beautiful layers of golden-brown crust, creamy filling, and glossy caramel topping make it perfect for any occasion, from intimate gatherings to grand celebrations. It’s a dessert that looks as delicious as it tastes.
- Homemade is Always Better: Making your own salted caramel and cheesecake filling ensures the highest quality ingredients and control over the sweetness and saltiness. You can adjust the recipe to your liking and create a perfectly personalized dessert.
- Make-Ahead Convenience: This cheesecake is best served after chilling overnight, allowing the flavors to meld together beautifully. This makes it incredibly convenient for prepping ahead of time for parties or special events. Just bake it, chill it, and enjoy!
Beyond the incredible taste and ease of preparation, this Salted Caramel Cheesecake offers a sense of accomplishment. Baking something this delicious from scratch is incredibly rewarding, and the pride you’ll feel presenting this masterpiece is unparalleled. It’s a recipe that fosters a sense of connection to the process and the joy of creating something extraordinary.
Why You Should Try This Salted Caramel Cheesecake Recipe
In a world filled with pre-made desserts and convenience foods, there’s something truly special about making something delicious from scratch. This Salted Caramel Cheesecake recipe isn’t just about the delicious end result; it’s about the journey and the satisfaction of creating something beautiful and delicious with your own hands. Here’s why you should give it a try:
- Impress Your Guests: This cheesecake is a guaranteed crowd-pleaser. Its unique flavor combination and elegant presentation will impress your friends and family, making you the star baker of any gathering. It’s a dessert that sparks conversation and creates lasting memories.
- Perfect for Any Occasion: Whether it’s a birthday, holiday, or simply a Tuesday night, this Salted Caramel Cheesecake is the perfect dessert for any occasion. Its rich flavors and satisfying texture make it suitable for any celebration or a quiet night in.
- High-Quality Ingredients: You’ll be using fresh, high-quality ingredients to create this masterpiece. This ensures a superior taste and texture that you simply won’t find in store-bought cheesecakes.
- A Skill-Building Experience: Making this cheesecake will help hone your baking skills. You’ll learn how to make a perfect crust, a smooth and creamy filling, and a rich, decadent salted caramel sauce. It’s a great way to improve your culinary confidence.
- A Delicious Treat: Let’s face it, sometimes you just deserve a delicious treat. This Salted Caramel Cheesecake is the perfect way to indulge your sweet tooth and reward yourself with a truly unforgettable dessert.
This Salted Caramel Cheesecake isn’t just a recipe; it’s an invitation to create a memorable experience. It’s a chance to connect with the culinary arts, impress loved ones, and savor a truly remarkable dessert. Don’t just bake a cheesecake; bake a story.
Ingredients and Necessary Utensils for Your Salted Caramel Cheesecake
Gathering the right ingredients and tools is key to baking a perfect Salted Caramel Cheesecake. Using high-quality ingredients will greatly enhance the overall flavor and texture of your dessert.
Ingredients:
- For the Crust:
- 1 ½ cups (150g) graham cracker crumbs – Choose high-quality graham crackers for a richer flavor. You can also use digestive biscuits for a similar result.
- ¼ cup (50g) granulated sugar – Granulated sugar provides the perfect sweetness for the crust.
- 6 tablespoons (3 ounces) unsalted butter, melted – Unsalted butter allows you to control the saltiness of the final product.
- For the Cheesecake Filling:
- 3 (8 ounce) packages cream cheese, softened – Make sure your cream cheese is softened to room temperature for a smooth and creamy filling. Using full-fat cream cheese is recommended.
- 1 ¾ cups (350g) granulated sugar – Adjust the sugar quantity to your preference for sweetness.
- ¼ cup (60ml) sour cream – Sour cream adds richness and tanginess to the cheesecake filling.
- 2 teaspoons vanilla extract – Pure vanilla extract is always best for its rich flavor.
- ¼ teaspoon salt – A touch of salt enhances the overall flavor of the cheesecake.
- 4 large eggs – Large eggs are essential for achieving the correct consistency of the filling.
- For the Salted Caramel Topping:
- 1 cup (200g) granulated sugar – Use granulated sugar for the best caramel texture.
- ¼ cup (60ml) water – Water helps the sugar dissolve evenly and prevent burning.
- ½ cup (120ml) heavy cream – Heavy cream creates a rich and creamy caramel sauce. Do not substitute with milk.
- 4 tablespoons (2 ounces) unsalted butter, cut into pieces – Unsalted butter adds richness and flavor to the caramel.
- ¼ teaspoon sea salt – Sea salt adds a delightful salty crunch and balances the sweetness of the caramel.
Necessary Utensils:
- 9-inch springform pan – A springform pan is essential for easily removing the cheesecake from the pan.
- Large bowl – For mixing the cheesecake filling.
- Medium bowl – For preparing the crust and the caramel.
- Hand mixer or stand mixer – For creaming the cream cheese and sugar.
- Measuring cups and spoons – For accurate ingredient measurements.
- Rubber spatula or wooden spoon – For scraping down the sides of the bowl.
- 9×13 inch baking pan (or larger) – For the water bath.
- Food processor (optional) – For making the graham cracker crumbs quickly.
- Parchment paper – To line the bottom of the springform pan to prevent sticking.
- Wire rack – For cooling the cheesecake.
- Medium saucepan – For making the salted caramel.
- Whisk – For stirring the caramel.
Investing in high-quality utensils will make the baking process much smoother and more enjoyable. Don’t hesitate to invest in good equipment for optimal results!
Detailed Recipe Steps for the Perfect Salted Caramel Cheesecake
Following these step-by-step instructions will help you create a delicious Salted Caramel Cheesecake.
Make the Crust:
- Preheat oven to 350°F (175°C). Ensure your oven is properly preheated for even baking.
- Make the graham cracker crumbs: If using whole graham crackers, pulse them in a food processor until finely ground. Alternatively, place them in a zip-top bag and crush them with a rolling pin.
- Combine dry ingredients: In a medium bowl, combine the graham cracker crumbs and granulated sugar.
- Add melted butter: Gradually add the melted butter and mix thoroughly until the crumbs are evenly moistened.
- Press into pan: Press the crumb mixture firmly into the bottom of your 9-inch springform pan. Use the bottom of a measuring cup or your fingers to create an even layer.
- Bake: Bake for 8-10 minutes, or until lightly golden brown. Keep a close eye on it, as ovens vary.
- Cool completely: Let the crust cool completely before adding the cheesecake filling. This prevents the filling from cracking.
Make the Cheesecake Filling:
- Beat cream cheese and sugar: In a large bowl, beat the softened cream cheese and granulated sugar together until smooth and creamy. Use a hand mixer or stand mixer for best results. **Scrape down the sides of the bowl frequently.**
- Add wet ingredients: Beat in the sour cream, vanilla extract, and salt until well combined.
- Add eggs one at a time: Add the eggs one at a time, beating well after each addition. **Do not overmix.** Overmixing incorporates too much air, which can lead to cracks in the cheesecake.
Make the Salted Caramel:
- Combine sugar and water: In a medium saucepan over medium heat, combine the granulated sugar and water. **Do not stir.**
- Cook until amber: Cook, swirling the pan occasionally, until the sugar is melted and a deep amber color. **Be extremely careful, as the caramel will be very hot.** Use a candy thermometer to monitor the temperature; it should reach approximately 320°F (160°C).
- Add cream carefully: Carefully pour in the heavy cream (it will bubble up). **Whisk constantly** to prevent splattering and lumps.
- Stir in butter and salt: Remove from heat and stir in the butter and sea salt until melted and combined. Let cool slightly before using.
Assemble and Bake the Cheesecake:
- Pour filling over crust: Pour the cheesecake filling over the cooled crust.
- Add caramel topping: Carefully pour the cooled salted caramel sauce over the top of the cheesecake filling. You can swirl it gently with a knife or toothpick for a marbled effect.
- Create a water bath: Place the springform pan in a larger roasting pan. Pour enough hot water into the larger pan to come halfway up the sides of the springform pan. This creates a water bath for even baking and prevents cracking.
- Bake: Bake in a preheated oven at 350°F (175°C) for 50-60 minutes, or until the cheesecake is set around the edges but still slightly jiggly in the center. **The center will firm up as it cools.**
- Cool in oven: Turn off the oven and leave the cheesecake in the oven with the door slightly ajar for 1 hour. This helps to prevent cracking.
- Cool completely: Remove the cheesecake from the oven and let it cool completely on a wire rack. This process is crucial for preventing cracks.
- Refrigerate: Once cooled, refrigerate for at least 4 hours, or preferably overnight, before serving. This allows the flavors to meld and the cheesecake to set completely.
Tips and Variations for Your Salted Caramel Cheesecake
Here are some tips and variations to help you customize your Salted Caramel Cheesecake:
- For a Gluten-Free Crust: Use gluten-free graham cracker crumbs or make your own crust using almond flour, pecans, or other gluten-free alternatives. Check out our Empanada Recipe for inspiration on gluten-free pastry ideas.
- For a Vegan Salted Caramel Cheesecake: Substitute the cream cheese with a vegan cream cheese alternative and the eggs with a flax egg substitute (1 tablespoon of flaxseed meal mixed with 3 tablespoons of water). There are many vegan salted caramel sauces available commercially, or you can find vegan recipes online.
- Add Chocolate Swirls: Incorporate melted dark chocolate into the cheesecake filling for a delicious twist. Simply drizzle melted chocolate over the filling before adding the caramel.
- Spice it Up: Add a pinch of cinnamon, nutmeg, or cardamom to the filling for a warm and inviting flavor.
- Different Crust Options: Experiment with different crusts like a digestive biscuit crust or a shortbread cookie crust. Our Pan con Tomate recipe offers interesting ideas on utilizing crusts.
- Prevent Cracks: Ensure your cream cheese is at room temperature, don’t overmix the batter, and use a water bath to bake the cheesecake evenly.
- Don’t Overbake: The cheesecake should be set around the edges but still slightly jiggly in the center when done. The center will firm up as it cools.
Nutritional Values and Benefits of Salted Caramel Cheesecake
While Salted Caramel Cheesecake is undeniably indulgent, let’s look at the nutritional aspects and potential benefits of its components:
Note: Nutritional values are approximate and can vary based on specific ingredients and portion sizes. This information is for general guidance only and should not be considered medical advice.
A typical slice of Salted Caramel Cheesecake contains a high amount of calories, primarily from fat and sugar. The exact nutritional breakdown will depend on the specific recipe and ingredients used. However, we can generally highlight the following:
- Cream Cheese: Provides calcium and protein, although it is high in fat.
- Graham Crackers: Offer some fiber and complex carbohydrates, depending on the type used.
- Sour Cream: Provides protein and calcium, but is also high in fat.
- Eggs: Are a good source of protein and essential nutrients.
- Butter: Provides fat-soluble vitamins. However, it’s important to consume in moderation.
- Sugar: Provides energy but should be consumed in moderation due to its impact on blood sugar levels.
To make this dessert slightly healthier, you could consider using whole wheat graham crackers for the crust, reduced-fat cream cheese, or a sugar substitute like stevia or erythritol (although this may affect the final taste and texture). However, remember that this is still a dessert, and it is best enjoyed in moderation as part of a balanced diet. It’s a special treat to enjoy occasionally.
FAQs
How long does Salted Caramel Cheesecake need to chill?
Can I make the salted caramel ahead of time?
What happens if my cheesecake cracks?
How do I know when my Salted Caramel Cheesecake is done?
Can I freeze Salted Caramel Cheesecake?
Conclusion: Your Salted Caramel Cheesecake Journey Awaits!
Creating this Salted Caramel Cheesecake is a journey, not just a recipe. It’s about the careful blending of ingredients, the anticipation as it bakes, and the ultimate reward of sharing a slice of pure deliciousness. Remember the importance of high-quality ingredients, careful measuring, and following the steps diligently. The end result a creamy, rich, and unforgettable dessert is well worth the effort. Don’t forget to share your baking experience and photos on social media! Tag us and let us know how your Salted Caramel Cheesecake turned out. Check out our other recipes at Noelia’s Recipes for more culinary inspiration! Happy baking!
Share this recipe with your friends and family, and let them experience the magic of homemade Salted Caramel Cheesecake. We encourage you to leave a comment below and share your thoughts, experiences, and any variations you tried. And most importantly, enjoy every decadent bite!

Salted Caramel Cheesecake
Ingredients
Equipment
Method
- Preheat oven to 350°F (175°C). Combine graham cracker crumbs, sugar, and melted butter. Press into the bottom of a 9-inch springform pan. Bake for 8-10 minutes.
- Beat cream cheese and sugar until smooth. Beat in sour cream, vanilla, and salt. Add eggs one at a time, mixing well after each addition.
- In a saucepan, combine sugar and water. Cook, swirling occasionally, until deep amber. Carefully pour in heavy cream (it will bubble). Whisk until smooth.
- Remove from heat; stir in butter and sea salt. Let cool slightly.
- Pour cheesecake filling over cooled crust. Pour cooled caramel sauce over the top. Swirl gently if desired.
- Place springform pan in a larger pan; pour hot water halfway up the sides. Bake for 50-60 minutes, or until set around the edges but slightly jiggly in the center.
- Turn off oven; leave cheesecake in oven with door ajar for 1 hour. Cool completely, then refrigerate for at least 4 hours, or preferably overnight.


