There are few desserts that conjure up the feeling of pure, unadulterated decadence quite like a perfectly executed Chocolate Silk Pie Recipe. This is not just any chocolate pie; it is a velvety cloud of rich, dark chocolate filling suspended over a perfectly crisp, buttery Graham cracker crust, all crowned with airy homemade whipped cream. It is the dessert of dreams a showstopper that requires surprisingly little actual cooking, relying instead on technique and patience (mostly chilling time!).
For those who adore that rich, deep chocolate flavor combined with a texture so impossibly light it feels like air, this guide is your key to unlocking dessert perfection. Forget the heavy, gelatinous pies of the past. The defining characteristic of a true silk pie is the marriage of copious amounts of whipped butter, sugar, and high-quality chocolate, which results in a filling that melts instantly on the tongue. We promise a comprehensive, step-by-step approach to mastering the technique, guaranteeing success whether you are baking for the holidays or simply satisfying a midnight craving. Let’s dive into making the most luxurious Chocolate Silk Pie Recipe you will ever taste.
Why This Chocolate Silk Pie Recipe is a Dessert Masterpiece
What elevates this specific Chocolate Silk Pie Recipe above standard chocolate cream pies or mousse cakes? It comes down to a few critical factors: texture, ingredient quality, and the delightful contrast between the components. Understanding these elements is key to appreciating why this recipe is truly a masterpiece worth the effort.
The Magic of the Velvet Texture
Unlike baked fillings or those stabilized heavily with gelatin, the “silk” texture is achieved primarily through aeration a process called creaming. We take softened butter and beat it with powdered sugar until it triples in volume and becomes incredibly pale and fluffy. When eggs are added later (and beaten for a crucial, extended amount of time), they incorporate air and emulsify the fat and sugar, turning the mixture into something impossibly light. This process ensures the finished filling is not dense or oily, but rather smooth and almost cloud-like. When chilled, this aeration holds, giving the pie its signature structure and melt-in-your-mouth quality.
A Symphony of Contrasts
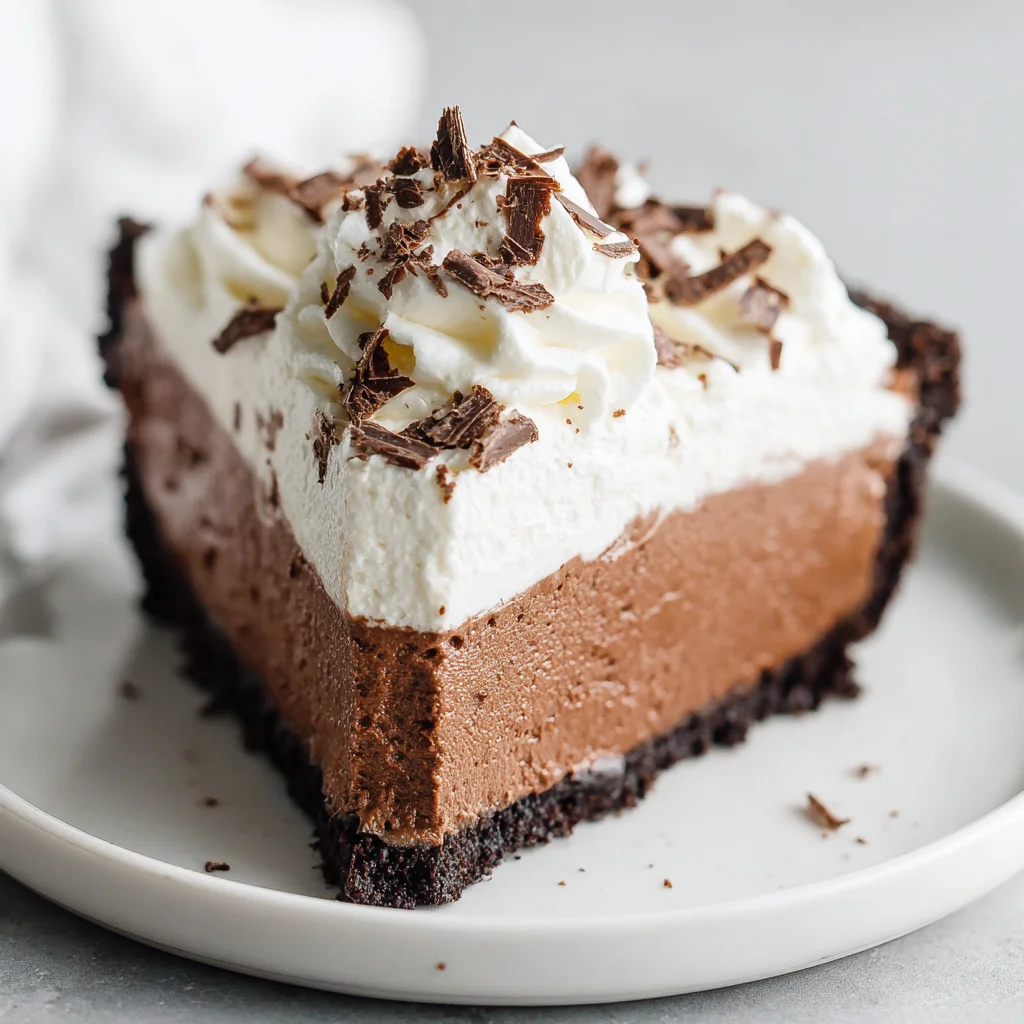
The best desserts offer textural variety. This Chocolate Silk Pie Recipe delivers spectacularly. You start with the satisfying crunch and sweetness of the baked Graham cracker crust. This provides a necessary counterpoint to the soft, cool, and ultra-smooth filling. Finally, the homemade whipped cream topping freshly sweetened and lightly flavored with vanilla adds one more layer of delicate airiness. This three-part harmony makes every bite exciting and prevents the richness of the chocolate from becoming overwhelming. It’s the perfect balance of richness and lightness.
Superior Ingredient Quality
Because the chocolate is not baked, its flavor remains front and center. Using a good quality semi-sweet chocolate is non-negotiable for success. If you use sub-par chocolate, you will taste it immediately. Similarly, using pure vanilla extract and real, unsalted butter ensures a clean, rich flavor profile. When you follow this precise Chocolate Silk Pie Recipe, you are building a dessert where every single ingredient shines, making the final result far superior to anything store-bought.
The Simple Joy of Making Your Own Chocolate Silk Pie (And Why You Should Try It Today)
While the name sounds fancy, making a Chocolate Silk Pie Recipe at home is surprisingly accessible and offers huge culinary rewards. If you have a stand mixer, you already possess the most important tool for success. The process is broken down into easily manageable stages, allowing even novice bakers to achieve professional-level results.
Control Over Richness and Sweetness
One major advantage of baking at home is customizing the flavor. Do you prefer darker, more intense chocolate? You can slightly adjust the ratio of semi-sweet to bittersweet chocolate (though ensure the total weight remains the same). While the recipe is perfectly balanced as written, knowing exactly what ingredients are going into your dessert pure butter, high-quality cocoa, and fresh cream provides peace of mind and allows you to cater to your exact preferences. If you love rich, dark flavors, consider dusting the top with unsweetened Dutch-process cocoa instead of chocolate shavings for an extra bitter punch that balances the sweetness perfectly.
A Perfect Make-Ahead Dessert
Hosting a dinner party? Holiday baking looming? This Chocolate Silk Pie Recipe is your best friend. In fact, it requires a minimum of four hours of chilling time, and truly shines when allowed to set overnight. This means you can complete the entire pie (minus the whipped cream topping) the day before your event. This frees up crucial time on the day of serving, allowing you to focus on main courses or other complex preparations. For more easy make-ahead Spanish dessert ideas, check out our guide to Basque Cheesecake, another fantastic dessert that benefits from chilling time.
The Safety Precaution: Using Pasteurized Eggs
A key point of this traditional silk pie is that the eggs are not cooked. They are crucial for creating the emulsion and structure. For modern home baking, we strongly recommend using pasteurized eggs. Pasteurization involves heating the eggs just enough to kill any potential bacteria without actually cooking them, making them entirely safe for use in raw preparations like this filling. You can easily find these cartons in the refrigerated section of most large grocery stores. If pasteurized eggs are unavailable, you should seek out extremely fresh, reliable, locally sourced eggs or use a specific recipe variation (like an eggless version, discussed later) to ensure food safety.
Ingredients and Essential Tools for the Perfect Chocolate Silk Pie Recipe (The Foundation of Success)
Success with any baking project, especially one relying on precise technique like the Chocolate Silk Pie Recipe, starts with having the right ingredients prepped and the necessary tools at hand. Quality truly matters here, particularly in the chocolate and butter.
For the Crust: Simple and Sturdy
The crust must be sturdy enough to hold the light filling without crumbling. We use a classic Graham cracker base.
- 1 1/2 cups Graham cracker crumbs (about 12 full sheets): Ensure the crumbs are fine. If grinding yourself, use a food processor for a consistent, sandy texture.
- 1/4 cup granulated sugar: Adds a touch of sweetness to enhance the natural flavor of the crackers.
- 6 tablespoons unsalted butter, melted: Use unsalted butter so you control the salt content. The melted butter binds the crumbs firmly.
For the Chocolate Silk Filling: The Heart of the Pie
This section demands attention to detail regarding temperature and quality.
- 4 ounces good quality semi-sweet chocolate, finely chopped: Quality is paramount. Choose a chocolate bar (like Ghirardelli or Guittard) over chocolate chips, as chips often contain stabilizers that prevent them from melting as smoothly. Chopping finely ensures quick, even melting.
- 1 cup (2 sticks) unsalted butter, softened to room temperature: This is critical. The butter must be truly soft not melted, but easily yielding to a gentle poke. Cold butter will not whip properly and will result in a grainy, dense filling.
- 1 1/2 cups powdered sugar, sifted: Sifting prevents lumps, which are difficult to remove once combined with the whipped butter.
- 1 teaspoon pure vanilla extract: Use pure extract for the best flavor lift.
- 2 large eggs (Pasteurized are highly recommended): As discussed, safety is key since these are not cooked. They must also be at room temperature to incorporate fully into the butter mixture without causing it to seize.
- 2 tablespoons cold heavy whipping cream: Helps smooth the final texture and aids in emulsification.
For the Whipped Cream Topping: The Finishing Touch
Homemade whipped cream is essential; it’s far superior to aerosol cans or frozen toppings.
- 1 cup cold heavy whipping cream: Must be very cold to whip to maximum volume.
- 3 tablespoons powdered sugar, sifted: Adjust to taste, but this provides a perfect subtle sweetness.
- 1/2 teaspoon pure vanilla extract: Enhances the flavor.
- Chocolate shavings or cocoa powder: For garnish.
Essential Utensils and Tools
While you can make this recipe with elbow grease, using a stand mixer makes the “silk” texture achievable with minimal effort. The extended whipping time is much easier with mechanized help.
- 9-inch Pie Plate: Standard size. Glass or ceramic works best.
- Food Processor (optional but helpful): For grinding Graham crackers and making quick work of chopping chocolate.
- Stand Mixer or Electric Hand Mixer: Absolutely essential for aerating the butter and eggs.
- Rubber Spatula or Offset Spatula: Necessary for scraping down the bowl and smoothing the filling.
- Wire Rack: For cooling the crust completely.
- Sifter/Fine Mesh Sieve: Crucial for sifting powdered sugar to ensure a smooth filling.
Investing in these basic tools and high-quality ingredients ensures that your homemade Chocolate Silk Pie Recipe is professional-grade every time.
Step-by-Step Instructions: Mastering the Chocolate Silk Pie Recipe
The magic of this Chocolate Silk Pie Recipe lies in following the sequence and respecting the temperatures. Do not rush the chilling or the whipping steps!
STEP 1: PREPARE THE CRUST
- Preheat: Preheat your oven to 350°F (175°C). Lightly grease a 9-inch pie plate.
- Combine Dry Ingredients: In a medium bowl, combine the Graham cracker crumbs and the 1/4 cup of granulated sugar. Stir them together thoroughly.
- Add Fat: Pour the 6 tablespoons of melted butter over the crumb mixture. Use a fork or spatula to mix until all crumbs are evenly moistened and resemble wet sand.
- Press and Compact: Press the crumb mixture firmly and evenly into the bottom and up the sides of the prepared pie plate. Use the bottom of a measuring cup or glass to help compact the crust tightly. A dense crust prevents the filling from softening it later.
- Bake and Cool: Bake the crust for 8 to 10 minutes, or until it is lightly fragrant and set. Remove the crust from the oven and allow it to cool completely on a wire rack while you prepare the filling. The crust must be 100% cool before adding the filling.
STEP 2: MELT AND COOL THE CHOCOLATE
- Melt: Place the 4 ounces of finely chopped semi-sweet chocolate into a small, heat-proof bowl. Microwave the chocolate in 30-second intervals, stirring well after each interval, until the chocolate is completely smooth and melted.
- Cool Slightly: Set the melted chocolate aside and allow it to cool slightly, ensuring it remains liquid but is not hot to the touch. If the chocolate is too hot, it will melt the whipped butter base and ruin the filling’s texture.
STEP 3: CREATE THE BUTTER BASE (The Silk Secret)
This is the most critical step for achieving the signature “silk.”
- Whip the Butter: In the bowl of a stand mixer fitted with the paddle attachment, beat the softened 1 cup of butter on medium-high speed for 3 to 5 minutes. The butter must become very light in color (pale yellow) and significantly fluffy. Scrape down the sides of the bowl frequently to ensure even whipping.
- Add Sugar: Gradually add the 1 1/2 cups of sifted powdered sugar to the whipped butter, mixing on low speed until combined, then increase the speed to medium-high. Continue beating for another 2 to 3 minutes until the mixture is airy and incredibly light.
STEP 4: WHIP THE SILK FILLING AND ADD FLAVOR
Introducing the air and the flavor is a delicate process.
- Add Vanilla: Reduce the mixer speed to low. Add the vanilla extract.
- Add Eggs Slowly (Crucial Step): Add the pasteurized eggs, one at a time. After adding the first egg, beat for a full 1 minute. Repeat this exact timing for the second egg. This extended beating time is crucial for incorporating enough air and emulsifying the raw eggs completely, which is what gives the pie its light, fluffy, and silky texture.
- Incorporate Cream: Pour in the 2 tablespoons of cold heavy cream and mix until just incorporated.
- Fold in Chocolate: Turn the mixer speed to low and slowly drizzle the slightly cooled melted chocolate into the butter and egg mixture. Mix only until the chocolate streaks disappear and the filling is uniform in color, avoiding overmixing. Overmixing at this stage can deflate the air you just whipped in.
STEP 5: ASSEMBLE AND CHILL THE PIE
- Fill the Crust: Carefully spoon the prepared Chocolate Silk Pie Recipe filling into the completely cooled Graham cracker crust. Use an offset spatula to smooth the top of the filling, creating an even, flawless layer.
- Cover and Chill: Cover the pie dish loosely with plastic wrap, ensuring the plastic does not touch the surface of the filling (this prevents condensation marks). Refrigerate the pie for a minimum of 4 hours, but preferably overnight, to allow the filling to set completely firm. A fully chilled pie slices perfectly. For other decadent chilling-required desserts, why not try our creamy Spanish rice pudding?
STEP 6: PREPARE THE TOPPING AND SERVE
- Whip the Cream: In a clean, chilled mixing bowl, combine the 1 cup of cold heavy whipping cream, 3 tablespoons of sifted powdered sugar, and 1/2 teaspoon of vanilla extract. Whip the ingredients on high speed until stiff peaks form. Watch closely! Overbeating will result in butter.
- Garnish: Just before serving, dollop or pipe the whipped cream topping onto the chilled pie.
- Final Touch: Garnish the pie with chocolate shavings or a light dusting of cocoa powder. Store any leftovers tightly covered in the refrigerator.
Tips, Troubleshooting, and Delicious Chocolate Silk Pie Variations
Even though this Chocolate Silk Pie Recipe is straightforward, there are a few common pitfalls. Mastering these tips will ensure a silky-smooth finish every time.
Troubleshooting Common Mistakes
- My Filling is Grainy: This almost always happens if the butter was too cold or the powdered sugar was not sifted. If the filling feels grainy after adding the eggs, you must keep whipping. If using a stand mixer, let it run on medium speed for an additional 2–3 minutes. The friction and air incorporation might smooth out the undissolved sugar granules.
- My Filling is Runny or Separated: This occurs if the butter was too warm, or if the melted chocolate was too hot when added, causing the butter emulsion to break. Ensure the butter is only soft, not shiny or partially melted. If the mixture looks separated, you can try adding a splash (about 1 teaspoon) of ice-cold cream and beating vigorously for 30 seconds to try and bring the emulsion back together.
- My Crust Crumbled When I Sliced It: You likely did not compact the crumbs enough before baking, or you didn’t let the crust cool completely. The pressing step is crucial!
Delicious Chocolate Silk Pie Recipe Variations
This classic recipe serves as a perfect base for creative twists:
- Gluten-Free Crust: Easily substitute the Graham cracker crumbs with gluten-free vanilla wafer crumbs or almond flour/cocoa powder blend. The ratio of fat to crumb often stays the same.
- Oreo Crust Variation: Replace Graham crackers with 1 1/2 cups of Oreo crumbs (filling removed) and reduce the melted butter slightly (to about 5 tablespoons) since Oreos already contain fat.
- Espresso Silk Pie: Add 1 teaspoon of instant espresso powder or fine coffee grounds to the powdered sugar mixture. Coffee enhances the flavor of chocolate immensely without making the pie taste overtly like coffee.
- Vegan Chocolate Silk Pie: This is trickier due to the role of raw eggs. Use a high-quality vegan butter substitute and replace the pasteurized eggs with a whipped coconut cream and refined coconut oil blend for structure, often stabilized with agar-agar or cornstarch.
Ingredient Alternatives for the Filling
While sticking to the recipe is best, here are quick swaps:
- Chocolate Type: For a deeper, darker pie, use 3 ounces of semi-sweet and 1 ounce of good quality bittersweet chocolate (around 70% cocoa solids).
- Flavor Extract: Swap out vanilla for 1/2 teaspoon of peppermint extract for a holiday twist, or a drop of almond extract for complex depth.
For more baking inspiration and dessert styling ideas, be sure to follow my board dedicated to luxurious treats on Pinterest: Noelia Recipes Desserts.
Decadence Without Guilt? Nutritional Insights for Your Chocolate Silk Pie
The Chocolate Silk Pie Recipe is undoubtedly a rich dessert, meant for enjoyment and celebration. While it is high in fat and sugar due to the whipped butter and powdered sugar, understanding the components allows for informed enjoyment. This recipe yields 8 generous servings.
Estimated Nutritional Profile (Per Serving, based on 8 servings):
Please note that these values are estimates and can vary based on the specific brand of chocolate and butter used.
- Calories: 450–550 kcal
- Total Fat: 35–45g (Saturated Fat is high due to butter)
- Carbohydrates: 35–45g (High due to sugar and Graham crackers)
- Sugars: 25–35g
- Protein: 4–6g
The Benefits of Good Quality Chocolate
While the pie itself is a treat, the star ingredient high-quality semi-sweet chocolate does offer notable benefits:
- Antioxidants: Semi-sweet chocolate (especially if it contains a higher percentage of cocoa solids) is packed with antioxidants, particularly flavonoids, which are linked to improved blood flow and reduced inflammation.
- Mood Booster: Chocolate contains compounds that can temporarily boost mood and reduce stress, making this pie literally a source of happiness!
- Minerals: Darker chocolate provides essential minerals like iron, magnesium, and copper.
Ultimately, this Chocolate Silk Pie Recipe should be enjoyed mindfully as a satisfying indulgence. The homemade nature ensures you are consuming high-quality fats (real butter) rather than hydrogenated oils often found in commercial desserts, making it a better treat when consumed in moderation.
Frequently Asked Questions (FAQs) about the Chocolate Silk Pie Recipe
We’ve gathered answers to the most common inquiries regarding the preparation and safety of this decadent dessert.
Is chocolate silk pie safe to eat because it contains raw eggs?
Traditional Chocolate Silk Pie Recipe requires eggs for aeration and texture, and they are not cooked. For safety, it is highly recommended to use pasteurized eggs, which have been gently heated to kill bacteria like salmonella without cooking the egg. If pasteurized eggs are not available, you should use an egg substitute designed for safe consumption.
What is the difference between French silk pie and a classic chocolate silk pie?
The names are often used interchangeably, and they share the same defining characteristics: a mousse-like filling made by whipping butter, powdered sugar, and eggs, resulting in a smooth, “silky” texture. A true French silk pie often uses cocoa powder rather than melted solid chocolate, though modern recipes frequently combine the two methods for depth of flavor, as we have in this Chocolate Silk Pie Recipe.
How long does a chocolate silk pie need to chill before serving?
The pie needs a minimum of 4 hours to chill, but for the very best results firm slices and perfect texture it should be refrigerated overnight (8 to 12 hours). The long chilling time allows the fat components to set completely, ensuring the slice holds its shape beautifully when cut.
Why did my chocolate filling turn grainy or separate?
Graininess usually stems from insufficiently sifted powdered sugar or cold butter that hasn’t fully emulsified during the whipping process. Separation (or a curdled look) often occurs if the melted chocolate was added while it was too hot, melting the structure you built in the whipped butter base.
Can I use store-bought crust for this Chocolate Silk Pie Recipe?
Yes, you can certainly save time by using a store-bought Graham cracker crust. However, for maximum flavor and sturdiness, it’s best to use the specified crust recipe and pre-bake it for 8 minutes. A homemade, baked crust provides a superior flavor and texture contrast to the silky filling.
How long does leftover chocolate silk pie last?
When stored tightly covered in the refrigerator, this pie will last for 3 to 4 days. Because it contains raw or pasteurized eggs, it is crucial to keep it chilled. For maximum quality, it is best eaten within two days of preparation.
Conclusion: The Velvety Reward of the Chocolate Silk Pie Recipe
The journey to perfecting the Chocolate Silk Pie Recipe is a rewarding one. From the satisfying crunch of the baked Graham cracker base to the transformative aeration of the butter and sugar, this recipe proves that simplicity, combined with precise technique, yields truly spectacular results. The long chilling time the hardest part of the entire process is merely a necessary rest before you are rewarded with a slice of pure, chocolate bliss.
This is more than just a dessert; it’s an experience. It’s the perfect centerpiece for celebrations, a soothing comfort on a gloomy day, and a testament to the luxurious potential of simple ingredients. Remember the key steps: use softened butter, sift the sugar, use pasteurized eggs, and beat for the full, crucial minute after each egg addition to achieve the signature silk texture. Once you master this method, you will never go back to any other chocolate pie.
We highly encourage you to set aside the time this week to try this decadent Chocolate Silk Pie Recipe. Whether you are seeking a simple Spanish appetizer, like our recipe for Tortilla de Patatas, or a complex dessert, quality ingredients and detailed instructions make all the difference. Bake this pie, share it with those you love, and let us know in the comments below what you thought of the finished product. Happy baking!
Decadent Homemade Chocolate Silk Pie
Ingredients
Equipment
Method
- Preheat your oven to 350°F (175°C). Lightly grease a 9-inch pie plate.
- In a medium bowl, combine the Graham cracker crumbs and the 1/4 cup of granulated sugar. Pour the 6 tablespoons of melted butter over the crumb mixture and mix until all crumbs are evenly moistened and resemble wet sand.
- Press the crumb mixture firmly and evenly into the bottom and up the sides of the prepared pie plate. Use the bottom of a measuring cup or glass to help compact the crust.
- Bake the crust for 8 to 10 minutes, or until it is lightly fragrant and set. Remove the crust from the oven and allow it to cool completely on a wire rack while you prepare the filling.
- Place the 4 ounces of finely chopped semi-sweet chocolate into a small, heat-proof bowl. Microwave the chocolate in 30-second intervals, stirring well after each interval, until the chocolate is completely smooth and melted (or use a double boiler).
- Set the melted chocolate aside and allow it to cool slightly, ensuring it remains liquid but is not hot to the touch.
- In the bowl of a stand mixer fitted with the paddle attachment, beat the softened 1 cup of butter on medium-high speed for 3 to 5 minutes. The butter must become very pale yellow, light, and significantly fluffy. Scrape down the sides of the bowl as needed.
- Gradually add the 1 1/2 cups of sifted powdered sugar to the whipped butter, mixing on low speed until combined, then increase the speed to medium-high. Continue beating for another 2 to 3 minutes until the mixture is airy and incredibly light.
- Reduce the mixer speed to low. Add the vanilla extract.
- Add the pasteurized eggs, one at a time, beating for a full 1 minute after each addition. This long beating time is crucial for incorporating enough air to achieve the signature light, fluffy, and silky texture.
- Pour in the 2 tablespoons of cold heavy cream and mix until just incorporated. Turn the mixer speed to low and slowly drizzle the slightly cooled melted chocolate into the butter and egg mixture. Mix only until the chocolate streaks disappear and the filling is uniform in color, avoiding overmixing.
- Carefully spoon the prepared chocolate silk filling into the completely cooled Graham cracker crust. Use an offset spatula to smooth the top of the filling, creating an even layer.
- Cover the pie dish loosely with plastic wrap. Refrigerate the pie for a minimum of 4 hours, but preferably overnight, to allow the filling to set completely firm.
- In a clean, chilled mixing bowl, combine the 1 cup of cold heavy whipping cream, 3 tablespoons of sifted powdered sugar, and 1/2 teaspoon of vanilla extract.
- Whip the ingredients on high speed until stiff peaks form. Just before serving, dollop or pipe the whipped cream topping onto the chilled pie.
- Garnish the pie with chocolate shavings or a light dusting of cocoa powder. Store any leftovers tightly covered in the refrigerator.


