Mastering the Art of Pressed Cookies for Festive Baking
There are few traditions as beloved during the holiday season as making delicate, crisp, and beautifully shaped Spritz Cookie. These classic butter cookies, whose name comes from the German word “spritzen,” meaning “to squirt” (referring to the action of pressing the dough), are the epitome of simple elegance. If you are looking for a reliable, perfectly balanced recipe that guarantees tender, buttery results and vibrant shapes, your search ends here. This guide will take you step-by-step through mastering the cookie press, ensuring your Spritz Cookie batch is the star of your next cookie platter.
Unlike roll-out sugar cookies, Spritz Cookie rely on precise technique and a cookie press to achieve their signature uniform appearance and fine crumb. We will cover the crucial details especially the necessity of ungreased baking sheets to make sure your dough releases cleanly every time. Prepare to fill your kitchen with the irresistible aroma of vanilla and butter. Whether you decorate them simply with sprinkles or use vibrant food coloring, this Spritz Cookie recipe is destined to become a cherished part of your annual baking ritual.
Why You’ll Love This Classic Spritz Cookie Recipe
If you have ever been intimidated by the cookie press, this foolproof recipe is designed to eliminate frustration and deliver consistent, spectacular results. The joy of creating dozens of perfectly formed tiny cookies in minutes is unmatched, and the flavor profile is pure, nostalgic perfection. Here is why this specific Spritz Cookie formulation stands out:
Unbeatable Texture and Flavor
The foundation of any great pressed cookie is the perfect balance of fats, sugars, and flour. Our recipe emphasizes high-quality butter and precise measurements, resulting in a cookie that is:
- Tender and Delicate: They practically melt in your mouth, thanks to the high butter content and minimal handling.
- Crisp Edges: Baking on ungreased sheets helps the cookie edges set quickly, providing a satisfying snap.
- Rich Buttery Taste: The combination of pure vanilla extract and the optional, yet highly recommended, almond extract deepens the classic flavor profile, making these Spritz Cookie incredibly addictive.
Furthermore, the high yield of this recipe means you will have plenty of cookies for every occasion. They hold their shape beautifully, making them ideal for elaborate decorating, dipping in chocolate, or simply dusting with colored sugars. For more inspiration on holiday desserts, check out how we perfect other sweet classics, such as this guide to making Tarta de Queso Vasca.
Ease of Preparation and Visual Appeal
While the cookie press may seem complex, the dough itself is incredibly fast to mix, provided you follow the golden rule: do not overmix the flour. The real beauty of the Spritz Cookie lies in the speed at which you can mass-produce intricate shapes:
- Rapid Shaping: Once the dough is loaded, you can press a full sheet pan in just a few minutes.
- Customization: With a set of diverse cookie press discs from Christmas trees and wreaths to flowers and hearts you can easily tailor the shapes to any season or celebration.
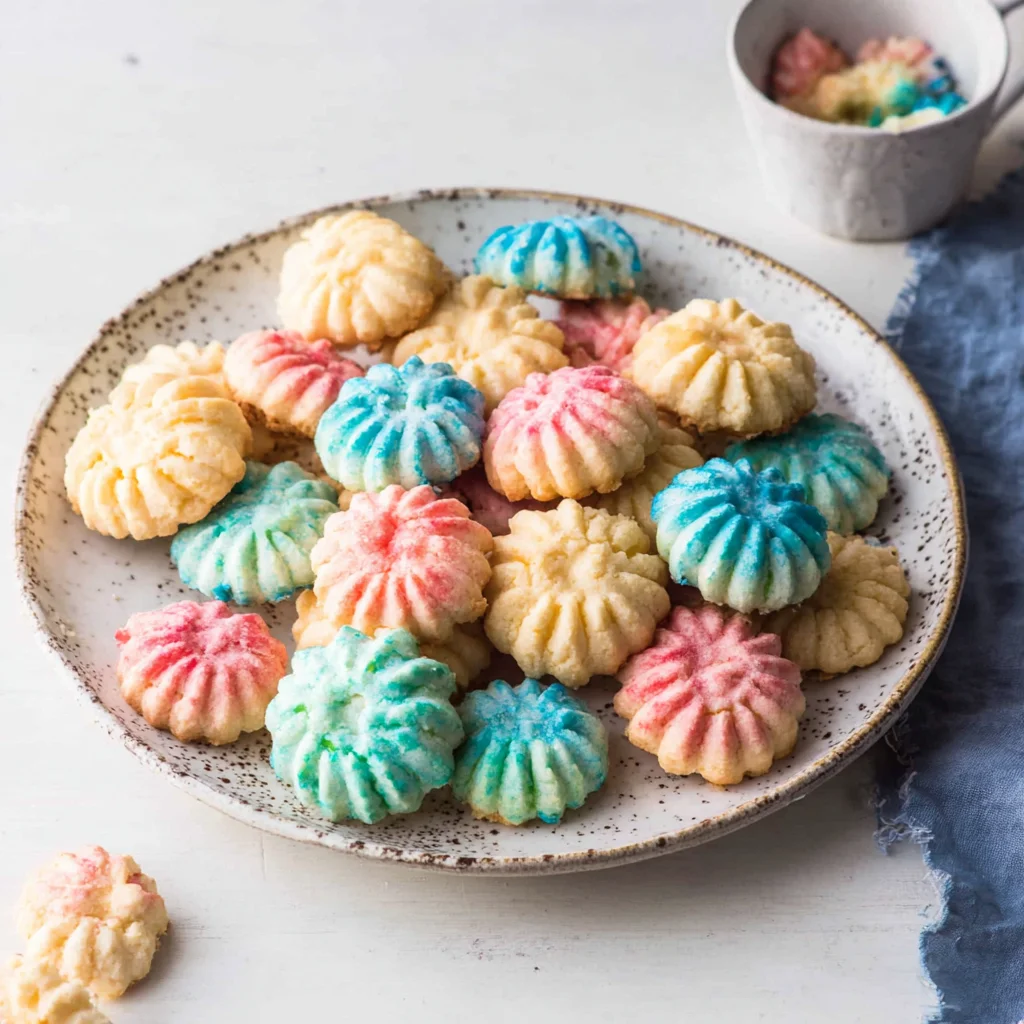
- Vibrant Coloring: The dough is a blank canvas. By incorporating food coloring, you can create bright reds, greens, or even swirling multi-colored designs that make these cookies visually stunning. This feature is especially popular for holiday baking and creating unique displays.
This recipe is designed for maximum efficiency and aesthetic appeal, proving that gorgeous, handcrafted cookies don’t require hours of tedious rolling and cutting. The Spritz Cookie is truly a testament to simple baking technology combined with superior ingredients.
Why You Should Try This Spritz Cookie Recipe Now
Many home bakers rely on the basic butter cookie recipe, but achieving the perfect Spritz Cookie that holds its shape and presses smoothly requires specific ingredient ratios. This recipe delivers the precise consistency needed to glide through the press without collapsing or sticking a common issue in inferior recipes. By following our detailed instructions, you will gain confidence in using specialized baking equipment and elevate your holiday production.
The Critical Role of the Cookie Press Technique
Successfully baking Spritz Cookie is fundamentally about the interaction between the dough and the baking surface. This is the key differentiator from other cookie types. You must ensure the dough sticks instantly to the pan when pressed, which prevents the shape from being pulled back up into the press.
Mastering the Ungreased Pan
The essential secret to perfect pressed cookies is the ungreased, unlined baking sheet. Fat (from grease, oil, or non-stick sprays) or slippery surfaces (like parchment or silicone mats) prevent the dough from adhering to the pan. If the dough doesn’t stick immediately, the pressure mechanism of the press will fail, leading to messy, indistinct shapes.
We emphasize using cold, bare metal sheets. If your kitchen is warm or if you are running multiple batches, keep extra baking sheets chilled. This small detail guarantees that the beautiful Christmas trees, snowflakes, or rosettes you press retain their sharp definition during baking.
Perfect for Gifting and Large Batches
Because these cookies are relatively small, uniform, and sturdy, they are ideal for packaging and sharing. If you participate in cookie exchanges, create holiday hampers, or simply need a reliable treat for school events, the Spritz Cookie offers high visual impact with low labor intensity. They store exceptionally well in airtight containers, retaining their crispness for up to two weeks, or they can be frozen for several months, making them perfect for advance preparation.
Trying this recipe now means you are investing in a skill that will serve you year after year. Forget struggling with sticky dough and misshapen cookies; embrace the precision and speed offered by this optimized Spritz Cookie formula. It’s time to retire those old, frustrating recipes and welcome the ease and artistry of perfectly pressed cookies into your home.
Ingredients and Essential Equipment for Perfect Spritz Cookie Success
Success with Spritz Cookie depends heavily on ingredient temperature and the specialized tools used. Take the time to gather and prepare everything before you start mixing; this streamlines the process and ensures the correct dough consistency.
Precise Ingredients for the Best Pressed Cookies
Using high-quality ingredients, especially the butter, is crucial since the buttery flavor is the signature characteristic of the Spritz Cookie.
- 1 cup (2 sticks) unsalted butter, softened to room temperature: This is non-negotiable. The butter must be properly softened not melted, not cold to ensure it creams properly with the sugar, incorporating the necessary air (aeration) for a light texture. If the butter is too cold, the creaming process fails; if it’s too warm, the dough will be greasy and won’t hold its shape when pressed.
- 2/3 cup granulated white sugar: Granulated sugar provides the necessary structure and helps achieve that desirable light browning on the edges.
- 1 large egg: Ensure the egg is also at room temperature. A cold egg can seize the creamed butter mixture, resulting in a lumpy dough.
- 1 teaspoon pure vanilla extract: Use pure extract, not imitation, for the best flavor depth in your classic butter cookie.
- 1/2 teaspoon almond extract (optional): While optional, almond extract adds a layer of sophistication often associated with traditional Scandinavian and German pressed cookies.
- 2 1/4 cups all-purpose flour: Accuracy is key. Always use the spoon-and-level method when measuring flour. Too much flour will result in a stiff dough that is impossible to press; too little will cause the cookies to spread.
- 1/4 teaspoon salt: Salt balances the sweetness and enhances the butter flavor.
- Food coloring (optional, for decorative dough): Use gel food coloring, as liquid coloring can introduce too much moisture, altering the dough consistency.
- Assorted sprinkles or decorative sugars (optional): Apply these immediately after pressing and before baking for best adhesion.
The total weight and volume of the fat and liquid components are meticulously balanced to create a dough with the perfect plasticity firm enough to hold the intricate disc shapes but soft enough to be expelled smoothly through the press.
Necessary Utensils and Equipment
While the ingredients are important, the equipment is what separates a regular cookie from a perfect Spritz Cookie.
Essential Tools for Pressed Cookies
- Electric stand mixer fitted with the paddle attachment, or a handheld electric mixer: Essential for proper creaming. The paddle attachment ensures even mixing without overdeveloping gluten.
- Mixing bowls, measuring cups, and spoons: Standard tools for precise preparation.
- Spatula for scraping the bowl: Absolutely necessary to ensure the butter and sugar are evenly incorporated and no pockets of unmixed ingredients remain at the bottom of the bowl.
Cookie Press with assorted discs:
This is the star of the show. Invest in a good quality metal press for better leverage and durability. If using a plastic press, handle it carefully.- Unlined and ungreased baking sheets: This cannot be stressed enough. The dough must stick directly to the cold metal pan for the cookie press to work correctly. Have several pans ready so you can swap out warm pans for cold ones between batches.
For bakers who enjoy Spanish desserts that also rely on precise timing and temperature, perhaps you would enjoy our recipe for Churros con Chocolate another classic treat that demands attention to detail!
If you are looking for visual inspiration on how to decorate your buttery holiday cookies, I highly recommend checking out the curated collection of holiday treats on my Pinterest boards.
Detailed Recipe Steps: Mastering the Pressed Spritz Cookie
Follow these steps closely, paying attention to temperature and mixing times, to achieve a dough that presses beautifully and bakes into a delightful, crisp Spritz Cookie.
1. PREPARE THE OVEN AND BAKING SHEETS
Preheat your oven to 375°F (190°C). Setting the oven temperature early ensures it is stabilized when the first batch is ready. Set aside several baking sheets. It is extremely important that the baking sheets remain ungreased and unlined with parchment paper or silicone mats; the dough must stick directly to the cold metal pan for the cookie press to work correctly. If you plan to bake multiple batches, ensure you have fresh, cold pans ready, or allow the used pans to cool completely before pressing more dough onto them.
2. CREAM THE WET INGREDIENTS
In the large bowl of your stand mixer, combine the softened butter and the granulated sugar. Begin beating on low speed until the ingredients start to combine, then increase to medium speed. Beat for approximately 3 to 4 minutes, until the mixture is light, fluffy, and pale yellow in color. This process, known as creaming, incorporates air bubbles into the butter, which are vital for the cookie’s final texture and lift. Stop the mixer and scrape down the sides of the bowl using a rubber spatula to ensure all sugar crystals are incorporated.
3. ADD EGG AND FLAVORINGS
Add the large, room-temperature egg, vanilla extract, and almond extract (if using) to the creamed mixture. Beat on medium-low speed until the ingredients are fully incorporated. Ensure there are no streaks of unmixed egg remaining. Over-beating at this stage can break down the structure achieved during creaming, so mix only until combined. Scrape the bowl down one final time.
4. INCORPORATE THE DRY INGREDIENTS
In a separate medium bowl, whisk together the all-purpose flour and the salt until they are thoroughly combined. Gradually add the flour mixture to the wet ingredients in three separate additions, mixing on low speed after each addition. Mix just until the flour is barely incorporated. Stop mixing immediately when the last of the flour disappears; overmixing the dough will result in tough, hard cookies because it develops the gluten structure. The resulting Spritz Cookie dough should be soft, slightly sticky, but homogenous.
5. PREPARE THE DOUGH FOR PRESSING
The finished dough should be firm but pliable and easy to handle. It should not feel oily. If you wish to make colored Spritz Cookie, divide the dough into separate portions now. Gently work in 2 to 3 drops of gel food coloring per portion until the desired uniform shade is achieved. Knead minimally just enough to distribute the color. If the dough feels too soft, chill it briefly (5-10 minutes), but avoid chilling for too long, as cold dough will not press easily.
6. LOAD AND PRESS THE COOKIES
Select your desired decorative disc for your cookie press and attach it firmly. Load the cookie dough into the cylinder of the cookie press. It is important to fill the press completely to ensure constant, even pressure. Position the base of the press flat against the cold, ungreased baking sheet and press the lever (or turn the ratchet) once for each cookie. Press the dough onto the prepared baking sheets, spacing the shapes about 1 inch apart.
Troubleshooting Pressing: If the dough does not stick to the pan, stop immediately. The pan may be too warm, or it may have residue from a previous baking session. Try wiping the pan clean with a dry cloth or switching to a fresh, cold pan. Never force the press; if the dough is too stiff, warm it slightly in your hands before reloading.
7. DECORATE AND BAKE
If using sprinkles or decorative sugars, scatter them over the cookies immediately after pressing. This ensures they adhere firmly to the raw dough. Place the baking sheet in the preheated oven and bake for 8 to 12 minutes. Baking time will vary based on the thickness of the shapes and your oven calibration. The Spritz Cookie are finished when the edges are set and are only very lightly golden brown. They should remain mostly pale in the center.
8. COOL THE COOKIES
Remove the baking sheets from the oven and allow the cookies to cool on the pan for 2 to 3 minutes to firm up. Attempting to move them too soon will cause them to break. Use a thin, wide spatula to gently transfer the warm cookies to a wire rack to cool completely before serving or storing. Store cooled cookies in an airtight container at room temperature.
Tips, Troubleshooting, and Flavor Variations for Your Buttery Spritz Cookie
While the process of making Spritz Cookie is straightforward, a few common issues can arise. Knowing how to troubleshoot and how to add variations will ensure your baking always results in perfection.
Common Mistakes and Quick Fixes
Mistake 1: The Dough Won’t Stick to the Pan
- The Fix: This is almost always a pan issue. Ensure the sheet is completely ungreased and cold. If your dough is too soft (usually from warm butter or ambient temperature), chill the loaded press for 5 minutes, or use a new, chilled baking sheet.
Mistake 2: The Cookies Spread Too Much
- The Fix: Spreading indicates too much fat or not enough flour. Check that your butter was properly softened, not melted. If the spreading is minor, try reducing the butter by 1-2 tablespoons in the next batch, or slightly increasing the flour (1-2 teaspoons). Also, ensure your oven temperature is accurate; too low of a temperature will encourage spreading.
Mistake 3: The Cookies Are Crumbly or Tough
- The Fix: Tough cookies result from overmixing the flour. Ensure you stop the mixer the moment the last streak of dry ingredients disappears. Crumbly cookies might indicate the dough was too dry; if so, next time, ensure your measurements are precise, especially for the flour.
For troubleshooting in other baking areas, such as creating the perfect flaky crust for a savory dish, consider learning from our detailed instructions on making a great Empanada Casera.
Creative Variations on the Classic Spritz Cookie
While the almond and vanilla combination is classic, Spritz Cookie dough is highly adaptable to flavor changes:
Citrus Zest Cookies
Replace the almond extract with 1 teaspoon of finely grated lemon, orange, or lime zest. This adds a bright, fresh note that pairs wonderfully with the buttery base. You can use a squeeze of fresh juice instead of the egg for a slight twist, though this may require a teaspoon less flour to maintain consistency.
Chocolate Spritz Cookie
For a chocolate version, reduce the all-purpose flour by 1/4 cup and replace it with 1/4 cup of unsweetened cocoa powder. Add an extra 1/4 teaspoon of vanilla extract to balance the richness. Mix the cocoa powder with the flour and salt before incorporating it into the wet ingredients.
Gluten-Free Adaptation
This recipe can often be successfully converted to gluten-free by using a good quality 1:1 gluten-free baking blend that contains xanthan gum. Note that the texture may be slightly more delicate, so handle the pressed cookies carefully before baking.
Vegan Spritz Cookie (Alternative)
To make a vegan version, substitute the butter with a high-quality, solid vegan butter stick (avoid tubs) and substitute the egg with 1 tablespoon of non-dairy milk (like almond or oat) or 1/4 teaspoon of powdered egg replacer mixed with water. This requires minor adjustments to maintain the plasticity needed for the press.
Nutritional Insights and the Benefits of Baking Homemade Spritz Cookie
Baking at home allows for total control over ingredients, providing both nutritional transparency and the immense psychological benefit of creation. While a classic butter cookie like the Spritz Cookie is certainly a treat, understanding its components helps in responsible enjoyment.
Estimated Nutritional Value (Per Cookie, based on 50 servings)
Please note that these values are estimates and can vary based on the specific ingredients used, the size of the pressed shape, and the total yield of the batch. This recipe typically yields 4 to 6 dozen small cookies.
| Nutrient | Estimated Value |
|---|---|
| Calories | Approximately 70-85 kcal |
| Total Fat | 4.5 – 5.5 g |
| Saturated Fat | 2.5 – 3 g |
| Carbohydrates | 8 – 10 g |
| Sugar | 4 – 5 g |
| Protein | ~1 g |
| Sodium | 25 – 35 mg |
Benefits of Baking with Quality Ingredients
The primary ingredients in Spritz Cookie butter, flour, and sugar are simple, but choosing the right ones matters:
The Power of Real Butter
We specify unsalted butter because it allows you to control the total sodium content. Butter, when used in baking, provides essential fat-soluble vitamins (A, D, E, K), though its main benefit here is taste and texture. High-quality butter provides a richer, cleaner flavor than shortening or margarine, which contributes significantly to the irresistible taste of the classic Spritz Cookie.
Minimal Processing
Unlike many store-bought holiday cookies that rely on high-fructose corn syrup, artificial flavors, and preservatives, homemade Spritz Cookie use basic pantry staples. This reduction in processed additives is a significant benefit of home baking.
Mental and Emotional Wellness
Beyond the nutritional facts, the act of baking itself offers immense mental health benefits. It is a mindful activity that reduces stress, boosts creativity (especially when decorating), and provides a tangible, delicious reward. Sharing homemade Spritz Cookie with loved ones strengthens social bonds and contributes to cherished holiday memories.
Frequently Asked Questions About Spritz Cookie
Why are my Spritz Cookie dough not sticking to the baking sheet?
The dough needs a cool, dry, ungreased surface to adhere properly. If the sheet pan is warm, oiled, or lined with parchment paper/silicone mats, the dough will not release from the press. Ensure you are using cold, bare metal pans between batches, wiping them dry if necessary.
Can I chill Spritz Cookie dough before pressing?
Generally, no. Unlike roll-out dough, Spritz Cookie dough must be pliable and warm enough to easily pass through the small openings of the press disc. If the dough is too cold, it will be too stiff, requiring excessive force on the press and resulting in misshapen cookies. If your dough is slightly sticky from a warm kitchen, only chill it for 5-10 minutes.
What is the difference between a Spritz Cookie and a standard butter cookie?
While both are butter-based, a Spritz Cookie recipe has a specific, high-fat ratio designed for mechanical pressing. The dough is softer than typical roll-out cookie dough. The main functional difference is the method of shaping: spritz cookies are pressed directly onto a pan using a specialty tool, resulting in delicate, uniform shapes.
How do I prevent my pressed cookies from spreading in the oven?
Spreading usually indicates the dough is too warm or contains too much fat relative to flour. Make sure your butter was only softened, not melted. If using high-fat European butter, try incorporating 1 tablespoon less. Also, ensure your oven temperature is accurate (375°F is recommended), as baking at too low a temperature allows the fat to melt before the dough sets.
How should I store leftover Spritz Cookie?
Store fully cooled Spritz Cookie in an airtight container at room temperature for up to two weeks. If the cookies are highly decorated with fragile icing, layer them gently with wax paper. They also freeze exceptionally well; place them in a freezer-safe container for up to three months.
Conclusion: The Timeless Appeal of the Perfect Spritz Cookie
The journey to creating the perfect batch of Spritz Cookie is a rewarding one. By paying close attention to the small details room-temperature ingredients, precise mixing to avoid gluten development, and the critical use of ungreased, cool baking sheets you guarantee a spectacular result. These simple yet elegant pressed cookies are a testament to how classic recipes, executed properly, can truly elevate any occasion, especially the holidays.
This recipe provides the foundational balance needed for dough that holds its intricate shapes perfectly, resulting in dozens of crisp, buttery treats ready for gifting or enjoying with a cup of coffee or tea. Remember the joy is not just in the eating, but in the creation watching those perfect little shapes emerge from the cookie press is a delightful moment for bakers of all ages. Whether you’ve chosen classic vanilla and almond or experimented with new citrus zest variations, you now possess the definitive guide to mastering this cherished holiday tradition.
We encourage you to try this ultimate Spritz Cookie recipe today and share the results! Let us know in the comments below which decorative disc was your favorite to use, or if you found a unique flavor combination that stole the show. Happy baking!
Classic Butter Spritz Cookies (Made with a Cookie Press)
Ingredients
Equipment
Method
- PREPARE THE OVEN AND BAKING SHEETS: Preheat your oven to 375°F (190°C). Set aside several baking sheets. It is extremely important that the baking sheets remain ungreased and unlined with parchment paper or silicone mats; the dough must stick directly to the cold metal pan for the cookie press to work correctly.
- CREAM THE WET INGREDIENTS: In the large bowl of your stand mixer, combine the softened butter and the granulated sugar. Beat on medium speed for approximately 3 to 4 minutes, until the mixture is light, fluffy, and pale yellow in color. Stop the mixer and scrape down the sides of the bowl using a rubber spatula.
- ADD EGG AND FLAVORINGS: Add the large egg, vanilla extract, and almond extract (if using) to the creamed mixture. Beat on medium-low speed until the ingredients are fully incorporated. Ensure there are no streaks of unmixed egg remaining. Scrape the bowl down one final time.
- INCORPORATE THE DRY INGREDIENTS: In a separate medium bowl, whisk together the all-purpose flour and the salt until they are thoroughly combined. Gradually add the flour mixture to the wet ingredients in three separate additions, mixing on low speed after each addition just until the flour is barely incorporated. Stop mixing immediately when the last of the flour disappears; overmixing the dough will result in tough cookies.
- PREPARE THE DOUGH FOR PRESSING: The dough should be firm but pliable and easy to handle. If you wish to make colored cookies, divide the dough into separate portions now and gently work in 2 to 3 drops of food coloring per portion until the desired shade is achieved.
- LOAD AND PRESS THE COOKIES: Select a decorative disc for your cookie press and attach it firmly. Load the cookie dough into the cylinder of the cookie press. Press the dough directly onto the prepared, ungreased baking sheets, spacing the shapes about 1 inch apart. If the dough does not stick to the pan, the pan may be too warm, or it may have residue; try wiping the pan clean and cooling it slightly.
- DECORATE AND BAKE: If using sprinkles or decorative sugars, scatter them over the cookies immediately after pressing, before they are baked. Place the baking sheet in the preheated oven and bake for 8 to 12 minutes. Baking time will vary based on the thickness of the shapes and your oven. The cookies are finished when the edges are set and very lightly golden brown.
- COOL THE COOKIES: Remove the baking sheets from the oven and allow the cookies to cool on the pan for 2 to 3 minutes to firm up. Use a thin spatula to gently transfer the warm cookies to a wire rack to cool completely before serving or storing.


