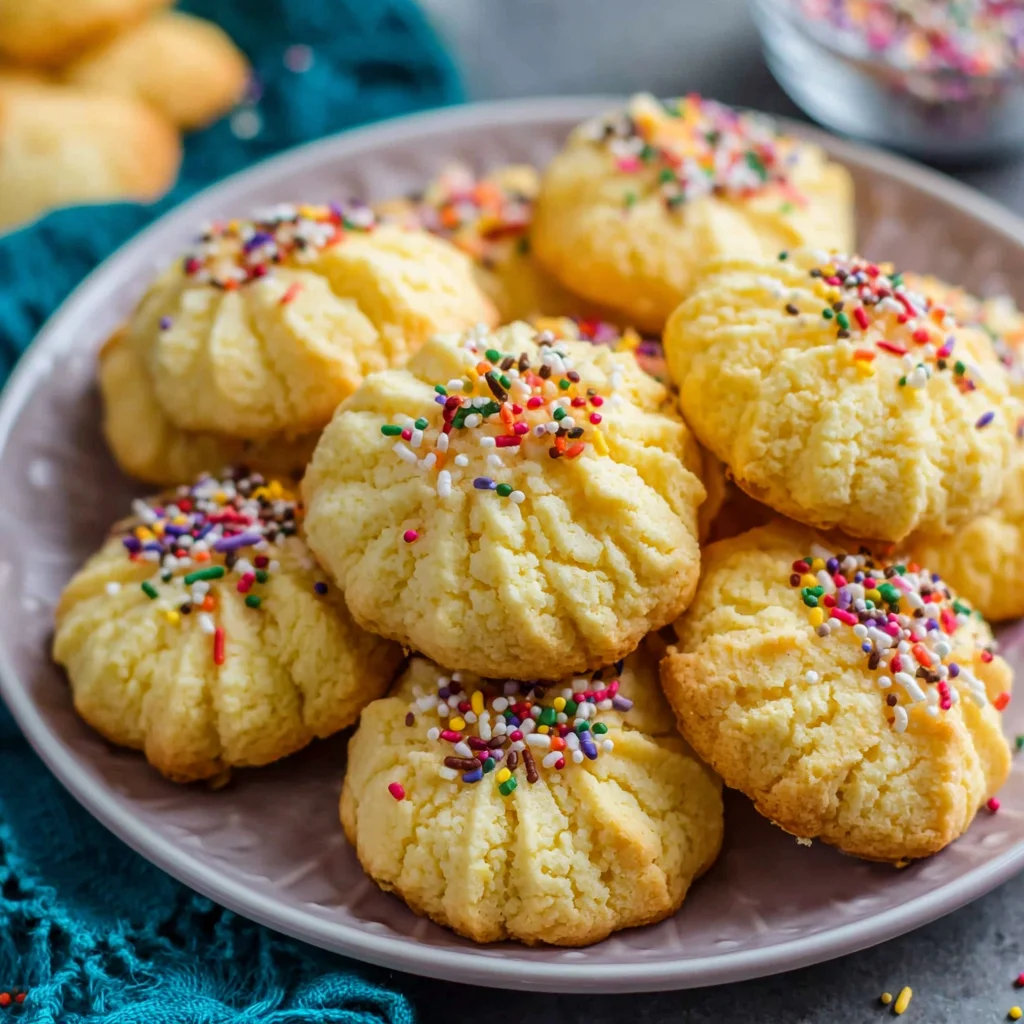
Indulge in the buttery, melt-in-your-mouth goodness of these whipped shortbread cookies! This recipe elevates the classic shortbread to new heights with a wonderfully light and airy texture. Forget those dense, heavy cookies – these whipped shortbreads are delicate and delightfully crisp, making them the perfect treat for any occasion. Whether you’re a seasoned baker or a complete novice, this simple recipe guarantees success, resulting in cookies that are both beautiful and incredibly delicious. Prepare to be amazed by how easy it is to create these seemingly sophisticated treats, perfect for sharing with friends and family, or simply enjoying a quiet moment with a cup of tea or coffee. These whipped shortbread cookies are a celebration of simple ingredients transformed into something truly special. Let’s dive into the recipe and unlock the secret to perfectly whipped shortbread perfection!
Why You’ll Love This Whipped Shortbread Cookies Recipe
These whipped shortbread cookies are more than just a delicious treat; they’re a baking experience you’ll cherish. The recipe is incredibly forgiving, making it perfect for beginners. The soft, whipped texture is a delightful contrast to traditional shortbread, offering a lighter, airier bite. The subtle sweetness, enhanced by the fragrant vanilla, isn’t overpowering, allowing the rich buttery flavor to shine through. And the best part? The minimal ingredients needed mean you likely already have everything in your pantry. No need to hunt down obscure baking supplies or spend hours in the kitchen. These cookies come together quickly, requiring only basic mixing and chilling time.
The versatility of this recipe is another significant advantage. You can easily customize the flavors by adding extracts like almond or lemon, or even incorporating sprinkles or chocolate chips for added flair. The simple process allows for creative experimentation; you can shape the cookies into different forms, from classic rounds to festive shapes using cookie cutters, depending on the occasion. Imagine these beautiful cookies adorning your holiday cookie platters, gracing a cozy afternoon tea, or simply brightening someone’s day with a thoughtful, homemade gift. The elegance and simplicity of these whipped shortbreads make them suitable for any occasion, from casual get-togethers to formal events. They’re truly a crowd-pleaser, guaranteed to leave a lasting impression on your taste buds and those of your loved ones.
Why You Should Try This Whipped Shortbread Cookies Recipe
Beyond the simple joy of baking and the delicious outcome, making these whipped shortbread cookies offers a multitude of benefits. It’s a fantastic way to relax and unwind after a long day, the rhythmic mixing and shaping a soothing activity perfect for stress relief. The act of creating something delicious from scratch is incredibly satisfying, fostering a sense of accomplishment and pride. Moreover, these cookies make a wonderful gift. Imagine the delight on someone’s face when you present them with a tin of these homemade delicacies. The personal touch adds a special dimension that store-bought cookies simply can’t match.
In a world of overly complicated recipes and processed treats, this recipe provides a refreshing return to simplicity. It’s a reminder that sometimes, the best things in life are the simplest. The focus on quality ingredients lets the natural flavors shine, creating a refined yet approachable treat. These cookies are not just a dessert; they’re a thoughtful gesture, a delicious reward for yourself, and a beautiful expression of care for others. They embody the essence of homemade goodness, a quality that’s increasingly rare and appreciated in our modern world. If you’re looking for a recipe that delivers on taste, simplicity, and satisfaction, look no further; these whipped shortbread cookies are your answer.
Ingredients and Utensils for Perfect Whipped Shortbread Cookies
This section details the essential ingredients and tools needed to bake these delightful cookies. The ingredient list is minimal, but quality matters. Using good quality butter, for instance, will significantly impact the final flavor and texture.
- Butter: 1 cup (2 sticks) unsalted butter, softened. Using unsalted butter allows you to control the salt level, ensuring perfectly balanced cookies. Softened butter is crucial for proper creaming. Don’t melt it!
- Sugar: 1 cup granulated sugar. Granulated sugar provides the perfect balance of sweetness without being overpowering.
- Vanilla Extract: 1 teaspoon pure vanilla extract. Pure vanilla extract adds depth and a warm, comforting aroma. Artificial extracts will not provide the same quality.
- Flour: 2 1/2 cups all-purpose flour. All-purpose flour is readily available and works perfectly for this recipe. Make sure to measure accurately for optimal results.
- Salt: 1/4 teaspoon salt. A pinch of salt enhances the overall flavor profile and balances the sweetness.
Utensils:
- Large Mixing Bowl: A large bowl is necessary for creaming the butter and sugar. A sturdy bowl is recommended.
- Electric Mixer (Handheld or Stand): An electric mixer makes the creaming process much easier and quicker. However, you can certainly do it by hand. Just be prepared for some arm exercise!
- Measuring Cups and Spoons: Accurate measurements are key in baking. Invest in a reliable set for consistent results. Use the “spoon and level” method for dry ingredients.
- Rubber Spatula or Wooden Spoon: A spatula or spoon is helpful for scraping down the sides of the bowl and ensuring all ingredients are incorporated.
- Baking Sheets: At least two baking sheets are needed, preferably non-stick or lined with parchment paper.
- Parchment Paper: Parchment paper prevents the cookies from sticking to the baking sheets and makes cleanup a breeze.
- Fork: A fork is used to create a decorative criss-cross pattern on the cookies, although this is optional.
- Wire Rack: A wire rack is essential for allowing the cookies to cool completely and prevent them from becoming soggy.
- Cookie Scoop (Optional): A cookie scoop helps to ensure uniform cookie size and simplifies the shaping process.
Detailed Steps for Making Whipped Shortbread Cookies
Follow these steps for perfectly delightful whipped shortbread cookies. Take your time, and enjoy the process!
- Cream Butter and Sugar: In your large mixing bowl, cream together the softened butter and granulated sugar using an electric mixer (or by hand) until the mixture is light, fluffy, and pale in color. This usually takes about 3-5 minutes with an electric mixer. The volume should visibly increase. This step is crucial for achieving the signature light texture.
- Add Vanilla Extract: Beat in the vanilla extract until it’s fully incorporated into the creamed butter and sugar mixture. Scrape down the sides of the bowl as needed.
- Incorporate Dry Ingredients: Gradually add the flour and salt to the wet ingredients, mixing on low speed (or gently folding by hand) until just combined. Avoid overmixing! Overmixing develops gluten, resulting in tough cookies. The dough should be soft and slightly sticky.
- Chill the Dough: Cover the bowl and refrigerate the dough for at least 30 minutes (or up to 2 hours). This chilling step firms the dough, making it much easier to handle and prevents the cookies from spreading too much during baking.
- Preheat Oven & Prepare Baking Sheet: Preheat your oven to 350°F (175°C). Line your baking sheets with parchment paper. This is a crucial step for easy cleanup and even baking.
- Shape the Cookies: Roll the chilled dough into 1-inch balls. Place the balls onto the prepared baking sheets, leaving about 2 inches between each cookie. Gently flatten each ball slightly with a fork, creating a criss-cross pattern if desired. Alternatively, you can use a cookie scoop for perfectly uniform cookies.
- Bake: Bake for 12-15 minutes, or until the edges are just starting to turn golden brown. Keep a close eye on them, as ovens can vary. Start checking for doneness around the 12-minute mark.
- Cool: Let the cookies cool on the baking sheets for a few minutes before carefully transferring them to a wire rack to cool completely. This prevents breakage and ensures the cookies maintain their shape.
Tips and Variations for Whipped Shortbread Cookies
Experiment with these tips and variations to personalize your whipped shortbread cookies.
- Flavour Variations: Try adding different extracts like almond, lemon, or peppermint. A touch of cinnamon or nutmeg can also create interesting flavor combinations.
- Add-ins: Incorporate chopped nuts, dried fruits (cranberries, chopped apricots), or chocolate chips into the dough for added texture and flavor.
- Shapes: Use cookie cutters to create festive shapes for holidays or special occasions. You can also roll the dough out thinly and use different cookie cutters.
- Sugar Alternatives: For a slightly less sweet cookie, reduce the sugar by 1/4 cup. Or try using brown sugar for a richer molasses flavor.
- Gluten-Free Option: Substitute all-purpose flour with a gluten-free blend. You may need to adjust the amount of flour slightly depending on the blend you use.
- Vegan Option: Replace butter with a vegan butter alternative, such as Miyoko’s Kitchen or Melt brand vegan butter. Ensure it is softened properly before creaming.
- Avoiding Common Mistakes: Don’t overmix the dough. Overmixing will result in tough cookies. Ensure the butter is softened but not melted. Don’t overcrowd the baking sheets; give the cookies enough space to spread.
Nutritional Information and Health Benefits of Whipped Shortbread Cookies
While these cookies are undeniably delicious, it’s important to be mindful of their nutritional content. A single serving (approximately 2-3 cookies) will contain approximately 150-225 calories, varying depending on the specific ingredients and portion size. The majority of the calories come from fat and carbohydrates. The protein content will be relatively low. Specific nutritional values can vary depending on the brands of ingredients used.
Benefits of Ingredients:
- Butter: Provides richness and flavor. Choose high-quality butter for the best taste and texture. However, moderation is key due to its high fat content.
- Flour: Provides structure and texture to the cookies. All-purpose flour is a good source of carbohydrates, providing energy.
- Vanilla Extract: Adds flavor and aroma. Pure vanilla extract can have antioxidant properties.
It’s important to remember that whipped shortbread cookies should be enjoyed in moderation as part of a balanced diet. They’re a treat, not a staple food.
FAQs about Whipped Shortbread Cookies
How long do Whipped Shortbread Cookies last?
Can I make Whipped Shortbread Cookies ahead of time?
What happens if I overbake my Whipped Shortbread Cookies?
Are these Whipped Shortbread Cookies gluten-free?
How can I store my Whipped Shortbread Cookies?
Conclusion: The Whipped Shortbread Cookie Experience
These whipped shortbread cookies are a delightful baking adventure that yields incredibly rewarding results. The simple recipe, coupled with the incredibly light and airy texture, makes these cookies a standout amongst other shortbread recipes. The ability to customize flavors and shapes adds to the fun, allowing you to create unique cookies for any occasion. From a relaxing baking session to a delicious treat, these cookies offer something special. So, grab your ingredients, and embark on this baking journey.
We’d love to hear your feedback! Share your whipped shortbread cookie creations with us in the comments below. Don’t forget to share this recipe with your friends and family, and follow us on Pinterest for more delicious recipes like this one! For more amazing recipe ideas, check out our other recipes like our delightful Empanadas or our classic Spanish Tortilla available on Noelia’s Recipes Blog!
Whipped Shortbread Cookies: Buttery, Melt-in-Your-Mouth Delight
Ingredients
Equipment
Method
- Cream butter and sugar: In a large bowl, cream together the softened butter and granulated sugar using an electric mixer until light and fluffy. This should take about 3-5 minutes.
- Add vanilla: Beat in the vanilla extract until well combined.
- Incorporate dry ingredients: Gradually add the flour and salt, mixing on low speed until just combined. Do not overmix; the dough will be soft.
- Chill the dough: Cover the bowl and refrigerate the dough for at least 30 minutes. This will prevent the cookies from spreading too much during baking.
- Preheat oven & prepare baking sheet: Preheat oven to 350°F (175°C). Line baking sheets with parchment paper.
- Shape and bake cookies: Roll the dough into 1-inch balls. Place them onto the prepared baking sheets, leaving about 2 inches between each cookie. Gently flatten each ball slightly with a fork, creating a criss-cross pattern if desired. Bake for 12-15 minutes, or until the edges are lightly golden.
- Cool and serve: Let the cookies cool on the baking sheets for a few minutes before transferring them to a wire rack to cool completely. Dust with powdered sugar, if desired.


