Indulge in the irresistible creamy texture and rich peanut butter flavor of this No Bake Peanut Butter Pie. This incredibly easy dessert requires no oven time, making it perfect for hot summer days or any time you crave a cool, refreshing treat. Forget complicated baking techniques and long hours in the kitchen; this recipe is a delightful shortcut to a classic dessert, delivering maximum flavor with minimal effort. The combination of a crunchy graham cracker crust, a luscious peanut butter filling, and a cloud of whipped cream is simply divine. Whether you’re a seasoned baker or a complete novice, this No Bake Peanut Butter Pie is guaranteed to impress your friends and family with its simplicity and stunning taste. Prepare to be amazed by how easy it is to create this sophisticated and delicious pie, perfect for any occasion, from casual weeknight gatherings to elegant dinner parties.
Why You’ll Love This No Bake Peanut Butter Pie Recipe
This No Bake Peanut Butter Pie isn’t just another dessert; it’s an experience. Here’s why you’ll fall head over heels for this recipe:
- Effortless Preparation: Say goodbye to oven preheating and baking times. This no-bake recipe is incredibly easy, requiring minimal effort and only simple mixing steps. Perfect for busy weeknights or when you crave a delicious treat without the hassle.
- Unbelievably Creamy Texture: The filling is luxuriously smooth and creamy, thanks to the perfect blend of sweetened condensed milk, peanut butter, and whipped cream. Each bite melts in your mouth, leaving you wanting more.
- Irresistible Peanut Butter Flavor: The rich, nutty flavor of peanut butter shines through in every spoonful. This is a peanut butter lover’s dream come true, a powerful taste that satisfies any craving.
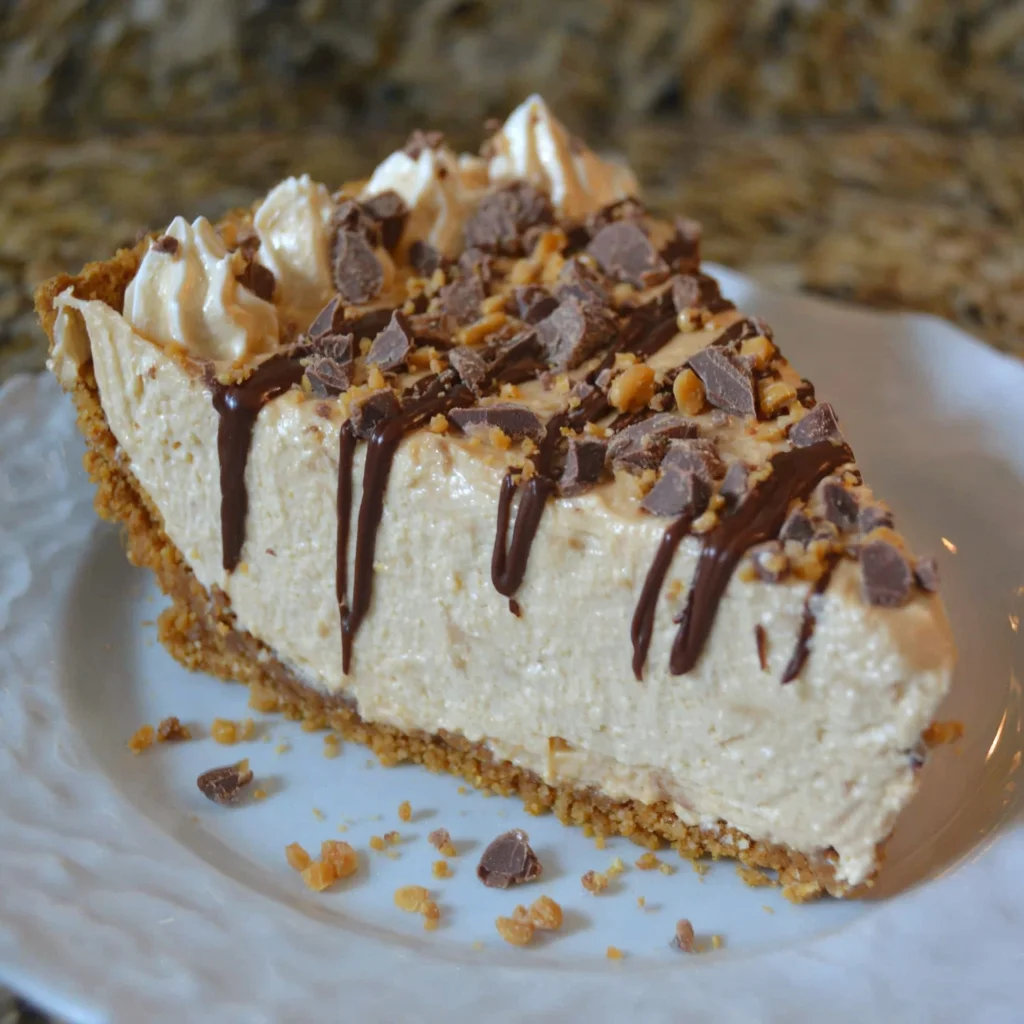
- Stunning Presentation: Despite its simplicity, this pie looks incredibly elegant. The beautiful layers of the crunchy crust and the creamy filling, topped with a swirl of whipped cream, will impress your guests. It’s a showstopper without the show-off effort!
- Perfect for Any Occasion: This versatile dessert is perfect for birthdays, potlucks, holidays, or simply a sweet treat after dinner. Its delightful flavor and stunning presentation make it appropriate for any occasion, from casual to elegant.
- Adaptable Recipe: Explore countless variations! From adding chocolate chips or pretzels to the crust to incorporating different types of nuts or even changing the whipped cream for a vegan alternative. The possibilities are endless!
Why You Should Try This No Bake Peanut Butter Pie Recipe
Beyond the deliciousness, this No Bake Peanut Butter Pie offers several compelling reasons to give it a try:
- No Special Equipment Needed: You likely already have all the necessary ingredients and tools in your kitchen. There’s no need to invest in expensive or specialized equipment to make this pie.
- Perfect for Beginners: This recipe is exceptionally easy to follow, even for those with limited baking experience. It’s a fantastic way to build confidence in the kitchen and create a delicious dessert.
- Great for Sharing: This pie serves a crowd, making it ideal for parties, gatherings, or sharing with loved ones. It’s a delightful way to bring people together over a delicious treat.
- Satisfies Sweet Cravings: The rich and creamy peanut butter filling satisfies those intense cravings for something sweet without being overly heavy or cloying.
- Healthier Alternatives Available: While this classic recipe uses traditional ingredients, you can easily adapt it to incorporate healthier alternatives, such as using whole wheat graham crackers, reducing the amount of sweetened condensed milk, or opting for a healthier alternative to heavy cream. More on these options below!
- Cost-Effective Dessert: The ingredients are readily available and relatively inexpensive, making this a budget-friendly dessert option that doesn’t compromise on taste or quality.
Ingredients and Utensils for Your No Bake Peanut Butter Pie
Gathering the right ingredients and having the necessary utensils on hand will ensure a smooth and enjoyable pie-making process. Let’s get started!
Ingredients: A Detailed Look
- Graham Cracker Crumbs (1 ½ cups): The foundation of your delicious crust. Look for the classic graham cracker flavor for the best results. You can also experiment with other crumbs like digestive biscuits or even crushed pretzels for variations.
- Granulated Sugar (¼ cup): Adds sweetness and helps bind the crust together. Consider using coconut sugar or other sweeteners for alternative flavor profiles.
- Unsalted Butter (6 tablespoons/3 ounces): Melted, this provides moisture and helps hold the crust’s shape. Ensure it’s completely melted for optimal blending. You can substitute with vegan butter for a plant-based version.
- Sweetened Condensed Milk (14-ounce can): The creamy heart of your pie’s filling. This provides sweetness and a luscious texture.
- Creamy Peanut Butter (½ cup): The star ingredient! Choose your favorite brand, but make sure it’s smooth and creamy for the best texture. Natural peanut butter works as well, but might need a slight adjustment in consistency.
- Milk (½ cup): Adds moisture and helps thin out the peanut butter filling to the desired consistency. Experiment with different types of milk, such as almond milk or oat milk, for variations.
- Vanilla Extract (1 teaspoon): A touch of vanilla enhances the overall flavor of the pie. Use pure vanilla extract for the best results.
- Heavy Cream (1 cup): Whipped to soft peaks, this adds a light and airy texture to the filling. Chill the cream beforehand for best results. For a vegan option, consider using coconut cream or a plant-based whipped topping.
Essential Utensils for No-Fail Pie Making
- 9-inch Pie Plate: The vessel that holds your masterpiece. A glass pie plate is recommended for even cooling.
- Medium Bowl: For combining the crust ingredients.
- Large Bowl: For mixing the filling.
- Measuring Cups and Spoons: For accurate ingredient measurements.
- Fork or Whisk: To combine the crust ingredients.
- Hand Mixer or Electric Mixer: To whip the heavy cream and ensure a smooth peanut butter filling. A whisk works but requires more effort.
- Rubber Spatula or Spoon: For gently folding the whipped cream into the filling. Avoid overmixing to maintain the airy texture.
- Measuring Cup or Glass: To firmly press the crust into the pie plate. The bottom of a glass or jar works perfectly for this purpose.
- Refrigerator: For chilling the pie to set.
Detailed Steps for Making Your No Bake Peanut Butter Pie
Follow these step-by-step instructions to create a delicious and impressive No Bake Peanut Butter Pie. Remember to take your time, especially during the folding stage to ensure a perfect texture.
Step 1: Crafting the Perfect Crust
- In a medium bowl, combine the graham cracker crumbs, granulated sugar, and melted unsalted butter. Ensure the butter is completely melted for even distribution.
- Mix thoroughly using a fork until all the crumbs are evenly moistened and the mixture resembles wet sand. Don’t overmix, or the crust may become tough.
- Press the crumb mixture firmly into the bottom of your 9-inch pie plate. Use the bottom of a measuring cup or glass to pack the crust evenly and create a solid base. Press firmly to prevent a crumbly crust.
- Refrigerate the crust while you prepare the filling. This will help the crust to set and prevent the filling from making it soggy.
Step 2: Creating the Creamy Peanut Butter Filling
- In a large bowl, combine the sweetened condensed milk, creamy peanut butter, milk, and vanilla extract.
- Beat the mixture using a hand mixer or electric mixer until it is completely smooth and creamy. Beat until there are no lumps of peanut butter remaining. The mixture should be completely homogenous.
- In a separate bowl, whip the heavy cream until it forms soft peaks. Ensure the cream is cold for better whipping. Do not overwhip; soft peaks are the goal for a lighter texture.
- Gently fold the whipped heavy cream into the peanut butter mixture using a rubber spatula or spoon. Fold gently in a circular motion, making sure not to overmix, as this will deflate the whipped cream and make the filling dense.
Step 3: Assembling and Chilling Your Pie
- Pour the creamy peanut butter filling over the chilled graham cracker crust. Spread it evenly across the surface, ensuring it reaches the edges of the crust.
- Refrigerate the pie for at least 2 hours, or preferably overnight. This allows the filling to set completely and achieve its ideal creamy texture. The longer it chills, the better it sets.
Step 4: Serving Your No Bake Peanut Butter Pie
- Once the pie has chilled, carefully slice it into portions and serve. Serve chilled for the best experience; the cold temperature accentuates the creamy texture.
Tips, Variations, and Troubleshooting Your No Bake Peanut Butter Pie
Here are some helpful tips and variations to elevate your No Bake Peanut Butter Pie experience:
- For a richer flavor: Use salted peanut butter and adjust the amount of sugar accordingly.
- For a crunchier crust: Add chopped nuts or pretzels to the graham cracker crumbs.
- For a chocolate twist: Add ½ cup of chocolate chips to the crust or swirl melted chocolate on top of the filling.
- Vegan Option: Use vegan butter, plant-based milk, and coconut cream instead of heavy cream.
- Gluten-Free Option: Use gluten-free graham cracker crumbs or make your own crust from almond flour, oats, or other gluten-free ingredients.
- Preventing a soggy crust: Ensure the crust is completely chilled before adding the filling. Use a well-drained filling to prevent excess moisture from affecting the crust’s texture.
- Troubleshooting: If the filling is too thick, add more milk, a tablespoon at a time, until you reach the desired consistency. If it’s too thin, add more peanut butter.
Check out our other delicious recipes, such as our delicious berenjenas con miel or our easy empanadas recipe for a savory counterpart to this sweet treat!
Nutritional Information and Health Benefits of Your No Bake Peanut Butter Pie
While this recipe is undeniably indulgent, let’s look at the nutritional aspects and benefits of the ingredients:
Note: The exact nutritional values will vary depending on the specific brands and types of ingredients used. The following is an approximation based on common ingredients.
Approximate Nutritional Information (per serving, assuming 8 slices):
- Calories: Approximately 400-500
- Protein: 5-7 grams
- Fat: 25-30 grams
- Carbohydrates: 40-50 grams
Health Benefits of Ingredients:
- Peanut Butter: A good source of protein, healthy fats, and fiber. Provides essential vitamins and minerals.
- Graham Crackers: Provides fiber, although whole wheat options are more beneficial.
- Heavy Cream: Rich in fat, but can also provide some vitamins and minerals. Use sparingly for health reasons.
Remember that this is a dessert, and moderation is key. Enjoy it as an occasional treat rather than a daily staple. Explore using healthier alternatives, as mentioned earlier, to further improve the nutritional profile.
FAQs about No Bake Peanut Butter Pie
How long does a No Bake Peanut Butter Pie need to chill?
Can I use natural peanut butter in a No Bake Peanut Butter Pie?
Is it possible to make a vegan No Bake Peanut Butter Pie?
How do I prevent my No Bake Peanut Butter Pie crust from getting soggy?
How can I store leftover No Bake Peanut Butter Pie?
Conclusion: Your No Bake Peanut Butter Pie Journey Awaits
This No Bake Peanut Butter Pie is more than just a recipe; it’s a gateway to a world of creamy, dreamy deliciousness. Its simplicity, versatility, and undeniable flavor make it a perfect addition to your dessert repertoire. Whether you’re a seasoned baker or a kitchen novice, this recipe is a guaranteed crowd-pleaser. We encourage you to try this recipe, experiment with different variations, and share your culinary creations with us! Don’t forget to share your photos on Pinterest and tag us! We’d love to see your beautiful No Bake Peanut Butter Pies. And for more amazing recipe ideas, head over to our website Noeliarecipes.com for more inspiration!
No-Bake Peanut Butter Pie
Ingredients
Equipment
Method
- Make the crust: In a medium bowl, combine graham cracker crumbs, sugar, and melted butter. Mix until evenly moistened.
- Press the mixture firmly into the bottom of a 9-inch pie plate. Use the bottom of a measuring cup or glass to create an even crust.
- Refrigerate the crust while you prepare the filling.
- Make the filling: In a large bowl, beat together the sweetened condensed milk, peanut butter, milk, and vanilla extract until smooth and creamy using a mixer (handheld or stand).
- Gently fold in the whipped heavy cream until just combined. Be careful not to overmix.
- Pour the peanut butter filling over the chilled crust and spread evenly.
- Refrigerate the pie for at least 2 hours, or preferably overnight, to allow the filling to set completely.
- Serve chilled and enjoy!


