Get ready to unleash your inner ghoul with this incredibly easy and irresistibly delicious Halloween Dirt Cake! This no-bake dessert is perfect for Halloween parties, family gatherings, or a spooky treat just for yourself. Forget complicated baking; this recipe is as simple as it is fun, creating a delightfully creepy yet charming centerpiece that will impress your guests. Imagine layers of rich chocolate cookies, creamy cream cheese frosting, and a decadent chocolate pudding base, all topped with gummy worms and plastic spiders for the ultimate Halloween effect. It’s a guaranteed crowd-pleaser, and the best part? It’s incredibly easy to make, leaving you with more time to enjoy the spooky festivities!
This Halloween Dirt Cake isn’t just about looking spooky; it’s about creating a dessert experience that’s both visually stunning and incredibly tasty. The combination of textures – the crunchy cookies, the smooth cream cheese frosting, and the velvety pudding – offers a delightful contrast that keeps you coming back for more. It’s the perfect blend of sweet and decadent, a delightful twist on classic flavors that’s perfectly suited to the Halloween season. This recipe is a delicious way to celebrate the holiday and make some lasting memories with loved ones. Prepare to be amazed by how simple it is to achieve such an impressive and delicious dessert. Let’s get started on this spooky adventure!
Why You’ll Love This Halloween Dirt Cake Recipe
This Halloween Dirt Cake recipe is more than just a dessert; it’s an experience. Here’s why you’ll absolutely adore making and sharing this spooky delight:
- No-Bake Simplicity: Perfect for busy schedules! No oven required, minimizing cleanup and maximizing fun. This is a fantastic recipe for those who prefer less time in the kitchen and more time with friends and family.
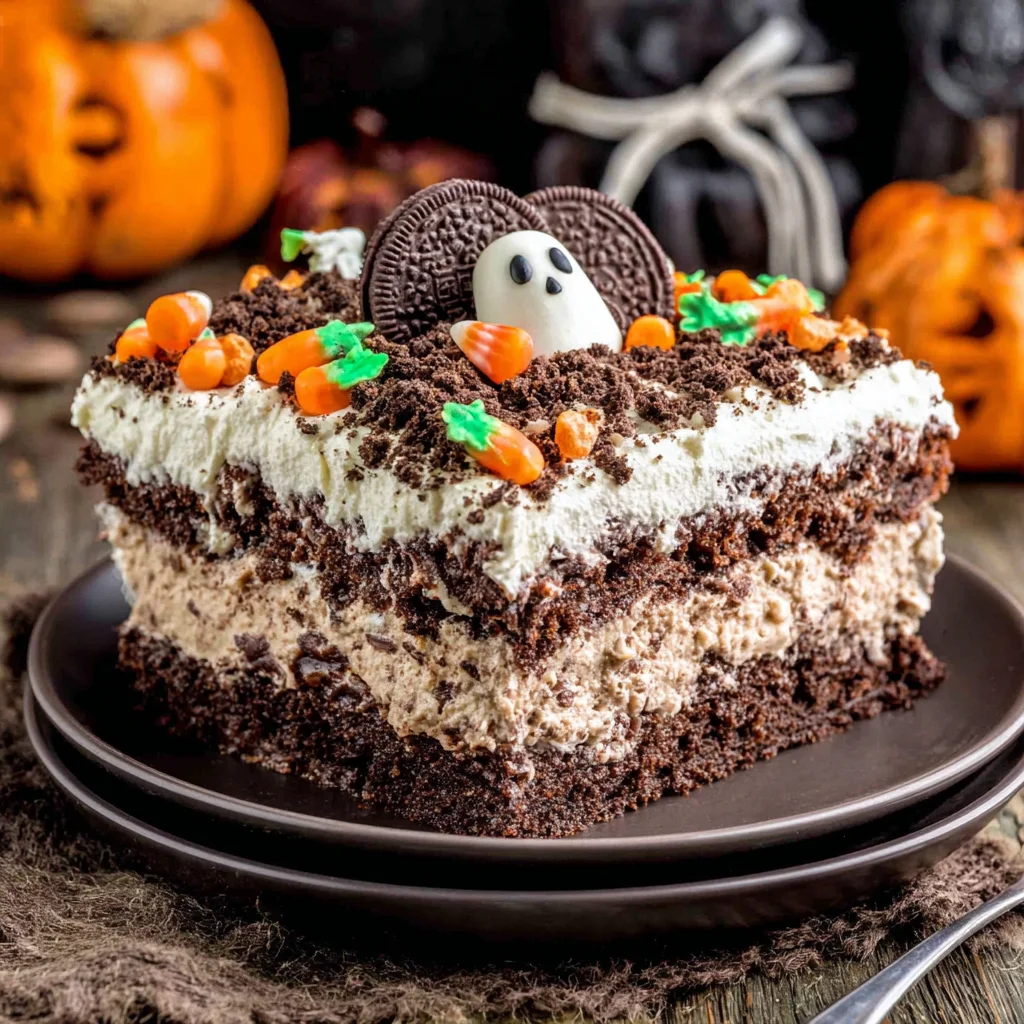
- Stunning Visual Appeal: The layered “dirt” effect is incredibly eye-catching and perfectly themed for Halloween. Your Halloween Dirt Cake will be the star of the dessert table, guaranteed to impress even the most discerning guests.
- Delicious Flavor Combination: The rich chocolate cookies, creamy cream cheese frosting, and chocolate pudding create a harmonious balance of textures and tastes that’s undeniably satisfying. This Halloween Dirt Cake is a true celebration of chocolate.
- Easy Customization: Want to add a personal touch? Easily customize the decorations with different candies, sprinkles, or even edible Halloween-themed figurines. This recipe is a canvas for your creativity!
- Kid-Friendly Fun: Get the kids involved in assembling the cake! It’s a fun and engaging activity that makes the baking process an enjoyable family experience. Let them help decorate and they’ll have a blast!
- Make-Ahead Convenience: You can prepare the components of the Halloween Dirt Cake ahead of time, making it incredibly convenient for parties or gatherings. Assemble it just a few hours before serving to keep it fresh and delicious.
Beyond the ease and deliciousness, this Halloween Dirt Cake offers a unique opportunity to create a memorable dessert that everyone will rave about. It’s the perfect combination of fun, flavor, and festive flair, making it a truly exceptional Halloween treat.
Why You Should Try This Halloween Dirt Cake Recipe
In a world of elaborate and time-consuming desserts, this Halloween Dirt Cake recipe shines as a beacon of simple elegance and delightful flavor. Here are some compelling reasons why you should give it a try:
- Unique Halloween Treat: It’s a refreshing alternative to traditional Halloween desserts. Stand out from the crowd with a spooky yet sophisticated dessert that’s both delicious and memorable.
- Impress Your Guests: This visually striking dessert will wow your guests, without requiring hours of baking and intricate techniques. It’s a showstopper that’s surprisingly easy to achieve.
- Perfect for All Skill Levels: Even beginners can master this recipe. The simple steps and clear instructions make it accessible to everyone, regardless of their baking experience.
- Cost-Effective: The ingredients are readily available and relatively inexpensive, making this a budget-friendly option for large gatherings or even a simple weeknight treat. You won’t break the bank creating this delicious dessert.
- Adaptable to Dietary Needs: With a few substitutions, you can easily adapt this recipe to suit various dietary needs, including gluten-free and vegan options (details below!).
- Endless Decorating Possibilities: Let your creativity run wild with the decorations! From gummy worms and spiders to chocolate shavings and Halloween sprinkles, the possibilities are endless.
Ultimately, this Halloween Dirt Cake recipe offers a unique blend of simplicity, deliciousness, and festive fun that you won’t find anywhere else. It’s a recipe that will become a staple in your Halloween baking repertoire, guaranteed to be a hit year after year.
Ingredients and Utensils for Your Spooktacular Halloween Dirt Cake
Gathering the ingredients for your Halloween Dirt Cake is as straightforward as the recipe itself. Here’s a detailed list to ensure you have everything you need for a successful spooky baking adventure:
Ingredients:
- 1 package (16 ounces) chocolate sandwich cookies: The foundation of your dirt! Choose your favorite brand. Oreos are a classic choice.
- 1/2 cup (1 stick) unsalted butter, softened: Essential for binding the cookie crumbs and creating a rich base.
- 8 ounces cream cheese, softened: The star ingredient for the creamy, dreamy frosting. Make sure it’s softened to room temperature for easy blending.
- 1 cup powdered sugar: Adds sweetness and helps create a smooth, fluffy frosting.
- 1 teaspoon vanilla extract: Enhances the flavor of the frosting and adds a touch of warmth.
- 1 cup cold heavy cream: The key to achieving a luscious and stable frosting.
- 1/2 cup chocolate pudding (instant mix is fine): The creamy base of your Halloween Dirt Cake.
- 1/4 cup milk: Used to prepare the instant chocolate pudding.
- Gummy worms: The perfect creepy-crawly topping for your Halloween Dirt Cake!
- Plastic spiders: Add a touch of extra spookiness to your creation.
- Chocolate shavings (optional): For an extra touch of elegance and chocolatey goodness.
Utensils:
- Food processor or zip-top bag: For easily crushing the chocolate sandwich cookies.
- Mixing bowls (at least 2): One for the cookie crumbs and one for the frosting.
- Electric mixer (handheld or stand mixer): Makes mixing the frosting a breeze.
- Rubber spatula or spoon: For scraping down the sides of the bowls and ensuring everything is well combined.
- Measuring cups and spoons: For accurate ingredient measurements.
- 9×13 inch baking dish or similar serving dish: To hold your delicious Halloween Dirt Cake.
- Serving spoon or spatula:
Having these tools ready will ensure a smooth and enjoyable Halloween Dirt Cake making experience. Now, let’s get baking…or rather, assembling!
Step-by-Step Instructions for Your Halloween Dirt Cake
This recipe is designed to be simple and straightforward. Follow these steps for a deliciously spooky result:
Step 1: Prepare the Cookie Crumb Base
Begin by crushing the chocolate sandwich cookies. You can use a food processor for a quicker, finer crumb, or place them in a zip-top bag and crush them with a rolling pin. Aim for a consistent crumb texture for a better base.
Step 2: Combine Cookie Crumbs and Butter
In a large mixing bowl, combine the crushed cookies with the softened butter. Use your hands or a fork to mix thoroughly until the crumbs are evenly moistened and hold their shape. **Make sure the butter is well incorporated**, otherwise, the base might be too crumbly.
Step 3: Press into the Baking Dish
Press the cookie crumb mixture firmly into the bottom of your 9×13 inch baking dish. Ensure an even layer to create a sturdy base for the rest of the dessert. You can use the bottom of a measuring cup to help you press it down evenly.
Step 4: Prepare the Chocolate Pudding
In a separate bowl, prepare the chocolate pudding according to the package instructions. Typically, this involves whisking the pudding mix with the milk until smooth and creamy. Let it sit for a few minutes to thicken slightly before proceeding.
Step 5: Spread the Pudding Layer
Once the pudding has thickened slightly, carefully spread it evenly over the cookie crumb base. Try to create a smooth and even layer.
Step 6: Make the Cream Cheese Frosting
In a clean mixing bowl, beat the softened cream cheese and powdered sugar together using an electric mixer until smooth and creamy. Beat until light and fluffy for the best texture. Add the vanilla extract and continue beating for another minute.
Step 7: Whip the Heavy Cream
In a separate bowl, whip the cold heavy cream using an electric mixer until stiff peaks form. Be careful not to overwhip, as this can result in a grainy texture.
Step 8: Gently Fold in the Whipped Cream
Gently fold the whipped cream into the cream cheese mixture. Be careful not to deflate the whipped cream; use a spatula and fold in a gentle, upward motion.
Step 9: Frost the Pudding Layer
Spread the cream cheese frosting evenly over the chocolate pudding layer. You can use a spatula or knife to create a smooth, even surface.
Step 10: Decorate and Chill
Decorate your Halloween Dirt Cake with gummy worms, plastic spiders, and chocolate shavings (if using). Refrigerate for at least 30 minutes to allow the frosting to set before serving. Chilling enhances the flavor and sets the frosting beautifully.
Tips and Variations for Your Halloween Dirt Cake
Here are some helpful tips and variations to elevate your Halloween Dirt Cake to the next level:
- Gluten-Free Option: Use gluten-free chocolate sandwich cookies to make this recipe gluten-free.
- Vegan Option: Use vegan cream cheese and butter alternatives, and a vegan chocolate pudding mix. Consider using coconut whipped cream for the frosting.
- Flavor Variations: Experiment with different types of cookies (e.g., peanut butter cookies) or pudding flavors (e.g., pumpkin pudding for a fall twist). You can even add a layer of crushed Oreos in between the pudding and frosting for extra chocolate flavor.
- Decoration Ideas: Get creative with your decorations! Use different candies, sprinkles, mini chocolate chips, or even edible Halloween-themed figurines.
- Avoid Overmixing: Overmixing the frosting can result in a grainy texture. Mix until just combined.
- Proper Chilling: Chilling the cake allows the flavors to meld and the frosting to set properly. Avoid skipping this step.
Nutritional Information and Health Benefits of Halloween Dirt Cake
While this Halloween Dirt Cake is undeniably indulgent, it’s important to understand its nutritional value. A single serving (approximately 1/12th of the cake) will contain approximately 300-350 calories, with varying amounts of protein, fats, and carbohydrates depending on the specific ingredients used.
The nutritional profile is primarily driven by the high sugar content from the cookies, powdered sugar, and pudding. However, the recipe also incorporates some beneficial ingredients:
- Dairy: The cream cheese and heavy cream contribute calcium and protein, which are essential for bone health and muscle function.
- Chocolate: Dark chocolate (if used in shavings) can be a source of antioxidants, but be mindful of added sugar.
- Whole Grains (potential): If you use whole-wheat based cookies (although this would alter the taste significantly), you can increase fiber intake.
It’s important to remember that this Halloween Dirt Cake is a treat, and moderation is key. It’s best enjoyed as an occasional indulgence rather than a regular part of a healthy diet.
Remember, you can modify the recipe to make it slightly healthier by choosing lower-sugar ingredients or incorporating more fruits, although this will change the overall dessert concept.
FAQs about Halloween Dirt Cake
How long does Halloween Dirt Cake last?
Can I make the Halloween Dirt Cake ahead of time?
What are some fun Halloween Dirt Cake decorations?
Is it possible to freeze Halloween Dirt Cake?
Can I use different types of cookies for my Halloween Dirt Cake?
Conclusion: Your Spooktacular Halloween Dirt Cake Awaits!
This Halloween Dirt Cake recipe is a testament to the fact that delicious desserts don’t have to be complicated. With its simple preparation, stunning visual appeal, and irresistible flavor combination, it’s the perfect treat for your Halloween celebrations. Remember to get creative with your decorations and have fun with the process!
We hope you enjoyed this recipe and found it helpful. We encourage you to try it out and share your experiences in the comments section below. Don’t forget to share your spooky creations on social media using the hashtag #HalloweenDirtCake. And if you’re looking for more delicious recipes, check out our other recipes on Noeliarecipes.com – we’ve got everything from savory Spanish dishes like berenjenas con miel to delightful pastries like ensaimada de Mallorca. Happy baking!
For more Halloween inspiration, check out our Pinterest board: Noeliarecipes Halloween Pinterest Board
Spooky Halloween Dirt Cake
Ingredients
Equipment
Method
- Crush chocolate sandwich cookies into fine crumbs using a food processor or by placing them in a zip-top bag and crushing with a rolling pin.
- In a medium bowl, cream together the softened butter and cream cheese until smooth.
- Add powdered sugar and vanilla extract to the butter-cream cheese mixture and mix until well combined.
- In a separate bowl, whisk together the cold heavy cream, chocolate pudding mix, and milk until smooth and slightly thickened.
- Gently fold the pudding mixture into the cream cheese mixture until just combined.
- Layer half of the crushed cookies in the bottom of your baking dish. Top with the cream cheese mixture, and then the remaining crushed cookies.
- Decorate with gummy worms, plastic spiders, and chocolate shavings (optional). Refrigerate for at least 2 hours before serving.


