Dive into a world of pure indulgence with this incredibly easy and irresistible Cake Batter Fudge recipe. Forget complicated baking; this no-bake dessert delivers all the fun and flavor of cake batter in a creamy, dreamy fudge form. Imagine the soft, melt-in-your-mouth texture, the delightful sweetness, and the vibrant burst of rainbow sprinkles (if you’re feeling festive!). This Cake Batter Fudge is the perfect treat for any occasion, from casual weeknight desserts to impressive party snacks. Whether you’re a seasoned baker or a complete novice, this recipe is guaranteed to impress. It’s a delightful combination of classic fudge and the beloved taste of cake batter, creating a truly unique and unforgettable culinary experience. Prepare to be amazed by how simple it is to make this crowd-pleasing dessert that’s sure to become a family favorite. Get ready to embark on a culinary adventure that will tantalize your taste buds and leave you craving more!
Why You’ll Love This Cake Batter Fudge Recipe
This Cake Batter Fudge recipe isn’t just another dessert; it’s an experience. Here’s why you’ll fall head over heels for it:
- Simplicity at its Finest: No oven required! This no-bake recipe makes it incredibly easy to whip up, even on the busiest of days. Perfect for beginners and experienced bakers alike.
- Unbeatable Flavor Combination: The perfect blend of sweet condensed milk, creamy butter, and the nostalgic essence of vanilla extract creates a flavor profile that’s both comforting and exciting. The subtle hint of flour adds a lovely texture, reminiscent of cake batter without the fuss of baking.
- Customization is Key: Add rainbow sprinkles, chocolate chips, or even chopped nuts to personalize your fudge and match your preferences. Feel free to experiment with different extracts, like almond or peppermint, for a unique twist.
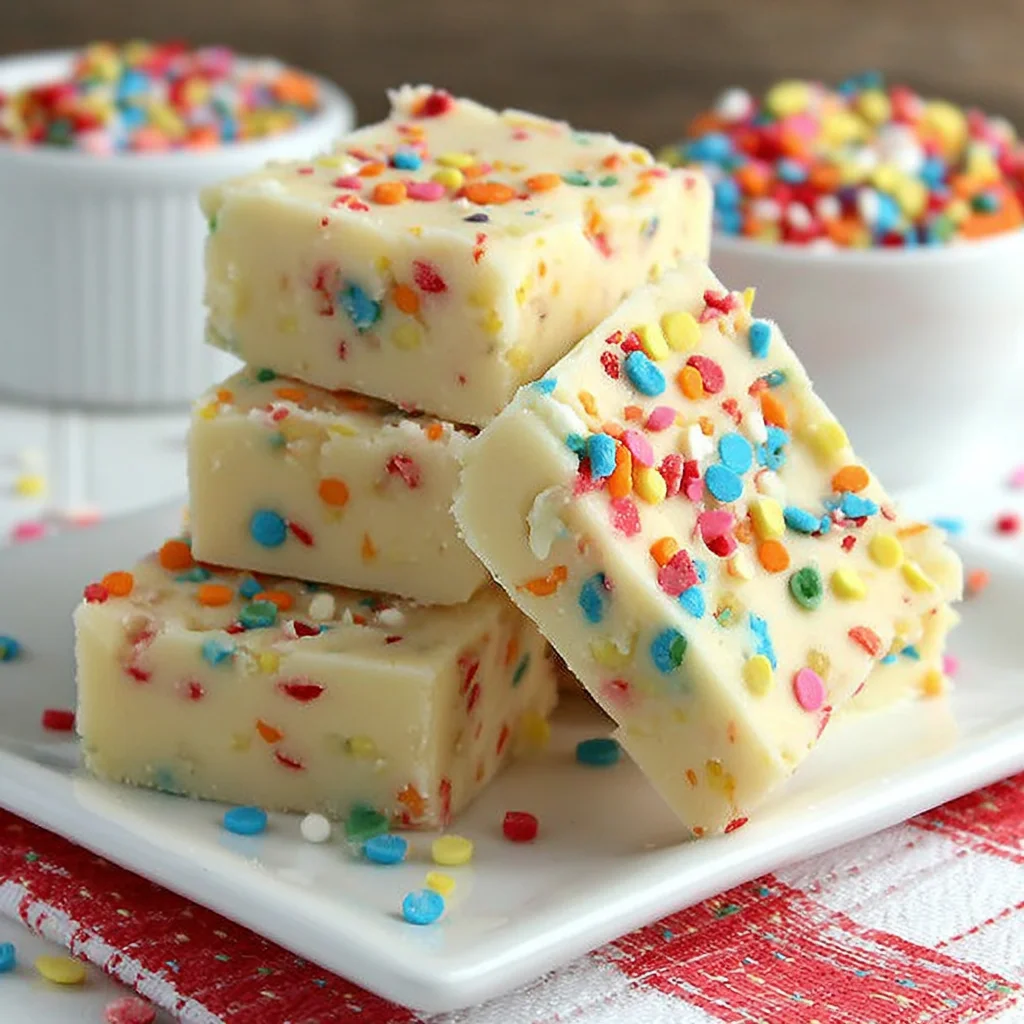
- Stunning Presentation: This fudge looks as good as it tastes. Its smooth, creamy texture and vibrant colors make it a showstopper on any dessert table. The ability to easily customize with sprinkles adds to its visual appeal.
- Perfect for Every Occasion: From casual weeknight treats to elaborate celebrations, this Cake Batter Fudge fits any setting. Its versatility makes it an excellent choice for parties, potlucks, or simply a delicious self-indulgent moment.
- Make-Ahead Magic: Prepare this fudge ahead of time and store it in the refrigerator. It’s a fantastic make-ahead dessert that allows you to prepare it well in advance and enjoy it fresh when ready.
Why You Should Try This Cake Batter Fudge Recipe
Beyond the deliciousness, this Cake Batter Fudge recipe offers several compelling reasons to give it a try:
- No-Bake Bliss: Escape the heat of the kitchen and avoid the hassle of oven-baking. This recipe is perfect for summer days when you want a delicious treat without heating up your home.
- Quick and Easy: From start to finish, this recipe takes only about 20 minutes of active prep time, making it ideal for busy schedules and spontaneous dessert cravings.
- Budget-Friendly: The ingredients are readily available and affordable, making this a cost-effective dessert option that doesn’t compromise on quality or taste.
- Crowd-Pleaser Guaranteed: This fudge is a universal favorite. It appeals to both kids and adults, making it a perfect treat for gatherings of all ages.
- Perfect for Gifting: Cut this fudge into elegant squares and package it beautifully for a thoughtful and delicious homemade gift for friends and family. It’s a unique and memorable present that’s sure to be appreciated.
- Endless Possibilities: Explore various additions and flavor combinations to create your signature Cake Batter Fudge. The possibilities are truly endless, making every batch a new adventure.
Ingredients and Necessary Utensils for Cake Batter Fudge
Gathering the right ingredients and utensils is key to baking success. Below, you will find a comprehensive list of everything you’ll need to make this amazing Cake Batter Fudge.
Ingredients:
- 1 (14-ounce) can sweetened condensed milk: This provides the creamy base and sweetness for the fudge. Look for brands like Eagle Brand. Ensure it’s well-mixed before using to avoid any lumps.
- 1/2 cup (1 stick) unsalted butter: Unsalted butter allows you to control the salt level and ensures a richer flavor. Make sure your butter is softened to room temperature for easier mixing.
- 1 teaspoon vanilla extract: This classic flavor enhancer brings out the best in the creamy base and enhances the “cake batter” essence. Use a high-quality vanilla extract for the best results.
- 2 cups powdered sugar: This is essential for achieving the smooth, velvety texture of the fudge. Sift the powdered sugar before using to remove any lumps and prevent them from appearing in the final product.
- 1/2 cup all-purpose flour: A small amount of flour adds a slightly cake-like texture and prevents the fudge from becoming overly dense. Using all-purpose flour ensures the right consistency.
- 1/4 cup rainbow sprinkles (optional): These add a festive touch and enhance the “cake batter” theme. Choose your favorite sprinkles – jimmies, nonpareils, or a mix of different shapes and sizes.
Utensils:
- Medium saucepan: A medium-sized saucepan is ideal for gently melting the butter and sweetened condensed milk. It should be non-reactive, like stainless steel or enamel-coated.
- Whisk or wooden spoon: These tools are perfect for stirring the mixture constantly to prevent sticking and burning, ensuring a smooth, lump-free consistency.
- 8×8 inch baking dish: This size dish will hold the fudge perfectly, giving you nice-sized squares after setting. You can use a square baking pan or a similar-sized dish.
- Parchment paper: Line your baking dish with parchment paper to prevent sticking and to allow for easy removal of the fudge once set. The overhang is helpful for lifting it out.
- Rubber spatula or spoon: Useful for scraping down the sides of the pan and ensuring all ingredients are well-combined. A sturdy spatula is beneficial for pressing the fudge evenly into the pan.
- Measuring cups and spoons: Accurate measurements are crucial for a consistent outcome. Use measuring cups and spoons for the best accuracy.
- Refrigerator: Essential for chilling the fudge until it sets firmly. This process will take at least two hours.
- Sharp knife: For cleanly cutting the fudge into squares once it has chilled and firmed. A sharp knife is preferred to achieve clean, even cuts.
Detailed Steps for Making Cake Batter Fudge
Follow these steps for a perfect batch of Cake Batter Fudge. Remember, precision and patience are key to success!
- Combine Ingredients (The Meltdown): In your medium saucepan over medium-low heat, carefully combine the sweetened condensed milk and unsalted butter. **Stir constantly** with your whisk or wooden spoon until the butter is completely melted and the mixture is perfectly smooth. This prevents scorching and ensures even melting.
- Simmer (The Thickening): Reduce the heat to low and gently simmer the mixture for 5 minutes. **Stir frequently** to prevent burning and to ensure the mixture thickens evenly. You’ll notice a slight increase in thickness, indicating the mixture is coming together.
- Remove from Heat (The Vanilla Infusion): Once the 5 minutes are up, remove the saucepan from the heat immediately. Stir in the vanilla extract. This step allows the vanilla’s flavor to fully infuse into the warm fudge mixture without burning.
- Add Dry Ingredients (The Dough Formation): Gradually add the powdered sugar and flour to the warm mixture. **Mix thoroughly** until a smooth, slightly stiff dough forms. **Be patient and persistent** to ensure there are no lumps. If needed, use your rubber spatula or spoon to scrape the sides of the pan to fully incorporate all the ingredients.
- Stir in Sprinkles (Optional): If you’re adding rainbow sprinkles, now’s the time to gently fold them into the fudge mixture. **Avoid overmixing**, as this could break the sprinkles and make them less vibrant.
- Press into Pan (The Shaping): Line your 8×8 inch baking dish with parchment paper, leaving an overhang on the sides. This makes removing the fudge much easier. Press the fudge mixture evenly into the prepared pan, ensuring it’s compact and uniform.
- Chill (The Firming): Refrigerate the fudge for at least 2 hours, or until it’s completely firm. This allows the fudge to set properly and achieve its signature creamy texture. Longer chilling time, up to 4 hours, can result in a firmer fudge.
- Cut and Serve (The Finale): Once the fudge is firm, lift it out of the pan using the parchment paper overhang. Cut into squares and serve. Enjoy your delicious homemade Cake Batter Fudge!
Tips and Variations for Cake Batter Fudge
Here are some helpful tips and variations to enhance your Cake Batter Fudge experience:
- For a richer flavor: Use browned butter instead of regular unsalted butter. Brown the butter before adding it to the sweetened condensed milk.
- Alternative sweeteners: For a healthier option, explore using a blend of powdered sugar and a sugar alternative such as erythritol or stevia. Keep in mind that these may slightly alter the texture and final taste.
- Gluten-free option: Use gluten-free all-purpose flour for a gluten-free version. Ensure the flour blend is of good quality for optimal texture.
- Vegan variation: Substitute the butter with vegan butter and ensure your condensed milk is vegan-friendly. Many brands offer vegan versions of these ingredients.
- Add-ins galore: Experiment with adding other mix-ins like chocolate chips, chopped nuts, cookie dough bits, or even dried fruits. Be mindful of the quantity to ensure the fudge maintains a smooth consistency.
- Avoid burning: **Maintain a low heat** throughout the cooking process. Constant stirring is crucial to prevent scorching.
- Proper chilling: Ensure the fudge is completely chilled before cutting. Cutting too early will result in a messy, crumbly fudge.
- Storage: Store leftover Cake Batter Fudge in an airtight container in the refrigerator for up to a week.
Nutritional Values and Benefits of Cake Batter Fudge
While Cake Batter Fudge is undeniably a treat, it’s helpful to understand its nutritional profile.
Note: The exact nutritional values will vary slightly based on the specific ingredients used. These values are estimates for a standard recipe serving size (approximately 1 square of an 8×8 inch pan):
- Calories: Approximately 200-250 calories per serving
- Fat: Primarily from butter, contributing to its rich texture and flavor.
- Carbohydrates: Primarily from sweetened condensed milk and powdered sugar. A significant source of energy.
- Protein: Relatively low in protein.
Benefits of Ingredients:
- Sweetened Condensed Milk: Provides a rich, creamy texture and sweetness. It contains calcium and some vitamins.
- Butter: A source of fat-soluble vitamins like Vitamin A and Vitamin E. Contributes to flavor and texture.
- Vanilla Extract: Offers a delightful aroma and flavor. Some studies suggest vanilla may have mild stress-reducing properties.
It’s important to consume Cake Batter Fudge in moderation as part of a balanced diet. Enjoy it as an occasional treat!
FAQs
Can I make this Cake Batter Fudge ahead of time?
What can I use instead of rainbow sprinkles?
How long will this Cake Batter Fudge last in the refrigerator?
Is this Cake Batter Fudge recipe gluten-free?
Can I freeze this Cake Batter Fudge?
Conclusion: Your Cake Batter Fudge Adventure Awaits!
This Cake Batter Fudge recipe is a testament to the magic of simple ingredients transformed into a delightful dessert. With its ease of preparation, irresistible flavor, and endless customization options, it’s sure to become a staple in your recipe book. We’ve explored the recipe’s intricacies, provided helpful tips and variations, and addressed frequently asked questions. Now, it’s your turn to embark on this culinary adventure! Don’t forget to share your Cake Batter Fudge creations with us in the comments below. Let us know how you customized it and what your favorite add-ins are. Happy baking (or rather, happy no-baking!), and be sure to share this recipe with your friends and family! For more delicious recipes, visit Noeli’s Recipes or check out some of our other popular recipes like our Basque Cheesecake or Mixed Paella.
Don’t forget to pin this recipe to your Pinterest board for later! Check out more recipes on my Pinterest!
Cake Batter Fudge
Ingredients
Equipment
Method
- Line an 8x8 inch baking dish with parchment paper, leaving an overhang on the sides.
- In a medium saucepan over medium-low heat, combine the sweetened condensed milk, butter, and salt. Stir constantly until the butter is melted and the mixture is smooth.
- Reduce heat to low and simmer for 5 minutes, stirring frequently to prevent burning. The mixture will thicken slightly.
- Remove from heat and stir in the vanilla extract.
- Gradually add the powdered sugar and flour, mixing until a smooth dough forms. Be sure to remove any lumps.
- Stir in the rainbow sprinkles, if using.
- Press the fudge mixture evenly into the prepared pan.
- Refrigerate for at least 2 hours, or until firm.
- Lift the fudge out of the pan using the parchment paper overhang. Cut into squares and serve.


